Short on time? Jump to the TL;DR section. Think of it as the party-planning version of a “jump to recipe” button for busy parents who need the details fast.
My first child turned one, and his lemon garden-themed party was a magical day of celebration. Now, I want to help other parents plan a special day with the insights I gained from doing it myself. If you love plants, gardening, nature, Waldorf-inspired play, fairy garden details, low-plastic party ideas, eco-conscious choices, or budget-friendly backyard celebrations, this guide is for you.
I tried to be comprehensive with intention. You don't need to use every idea or recreate the party exactly. Borrow the structure, copy the parts that fit your family, and skip anything that adds more stress than value. My hope is that having a complete plan to work from will help you create something special while reducing overwhelm and decision fatigue.
Table of Contents
Start with the Meaning Behind the Party
Plan Earlier Than You Think
Send the Invitations
Choose the Party Backbone
Make a Master Project List
Book Rentals and Big Logistics Early
Gather, Borrow, Thrift, and Buy Decor
Plan the Menu
Plan What to Wear Early
Prep the Party Space and Guest Comfort
Make a Weather Back-up Plan
Create the Party Zones
Bundle Station Supplies Ahead of Time
Create a Week-of Timeline
Delegate Help
Assign a Photographer and Make a Shot List
Create a Cleanup Plan
What I’d Do Differently
TL;DR
Start with the Meaning Behind the Party
Hosting a party involves so much behind-the-scenes work that most people don’t see until they’re the one planning it. It can be creative and fun, but also daunting once you get into the weeds of it. Add a first birthday to the mix, and there’s a whole emotional layer you might not anticipate. Pinterest mood boards make everything seem straightforward until it’s time to organize the moving parts and actually bring the vision to life.
Preparing for my son’s first birthday party brought me back to this time a year ago, when we were getting ready to bring him home. I was preparing the house again, cleaning more carefully than usual, and asking friends and family to help with little tasks. Only this time, the house stayed a little less tidy than it might have before. Signs of a year lived were quietly, and sometimes not so quietly, in every room.
In that way, throwing his party became more than party prep. It became a ritual of reflection. It was a way of looking around and realizing how much had changed in our home, our family, and myself over the past year.
My ideas tend to mushroom the more I think about them. Even simple plans require time, and with kids, time is a balancing act. That’s why the main philosophy of this party became “choose the backbone first, then add details only if they support it.”
For this party, the theme was a lemon garden: nature-inspired, whimsical, and handmade. My goal was to create something beautiful but low-plastic, budget-conscious, and manageable. I wanted a celebration that felt special without losing sight of the reason we were gathering.
At a Glance
Theme: lemon garden | nature-inspired | whimsical backyard first birthday
Goal: meaningful, beautiful, low-plastic, budget-conscious, and manageable
Philosophy: choose the backbone first, then add details only if they support it
Best for: parents who want a beautiful backyard party without relying on lots of plastic or disposable decor
Plan Earlier Than You Think
The earlier, the better. Planning months in advance might seem excessive at first, but it rarely feels that way once the party is near.
Pick a day and general time for your party. I kept the time tentative until I was ready to send the invitations, which gave me a little more time to gauge my son’s natural wake windows and nap schedule. I wanted him to be able to enjoy his big day.
This is also why it’s important to plan ahead and avoid leaving too much for the last minute, especially anything that requires day-of setup. Running around the morning of the party can throw off naps and make a fussy baby for party time.
It’s also smart to have a rough idea of your party size early on. An intimate gathering of parents and siblings is very different from planning a larger backyard party with extended family, friends, and kids of different ages.
At a Glance
Pick a date: ideally 8+ weeks before the party
Pick a time: choose a timeframe, then adjust based on naps if needed before sending invites
Make a guest list: include a rough headcount for adults and kids
Remember: keep the baby’s routine in mind to make the day best for everyone
Send the Invitations
Once you have a party date in mind, it’s time to pick a design, ideally with enough lead time to have invitations delivered four to six weeks before the party. As both an artist and a parent, I wanted to make something homemade to mark this milestone, so I created a nature-inspired invitation.
I often find myself taking the more handmade, complicated path when a moment feels meaningful. I remember flipping through old baby books while pregnant, looking at my husband’s first birthday invitation and the little mementos our parents had saved from our childhoods. I wanted to do that for my son so he could have something to look back on too. It was a creative outlet for me and helped me tap into the part of my identity that isn’t just mom.
If you’re not the creative type or you simply don’t have the capacity during this season, don’t stress. At the end of the day, the invitation simply needs to communicate the party details to guests, and there are plenty of beautiful, premade options you can choose from. I also made my invitation available on Etsy as a digital download.
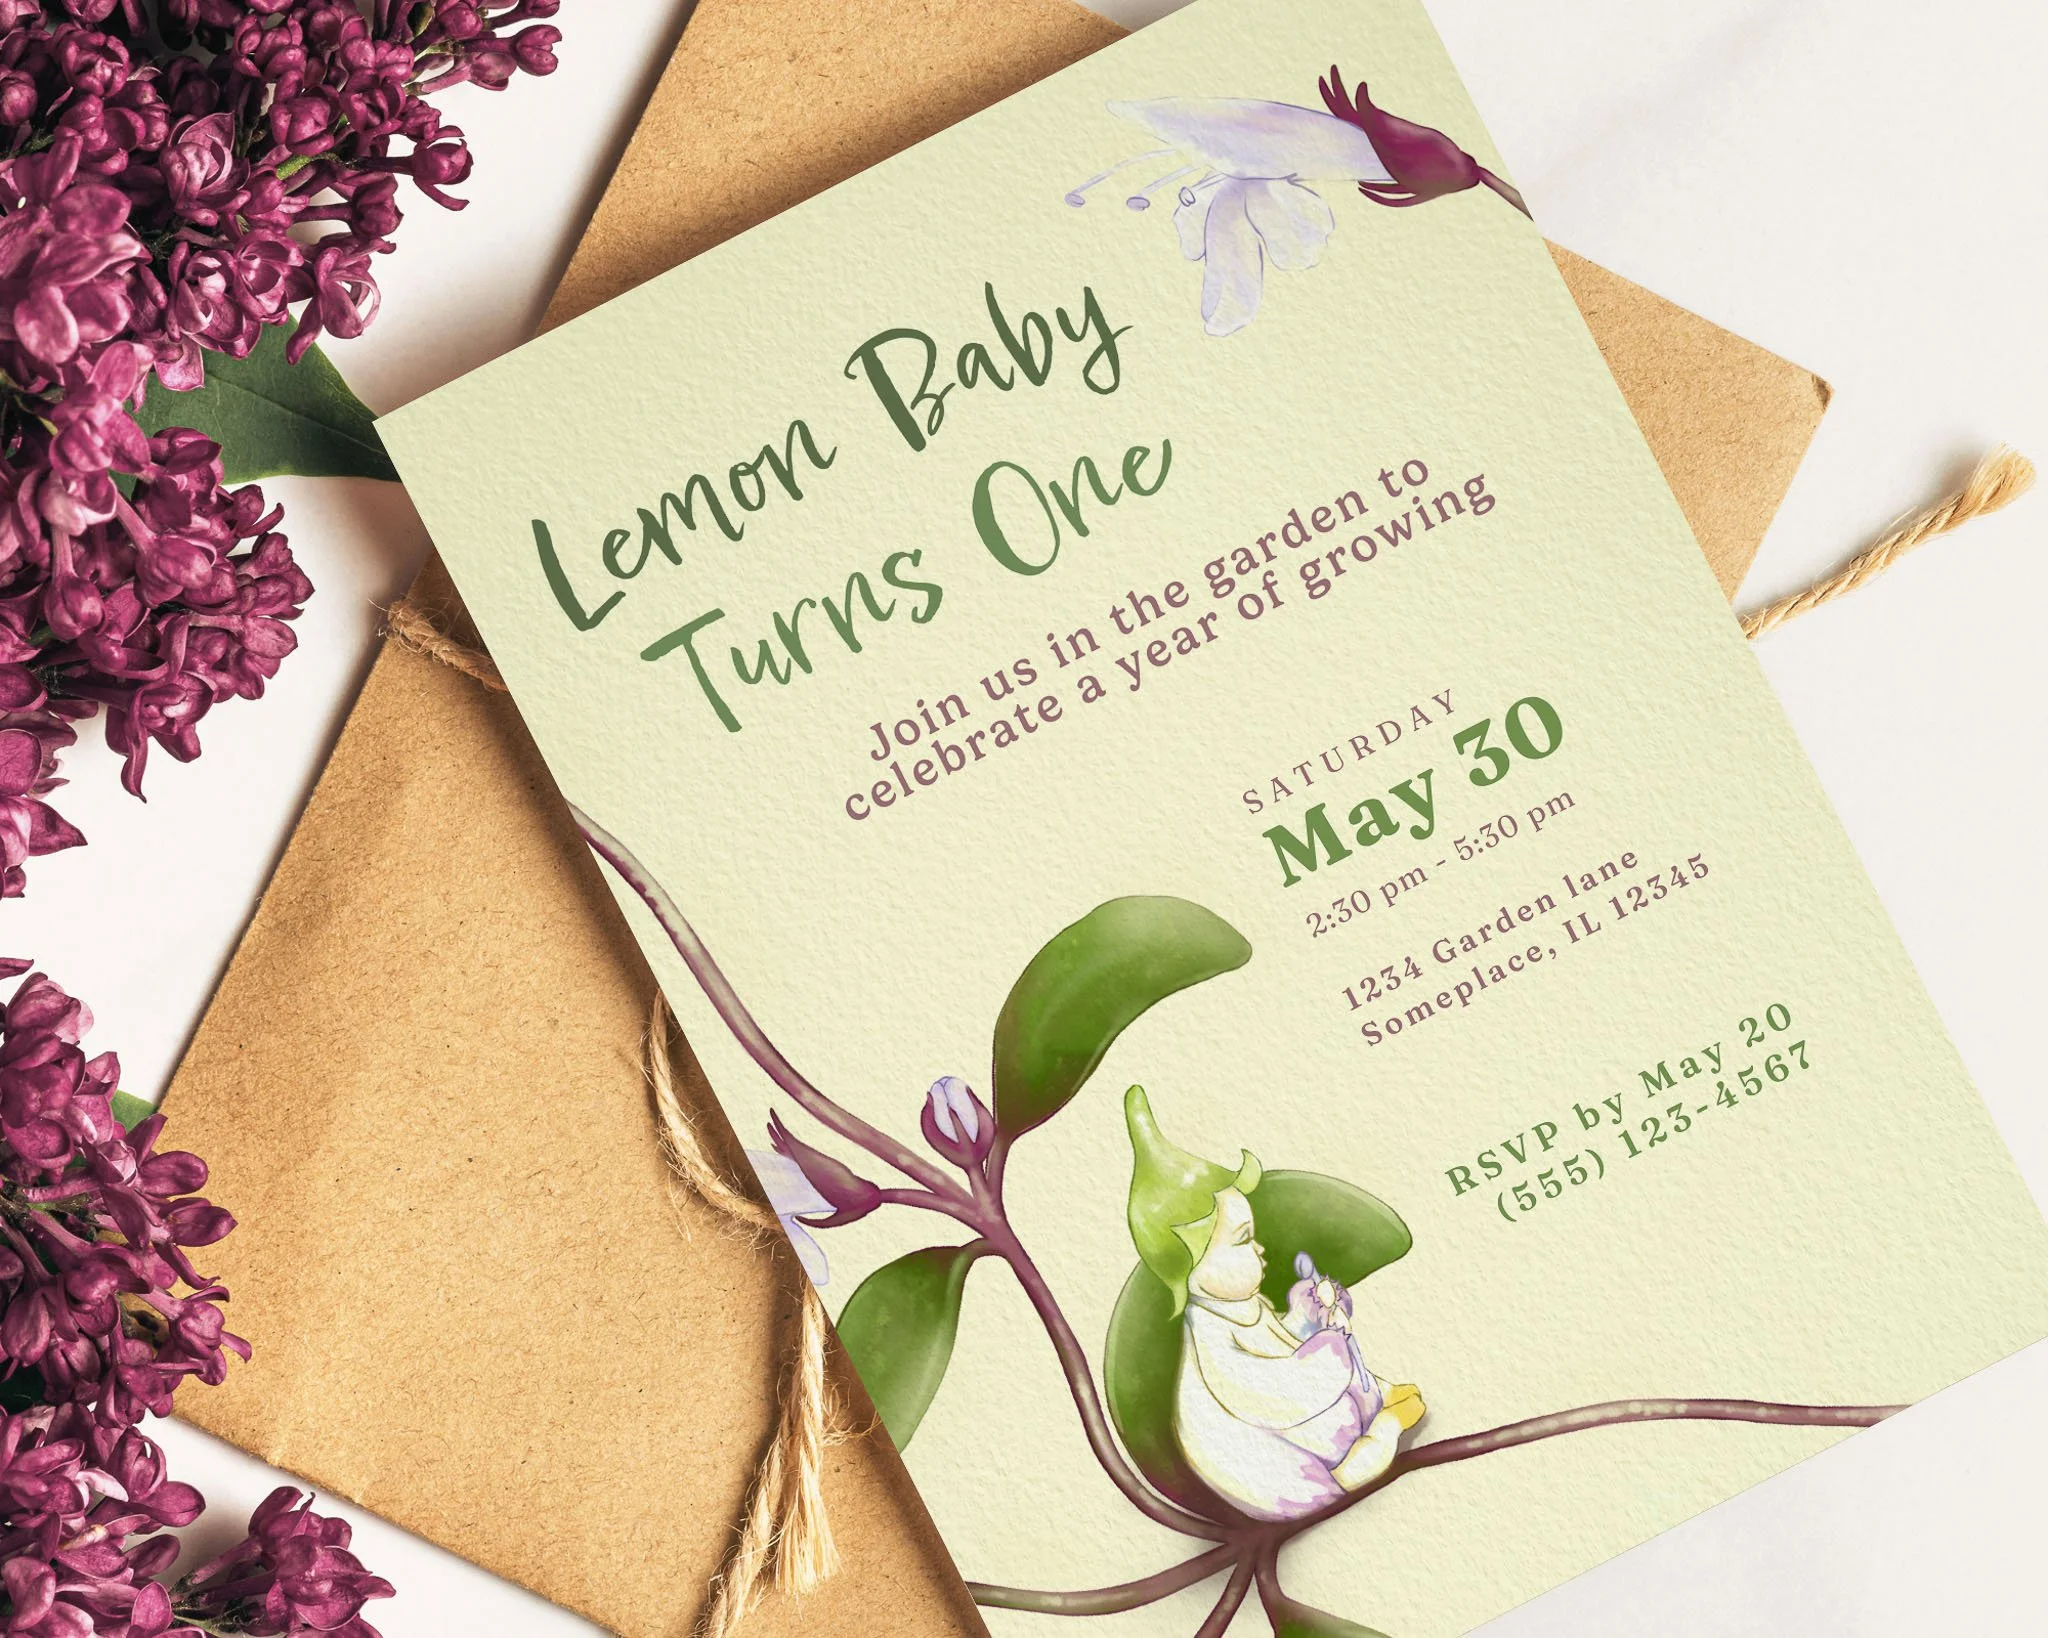
Once you have the design selected, it’s time to work on the details. Keep it simple and just include a date, time, location, and RSVP date. That’s all guests really need. You can also include a link to a birthday wishlist if you’d like. I included this because you’ll likely get asked what your child would like or need, and it’s nice to have a list ready of ideas. It also helps show loved ones the kinds of toys and materials that fit your parenting style.
I used Evite to send a digital invitation for speed and the ability to send messages leading up to the party. If you have any information about parking, weather conditions, or reminders about the party, having an electronic invite makes notifying guests quick and easy. I also like to mail physical invites out for special parties like a first birthday. I wanted a keepsake, and I knew other relatives would too, so we mailed them after the digital invitation. Evite is great for getting information out quickly, while physical invitations become keepsakes long after the day. They also tend to end up on the fridge, creating an easy reminder and quick access to the party details.
It’s best to have the party details, invitation design, and mailing supplies finalized well before you plan to send the invites so you're not scrambling at the last moment. You want to give others time to put it on their calendar. This is especially true during busy times like May, summer months, or holidays. Planning ahead allows you to pick a design, order stationery, and account for returned mail without feeling rushed. Last-minute rushing often means spending more or settling for an option that isn’t your first choice.
At a Glance
Send invites: 4–6 weeks before the party
Use digital if: you want fast delivery and easy updates
Use physical if: you want a keepsake, visual reminder, and quick access to details
Use both if: you want the convenience of digital and the keepsake quality of physical cards
Include: date, time, location, RSVP date, wishlist link if desired
Plan ahead for: printing, ordering supplies, mail delays, returned cards
Choose the Party Backbone
Before making a full project list, choose the backbone of the party. These are the few moments that matter most. I knew I wanted my son’s first birthday to feel special, but simple enough that I could be present instead of overwhelmed by party prep.
Making the structure first helps keep the scope focused when you inevitably think of more ideas to add. Even simple ideas take energy, and not every cute idea needs to become part of the final party.
For my son’s birthday, I chose three main moments: storytime, cake smash, and milk bath. That was it. I wrote a story as my gift to him, so I turned it into a sensory garden storytime. I knew he would have a cake smash, and I wanted to recreate the milk bath I did for him when we first brought him home. The milk bath also served a practical purpose by helping clean him up after the cake smash.
Any activities, food, or decor ideas beyond those three things could be added, but they could also be cut if time required. Picking what mattered most ahead of time helped guide my choices when it got down to the wire. I’ll share the full setup and additional activity ideas later in the party zones section.
I also recommend having a simple itinerary included with the invite for guests, especially if there are a few special moments you don’t want them to miss. It doesn’t have to be complicated, but a basic flow helps people know what to expect.
At a Glance
Choose: 2–3 main party moments
Mine were: sensory garden storytime, cake smash, milk bath
Purpose: keep the party manageable and preserve what matters
Cut if needed: extra activities, extra decor, overly complicated food
Remember: even simple ideas take energy
Make a Master Project List
Once you know the backbone of the party, make a comprehensive list of projects and supplies. I start by listing every project I can think of, from food and activities to decor, rentals, cleaning, and clothing. Then I go project by project and list anything I might need to do or buy to make it happen.
Break each project into subtasks. Even looking up information, placing an order, sending a text, or checking a delivery date can count as a subtask. This helps you pace the work out over several weeks instead of letting everything pile up at the end.
For example, food was not just one task. I needed to look for inspiration, choose specific recipes that felt festive but budget-friendly, make a grocery list, place orders, and create a cooking schedule. I planned the cooking schedule alongside cleaning and day-of setup because those tasks all had to happen in the same final window of time. If one project fell too far behind, it could eat into the time needed for another.
I also had ideas that were nice-to-haves but weren’t high priority. Start with the minimum needed, then add extras if time allows. If an extra project won’t be finished by a realistic deadline, be willing to cut it, simplify it, or let it be imperfect.
Remember, the most important part of the day is being present. Protect that.
Main planning categories:
Invitations, rentals, food, attire, yard prep, cleaning, decor, activities, comfort/weather, miscellaneous
Party zones and activities:
Storytime/Sensory Garden, Mud Kitchen, Potting Station, Fort, Flower Photo Spot, Memory Book, Cake Smash, Milk Bath, Snow Cone Station, Lemon Harvest Fairy Garden Search, Kids’ Corner, Seating
Once you have your party ideas narrowed down, create a calendar to stay on track. Set deadlines for each task and mark them as hard or soft deadlines. A hard deadline is anything time-sensitive or anything that could create a domino effect if delayed. A soft deadline is for a less important task that can be moved if needed.
Planning a party while taking care of a baby means things are going to shift. That’s okay. Focus on the hard deadlines and non-negotiables. For my calendar, I created lists of what needed to be done by the end of the week because that fit my lifestyle better than assigning everything to specific days. I also had a list of what needed to be done by the end of each month so tasks didn’t snowball and accumulate at the end.
At a Glance
Start with: writing down every project you can think of
Break down: each project into small subtasks
Prioritize: must-haves before nice-to-haves
Use hard deadlines for: time-sensitive tasks or anything that could delay another project
Use soft deadlines for: flexible extras
Remember: be willing to cut, simplify, or let things be imperfect. The most important part of the day is being present
Book Rentals and Big Logistics Early
For anything that will be rented, do your research and secure rentals early. The last thing you want is for your snow cone station idea to be derailed because there’s no availability.
Renting items is a great way to avoid buying bulky supplies you may only use once. Sure, you could buy enough tables and chairs for your party, but that can mean spending hundreds of dollars upfront and finding somewhere to store everything afterward. It’s a balancing act deciding what should be bought versus rented.
If something is within your budget, easy to store, and likely to be used many times, buying can make sense. Otherwise, renting is usually the simpler and more practical option.
Potential items to rent include tables, chairs, a snow cone machine or other concession equipment, a bounce house, interactive games, and a tent or canopy. When renting, confirm what’s included and what you will need to provide or prepare, such as ice, serving supplies, access to power, or a suitable setup area.
When comparing rental companies, ask whether delivery includes setup. Some companies will drop off tables and chairs but require you to set them up yourself. Others may offer this service for an additional fee, while some include it as a courtesy. This is worth knowing ahead of time because preparation time matters, especially when you’re hosting at home and caring for a baby.
At a Glance
Reserve early: rentals with limited availability, especially if another party idea depends on them
Rent: bulky, expensive, one-time-use items
Buy: affordable items you can store and reuse
Consider renting: tables, chairs, concessions, bounce houses, games, a tent or canopy
Ask before booking: whether delivery includes setup or only drop-off
Gather, Borrow, Thrift, and Buy Decor
Start gathering or purchasing as much as you can upfront. To keep it budget-friendly, I borrowed a lot of decor from family and friends, used curbside finds, shopped thrift stores and Facebook Marketplace, and upcycled what I could. These options can save you money, but not time. So start early if you’re trying to keep costs low.
My goal was to minimize the amount of plastic and single-use items for this party. I like being intentional with my decor. An added bonus is that it gives the party a charming homemade, yet elevated vibe. So many of my guests commented that they felt like they were at a wedding, which goes to show, it doesn’t need to be costly or wasteful to make a space feel magical.
My main decor was dehydrated lemon slices and whole lemons. I bought canvas drop cloths to use as “rugs,” curtains, seat covers for hay seating, and tablecloths. I reused linen tablecloths and placemats from my baby shower too. I made giant fabric and paper flowers for my Victorian-inspired wedding, and they have since been used for a Peter Rabbit baby shower, fairy first birthday party, and now a lemon garden-themed party.
The rest of my decor was old baskets and crates I found in my garage, along with plants I already owned or borrowed from my mom. If you’re local, The Children’s Farm in Palos Park, IL, also holds a late-summer rummage sale that can be a good place to look for things like baskets and other secondhand decor. I left garden and lawn tools visible since they matched the theme. I thrifted curtains for the lemon milk bath backdrop to hang on a clothesline with some of my favorite outfits of my son’s. I put together a mud kitchen with leftover bricks, scrap wood, old cups, and hand-me-down utensils.
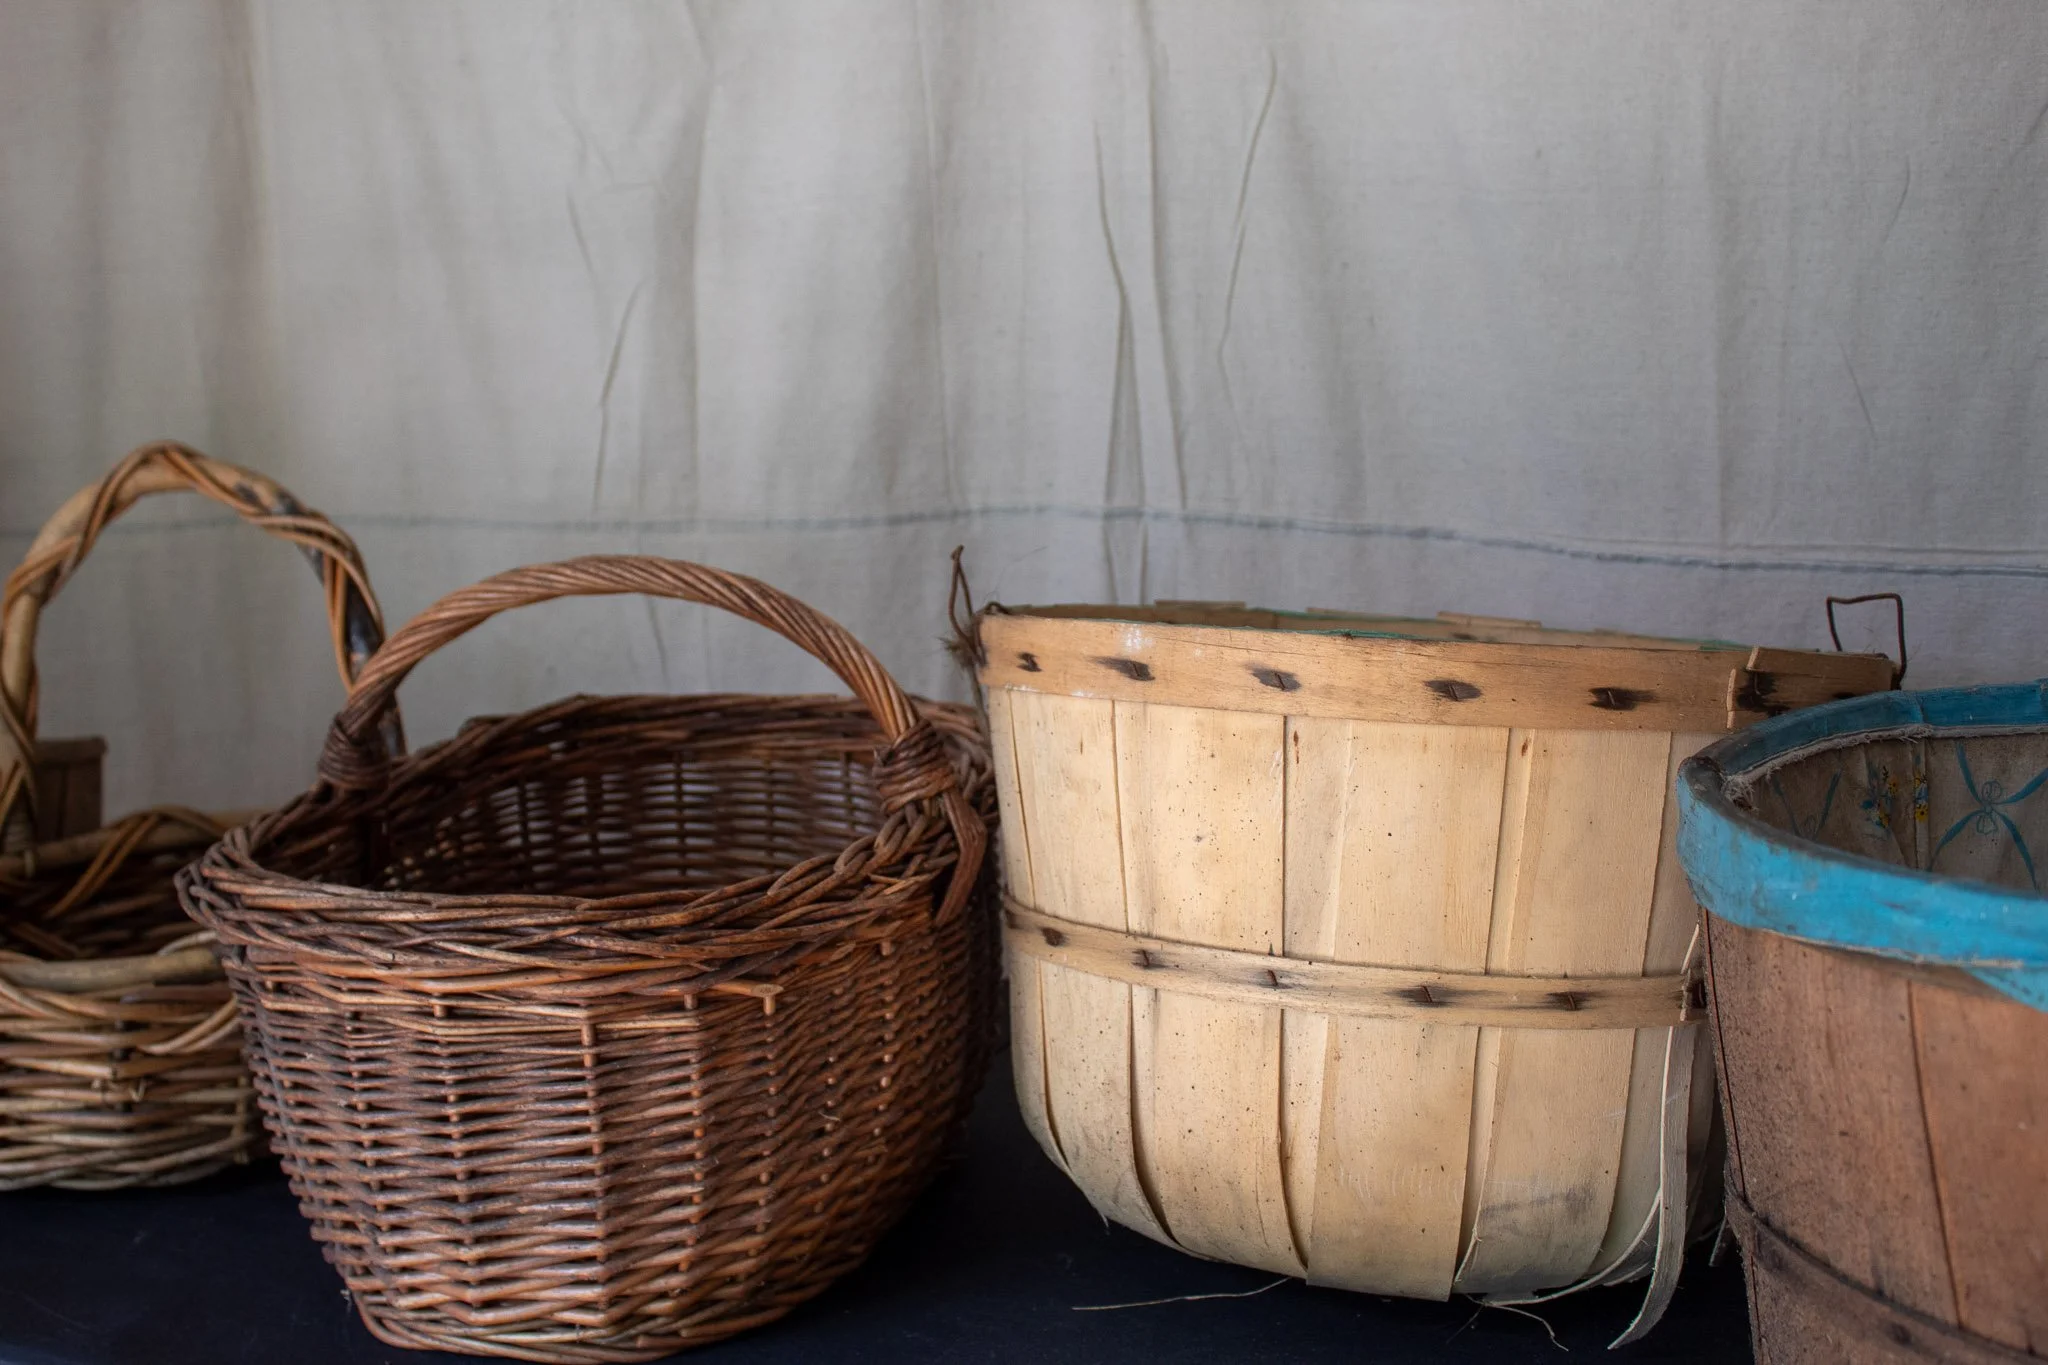
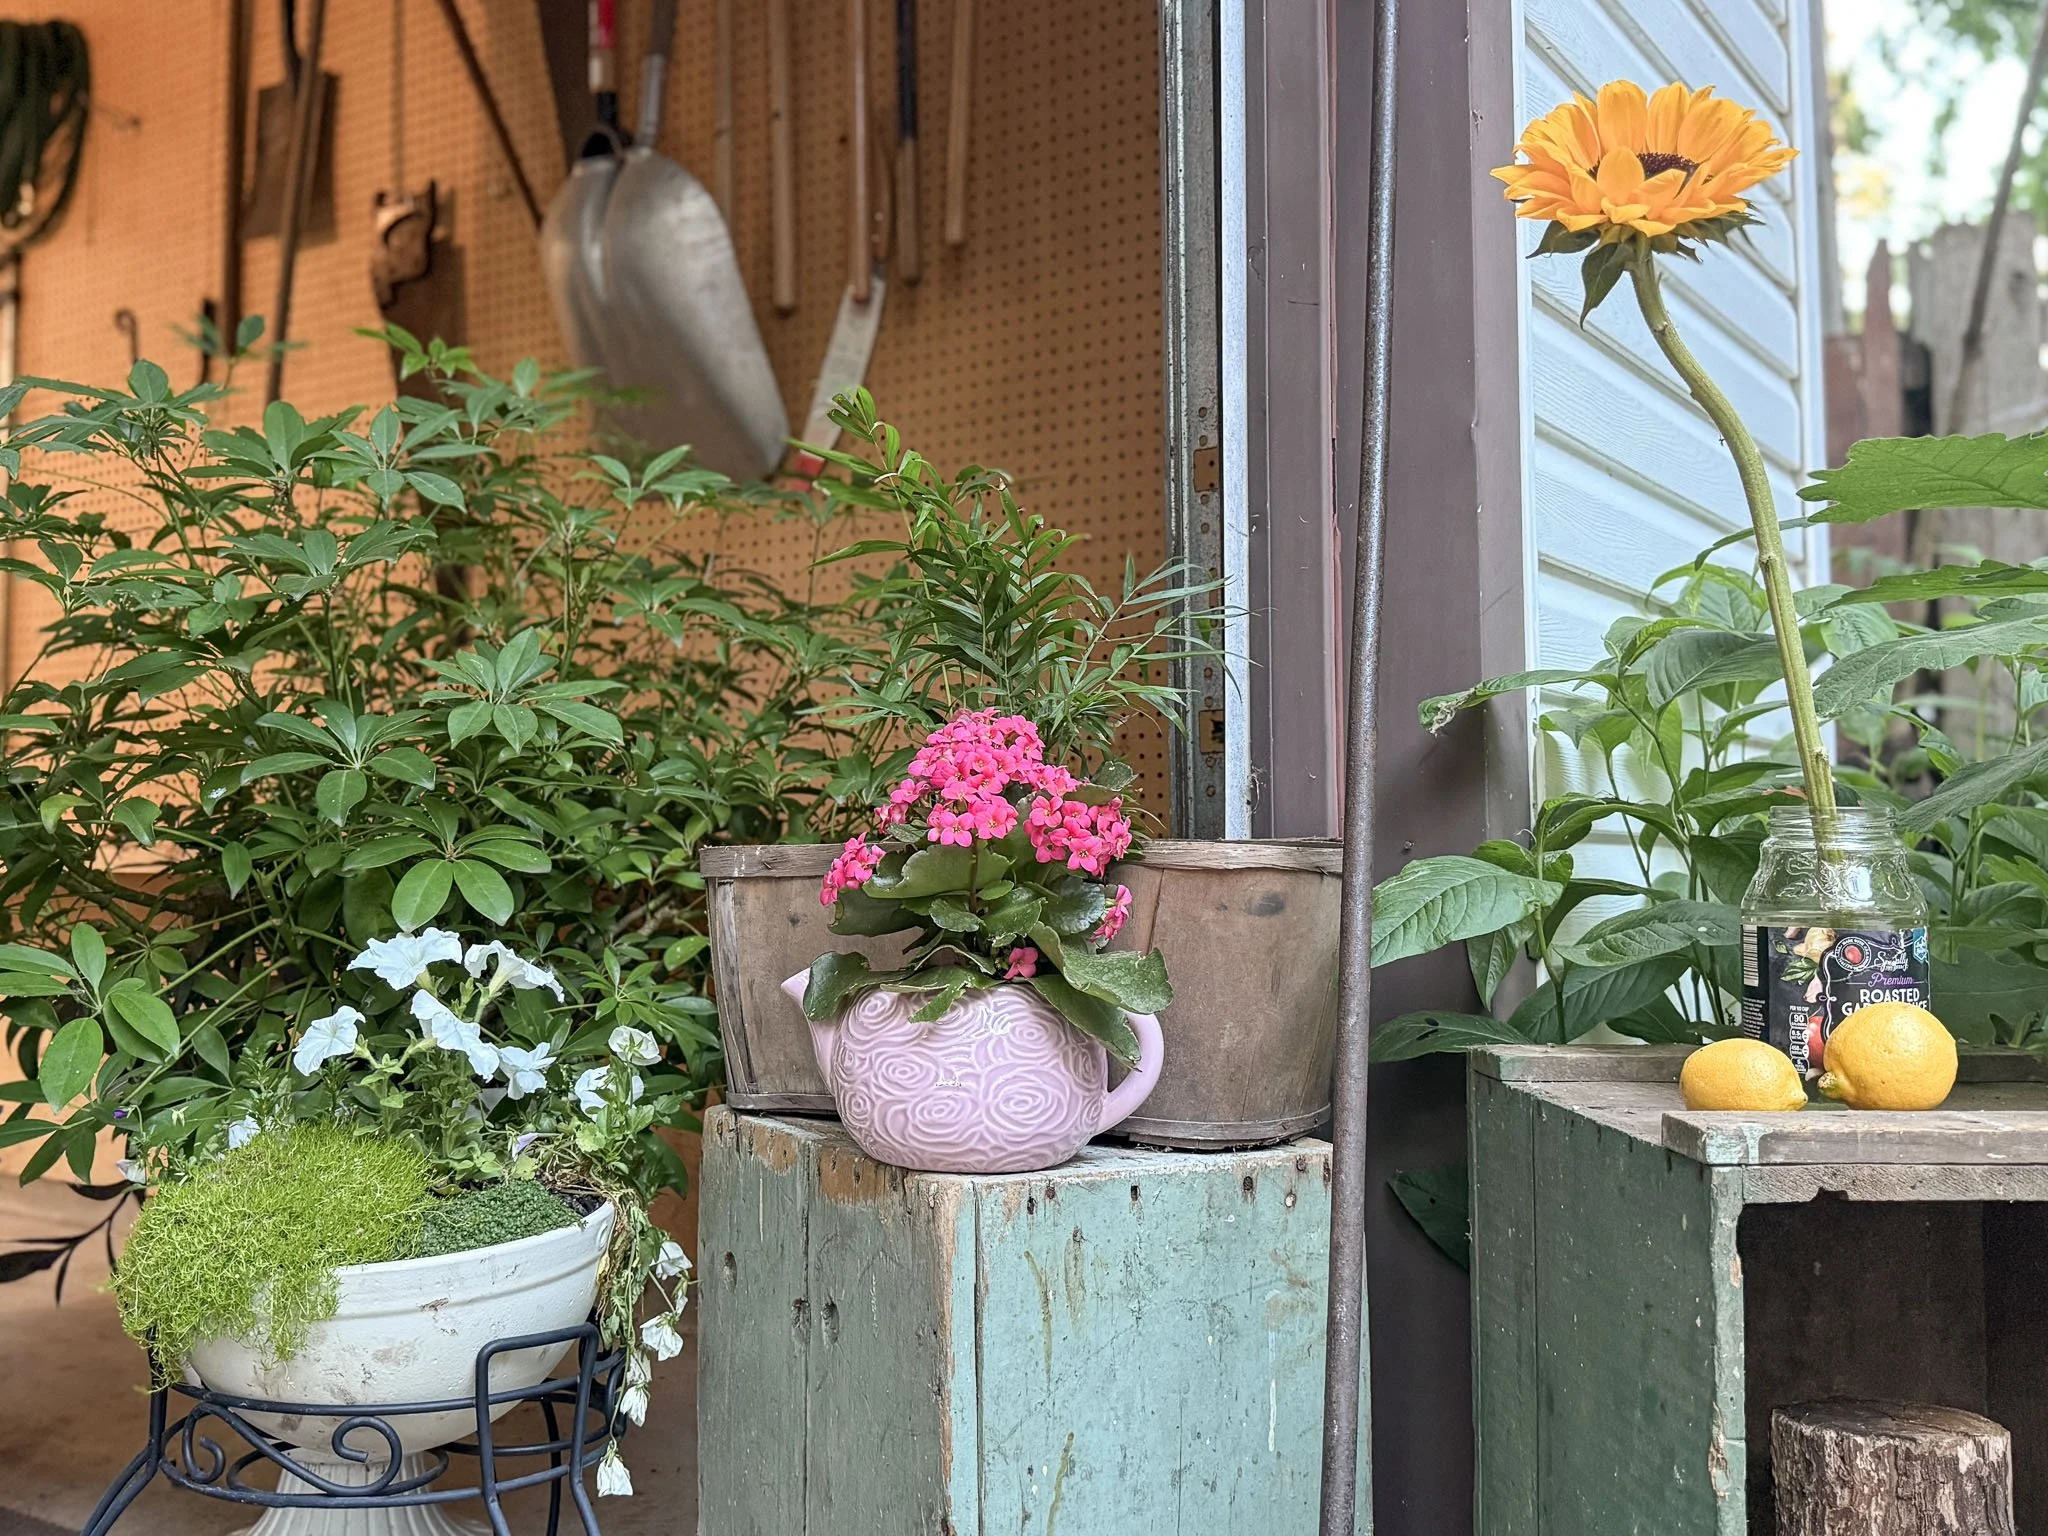
I used glass mason jars for drinks, but I also had paper cups available for my sanity because I don’t have a dishwasher. Instead of water bottles, I used a stainless steel dispenser for water and a few glass drink dispensers for homemade lemonade and lemon-infused water with edible flowers. I used bamboo utensils and plates. I was even able to buy the plates “used” on Amazon and got them for a steep discount. I love bamboo plates because they’re sturdy enough that you don’t need to layer multiple plates, and they look nice too. A more reusable option would be regular plates, but I didn’t already have enough, and I didn’t want the cleanup to become overwhelming.
I liked knowing that so many of the party details were largely plastic-free, reusable, or could be repurposed after the party, like the hay bales we used for seating and later as mulch in my garden.
Decor Sourcing Guide
Rent: tables, chairs, bounce house, snow cone machine, tent/canopy, concession equipment
Buy: plates, utensils, napkins, lemons, craft/activity supplies
Reuse/borrow/thrift: jars, baskets, crates, linens, trays, props, curtains, plants, flower vases
At a Glance
Start early: budget-friendly sourcing saves money, but takes time
Look for: borrowed decor, curbside finds, thrifted pieces, and what you already have
Choose decor that can: decompose, be reused, or be repurposed after the party
Use what you already have: baskets, crates, plants, linens, jars, curtains, and garden tools
Balance sustainability with sanity: reusable is ideal, but cleanup has to be manageable
Remember: it doesn’t need to be costly or wasteful to make a space feel magical
Plan the Menu
Catering can save time and stress, but cooking yourself is usually better for the budget. For my son’s birthday, I wanted an airy garden menu with lemon flavors, herbs, edible flowers, and refreshing berries. I included strawberries and blackberries because they appeared in the story I wrote for him. If you plan to have storytime or are building the party around a specific garden book, it can be fun to incorporate food inspired by the story.
This is another area where Pinterest meets reality. Think about feeding people well, not just creating a pretty spread. Choose filling foods that are easy to make or prep ahead of time. You don’t want to be cooking the day of the party or needing to reheat or garnish too many things. That invites stress and can throw off naps and the rest of the schedule.
I recommend planning savory foods before worrying about an elaborate dessert spread. Guests would rather have satisfying food than only sweets. There are only so many desserts people want before they need something more substantial. We kept it very simple and only had one dessert outside of the cut watermelon. We ordered a vegan strawberry cake from Moonlit Sweet Studio, a local bakery in Mokena, IL. Everyone who tried it raved about it. This was perfect and more than enough.
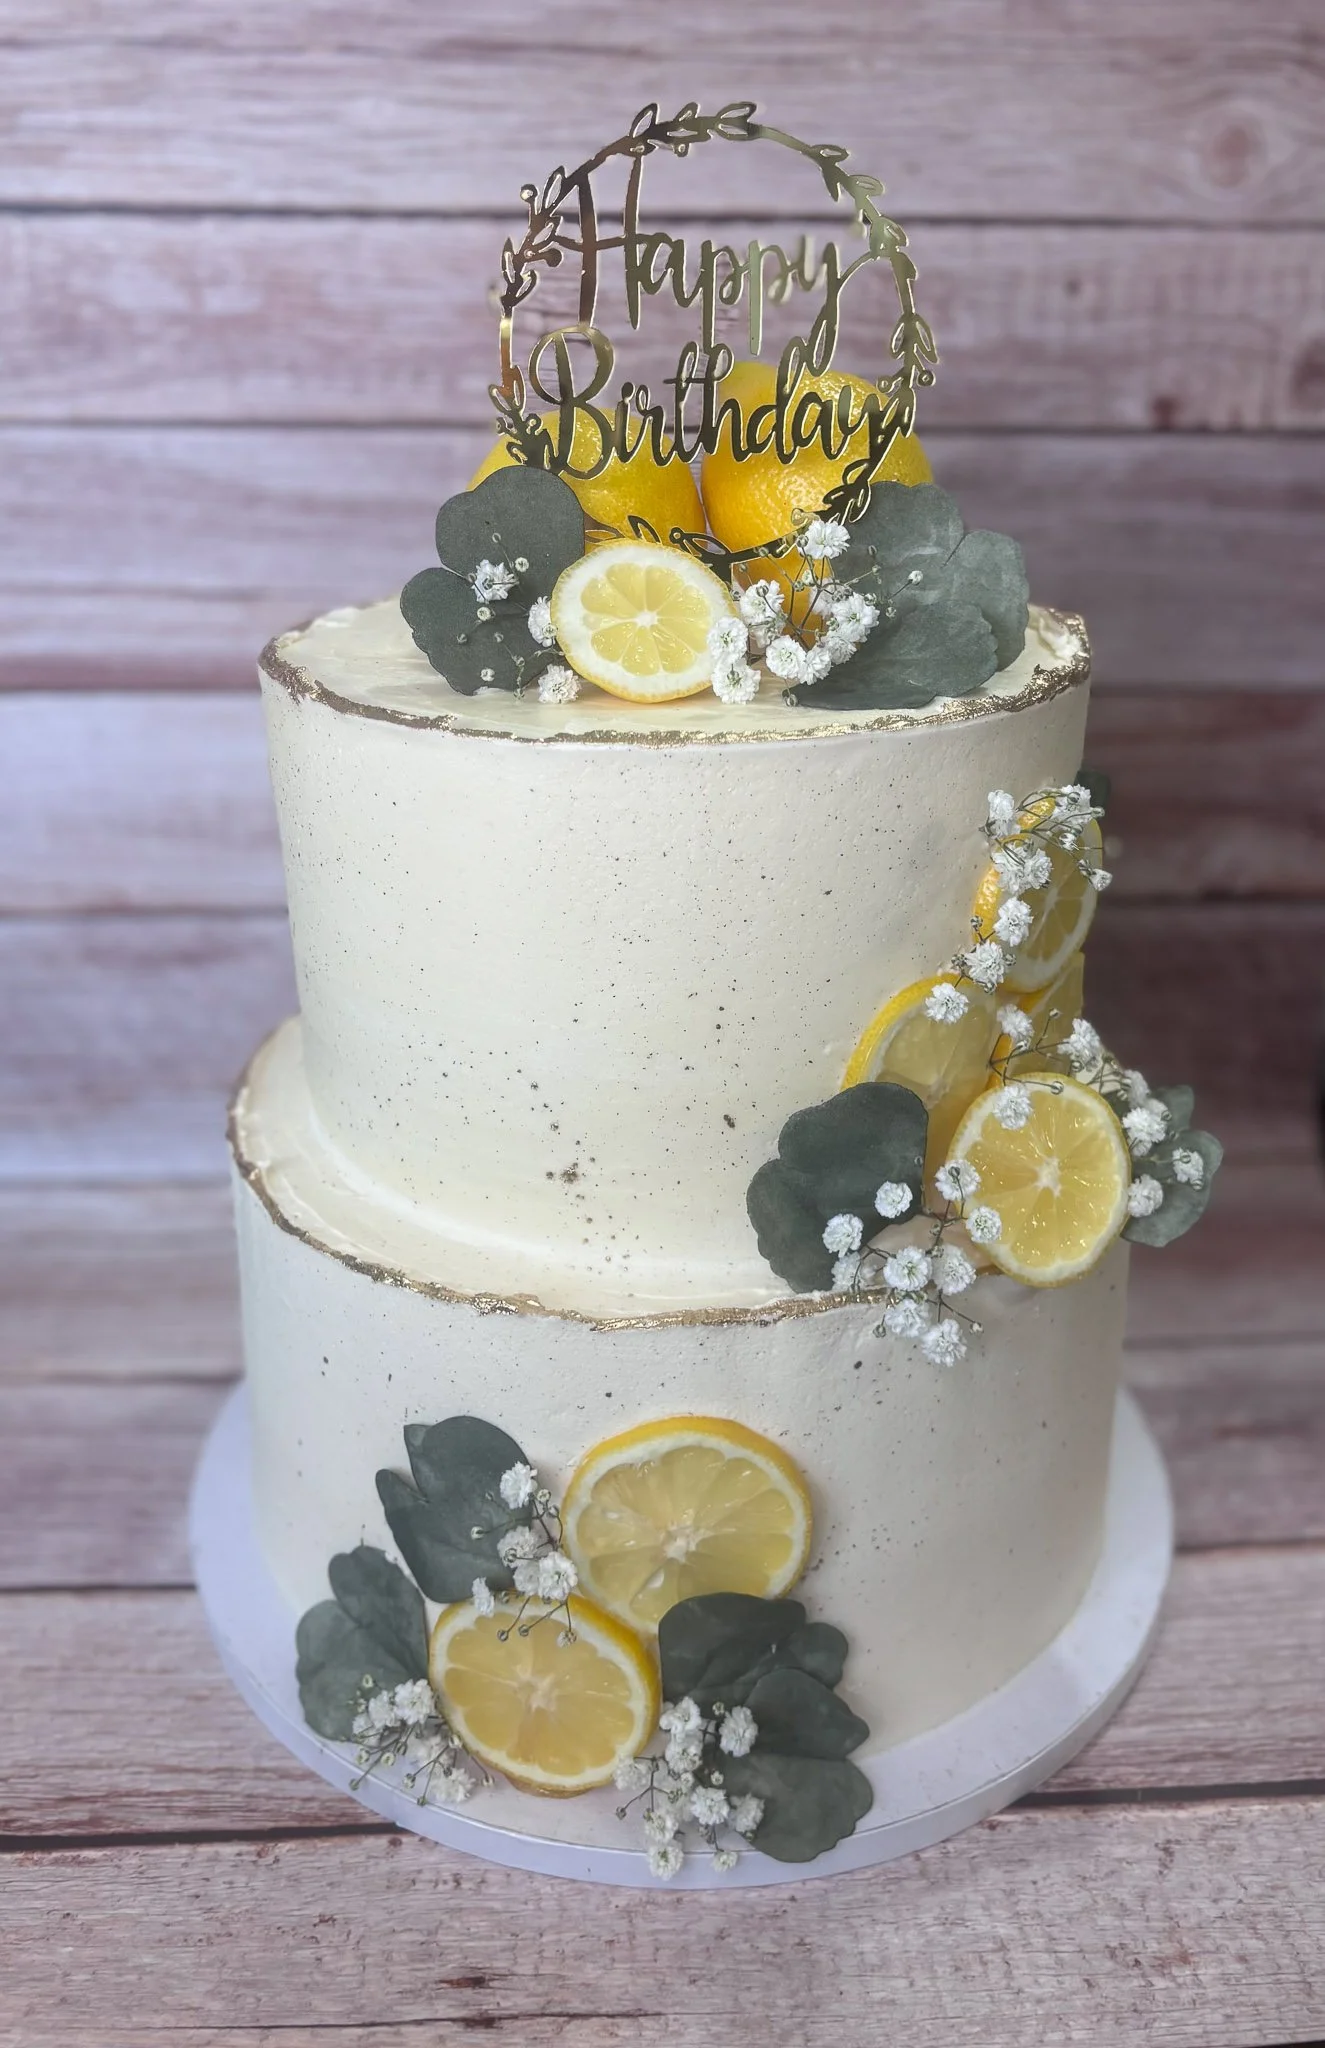
Photo: Moonlit Sweet Studio
If you’re looking for ideas for a lemon garden-inspired food spread, this is what we served:
Grape leaves
Yellow watermelon
Tomato bread with yellow heirloom tomatoes
Hummus
Lemon pasta salad
Stuffed cabbage in golden tomato sauce
Homemade lemonade
Shaved ice with homemade syrups
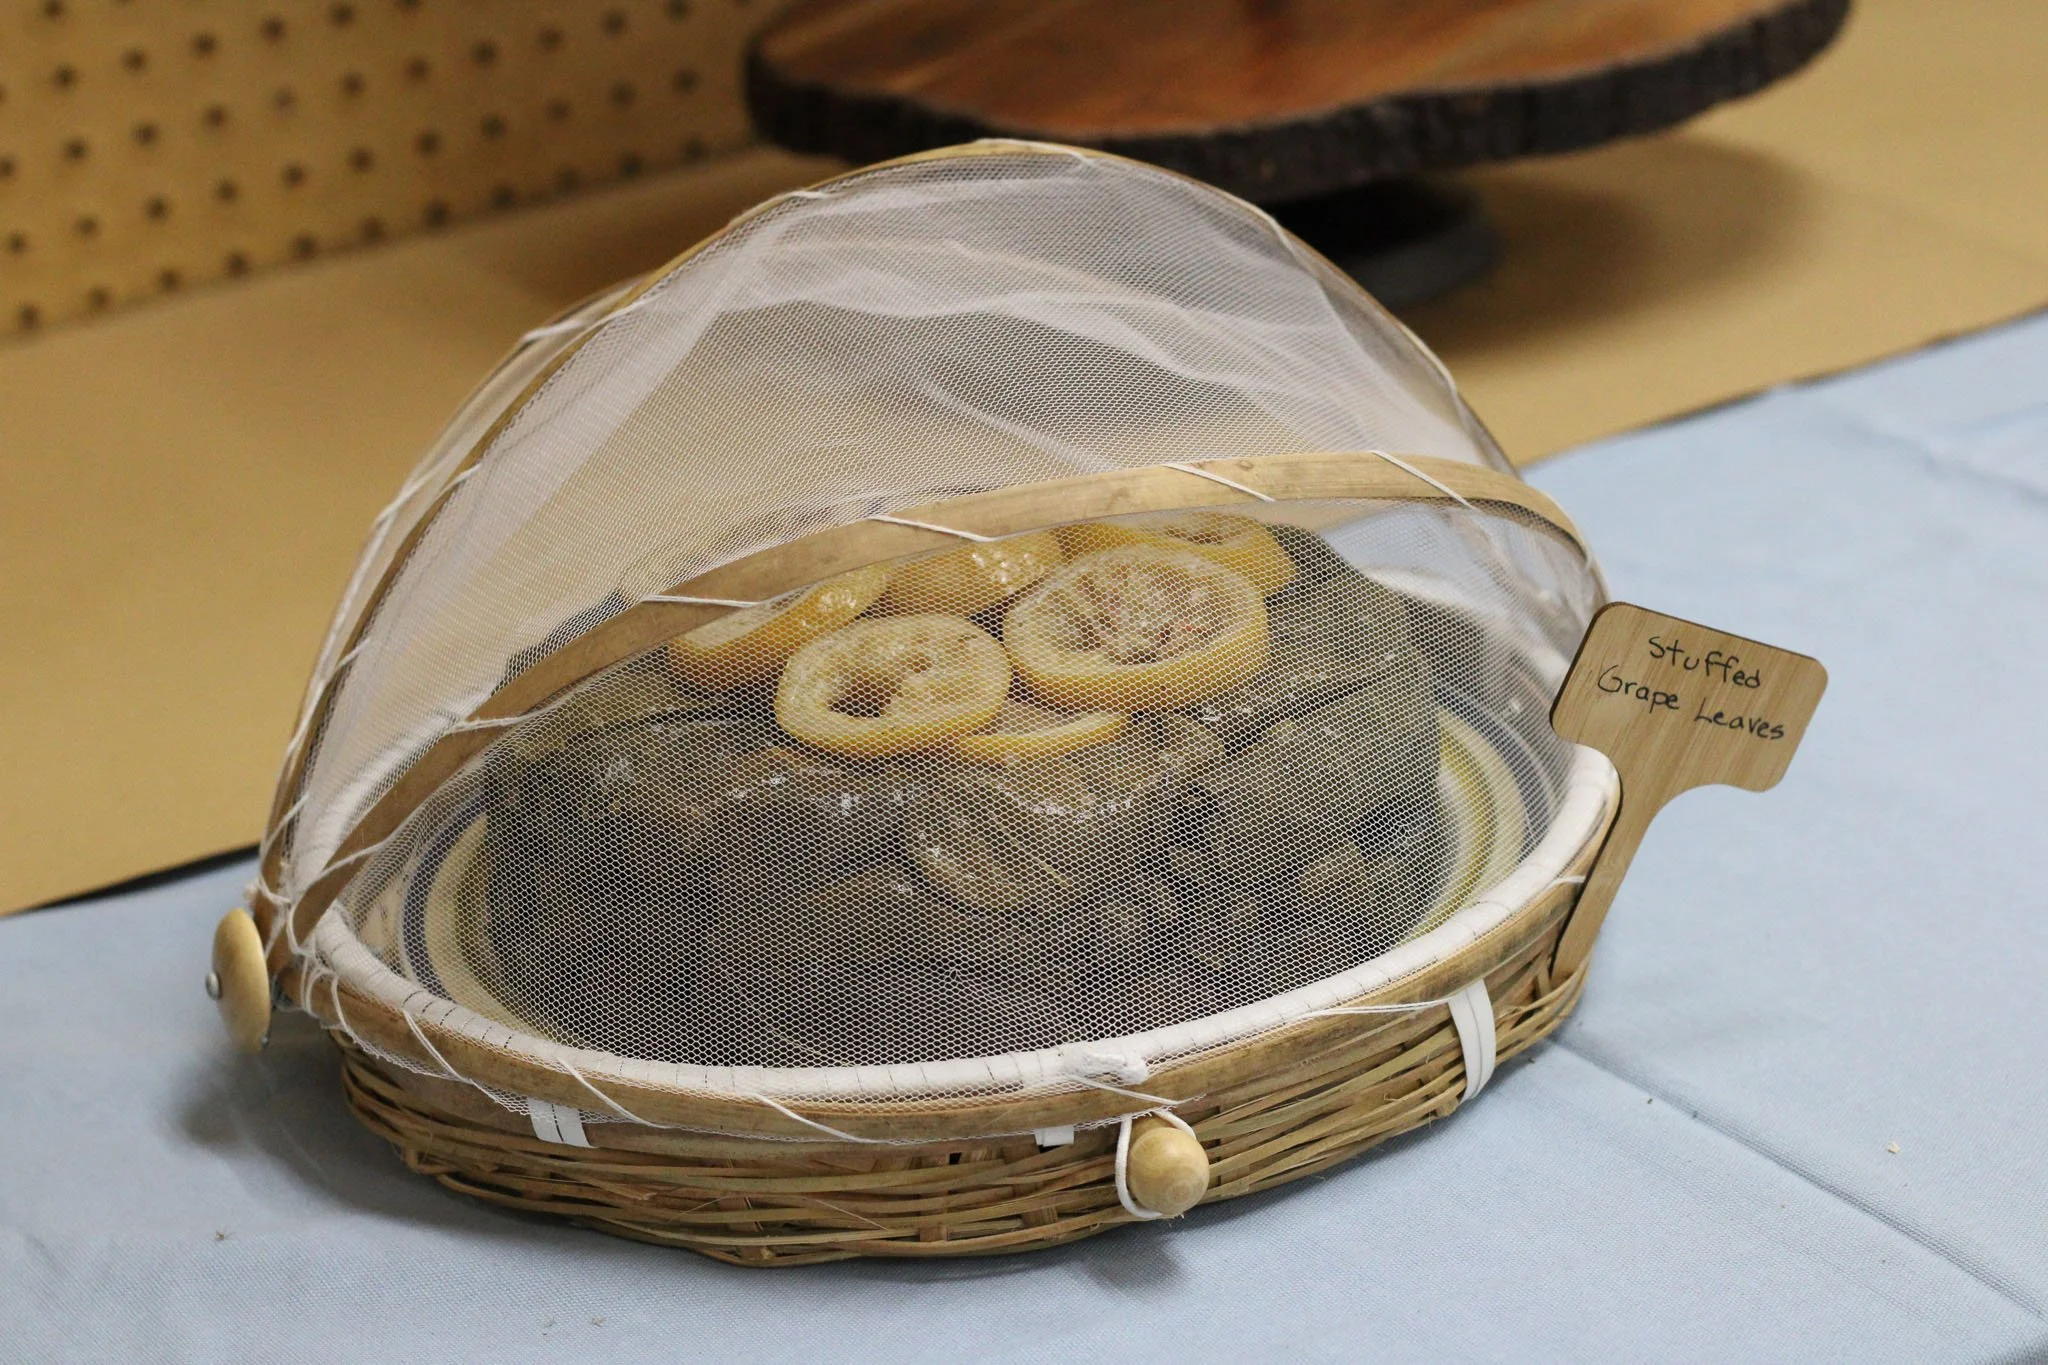
Photo: Juan Rodriguez
Everyone left full, surprised that we made so much ourselves, and many guests asked us to send them the recipes. For more garden flair, I added edible flowers to the lemon water and used them on the smash cake. I had planned to garnish the food with flowers too, but I ran out of time. By the time the party began, it did not feel important enough to finish.
In hindsight, I probably could have thrown the flowers on quickly since I had already bought them, but it was also a good lesson in why simplifying matters and why not every project idea needs to make it into the final party. If you want many projects, be okay with more simplified versions. If you are detail-oriented or the perfectionist type, try to limit them. Sometimes you just want to be done and enjoy the party. Nobody will know what you had planned and what the party ended up being.
Treat the food plan as one of your main party projects. Ideally, the week of the party should be reserved for cleaning, cooking, and only the most necessary final tasks. I ran out of time to make homemade hummus, so we used store-bought instead. It cost slightly more in the end, but sometimes you have to stay flexible and shift when needed.
At a Glance
Choose: filling foods that can be made or prepped ahead
Prioritize: savory foods before planning extra desserts
Avoid: cooking, reheating, or garnishing too many things on party day
Tie in the theme: use flavors, colors, or ingredients from the story or garden setting
Simplify when needed: store-bought items help when time runs short
Remember: if you’re the perfectionist type, limit your projects; otherwise, simplify each one
Plan What to Wear Early
Most people already plan what they want their child to wear, but don’t forget to plan what you and your partner will be wearing too. Whether you’re buying something new or wearing what you already have, having outfits chosen, washed, and laid out ahead of time reduces the stress of trying to find something at the last minute. I wanted a gardener-inspired look, so I wore pink cotton overalls with a wide-brimmed sun hat that had a floral bow in the back.
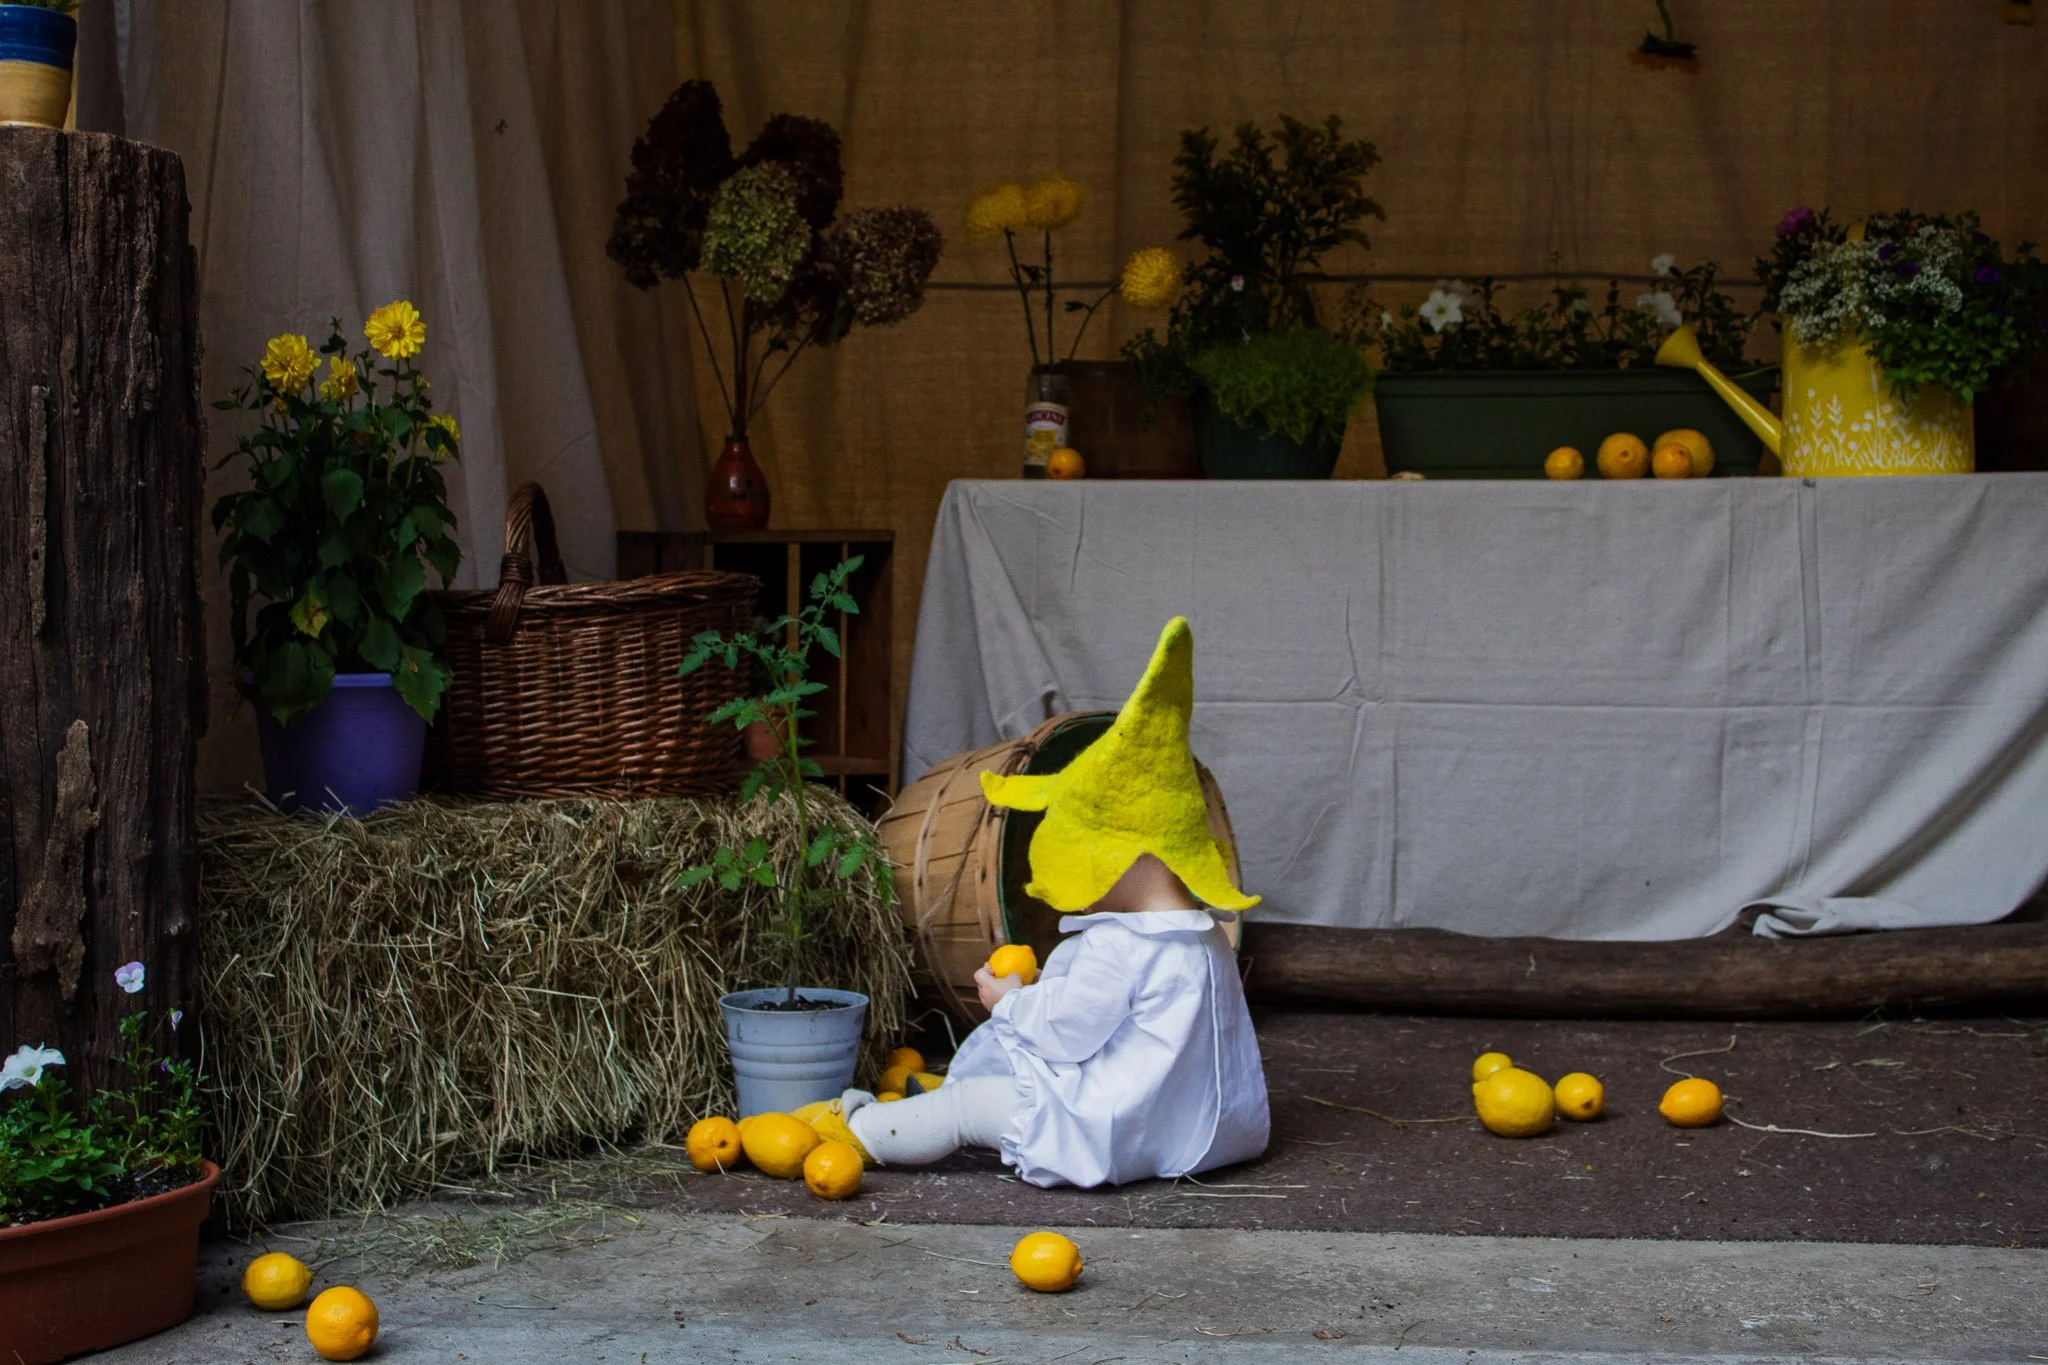
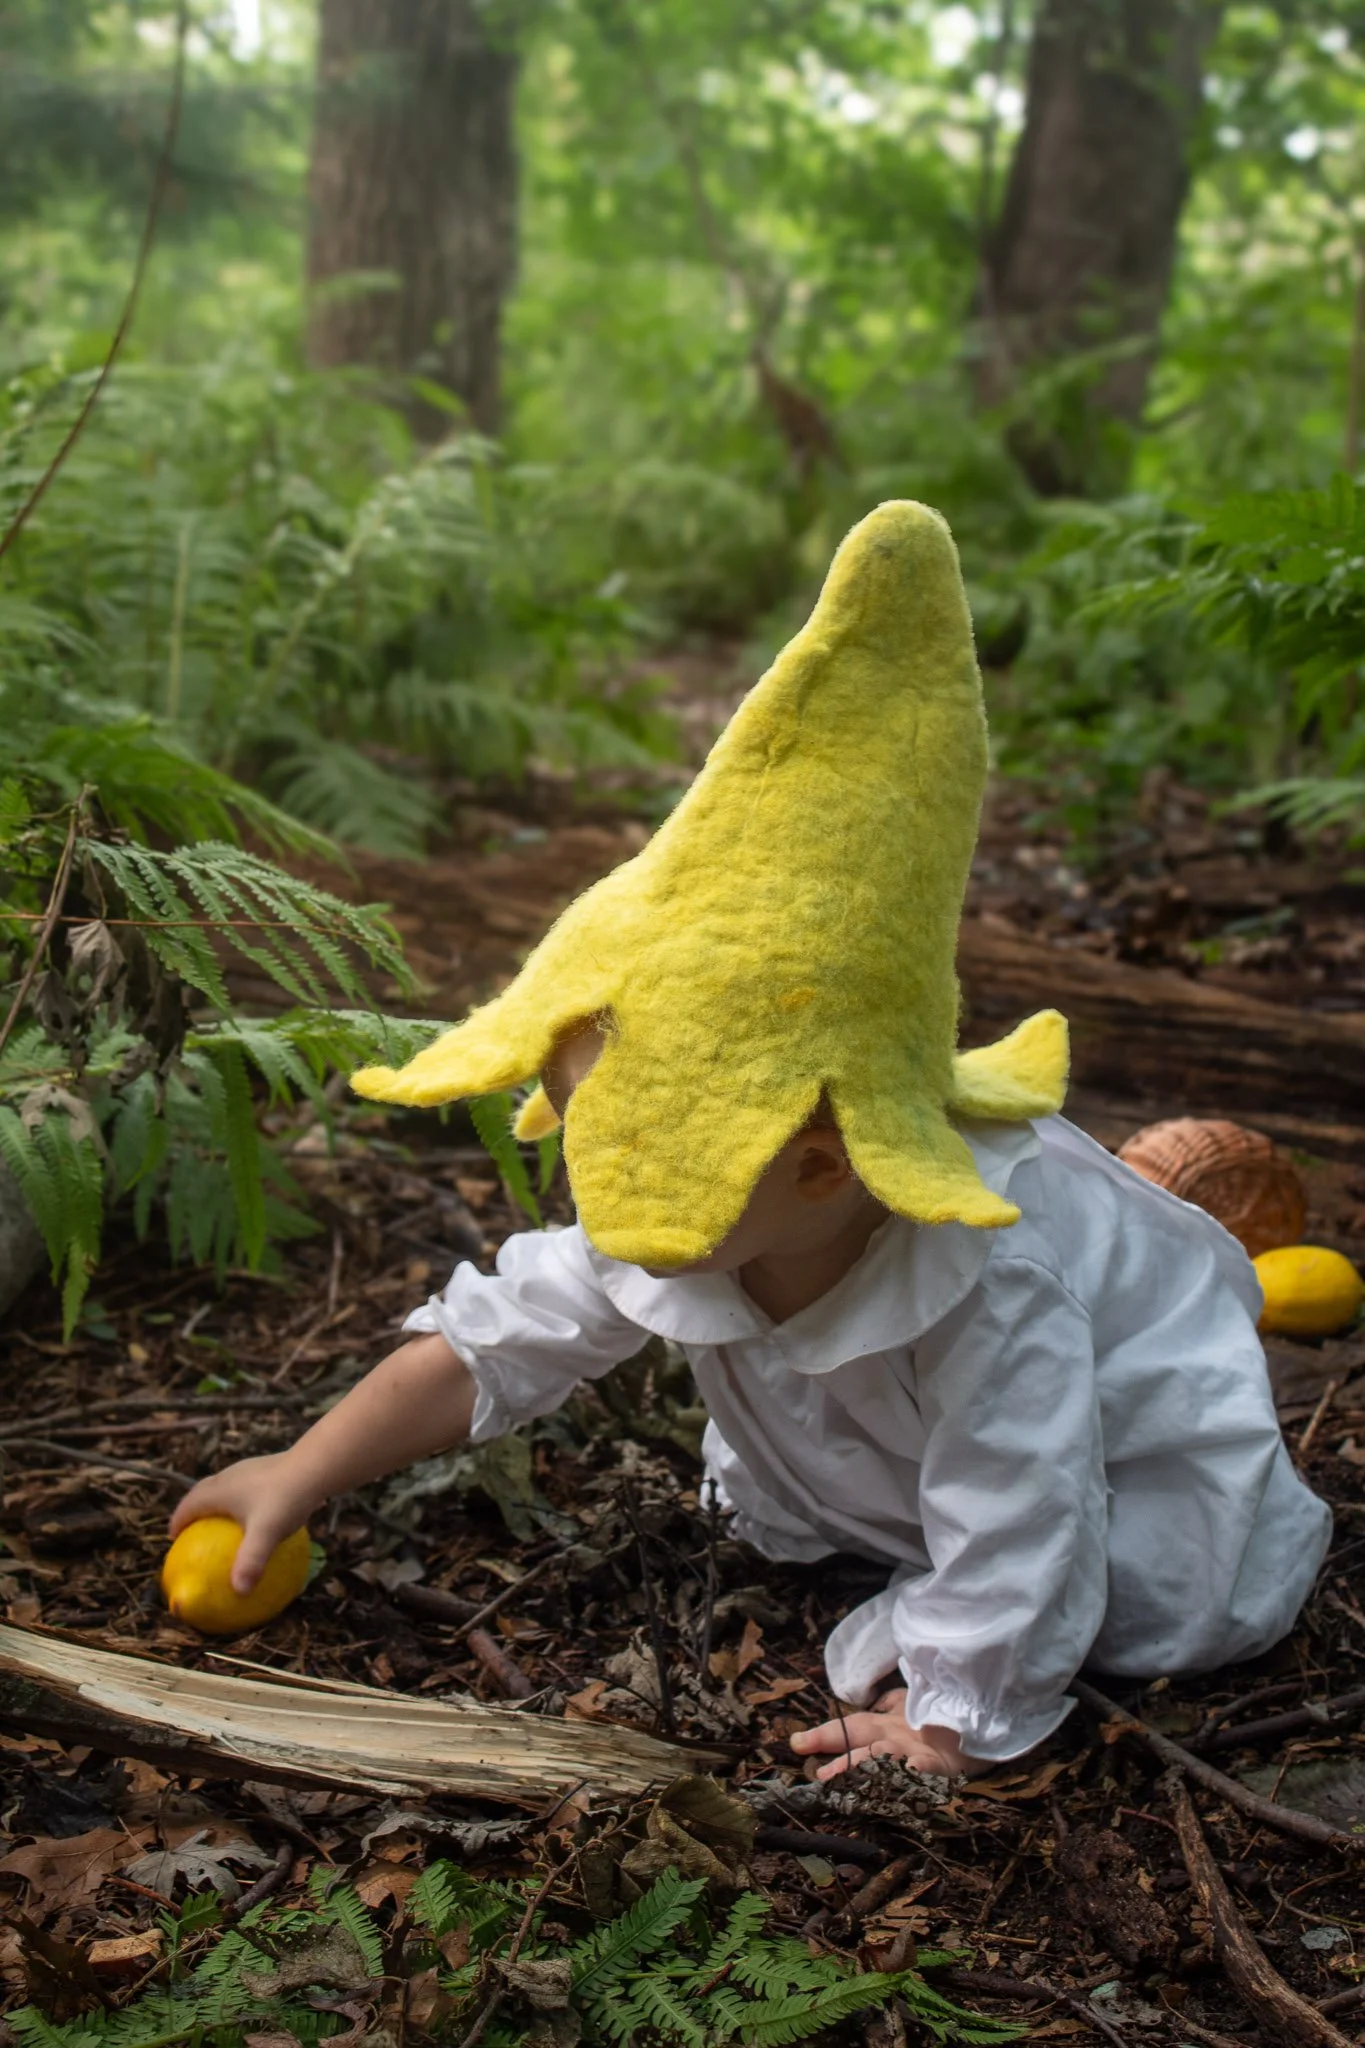
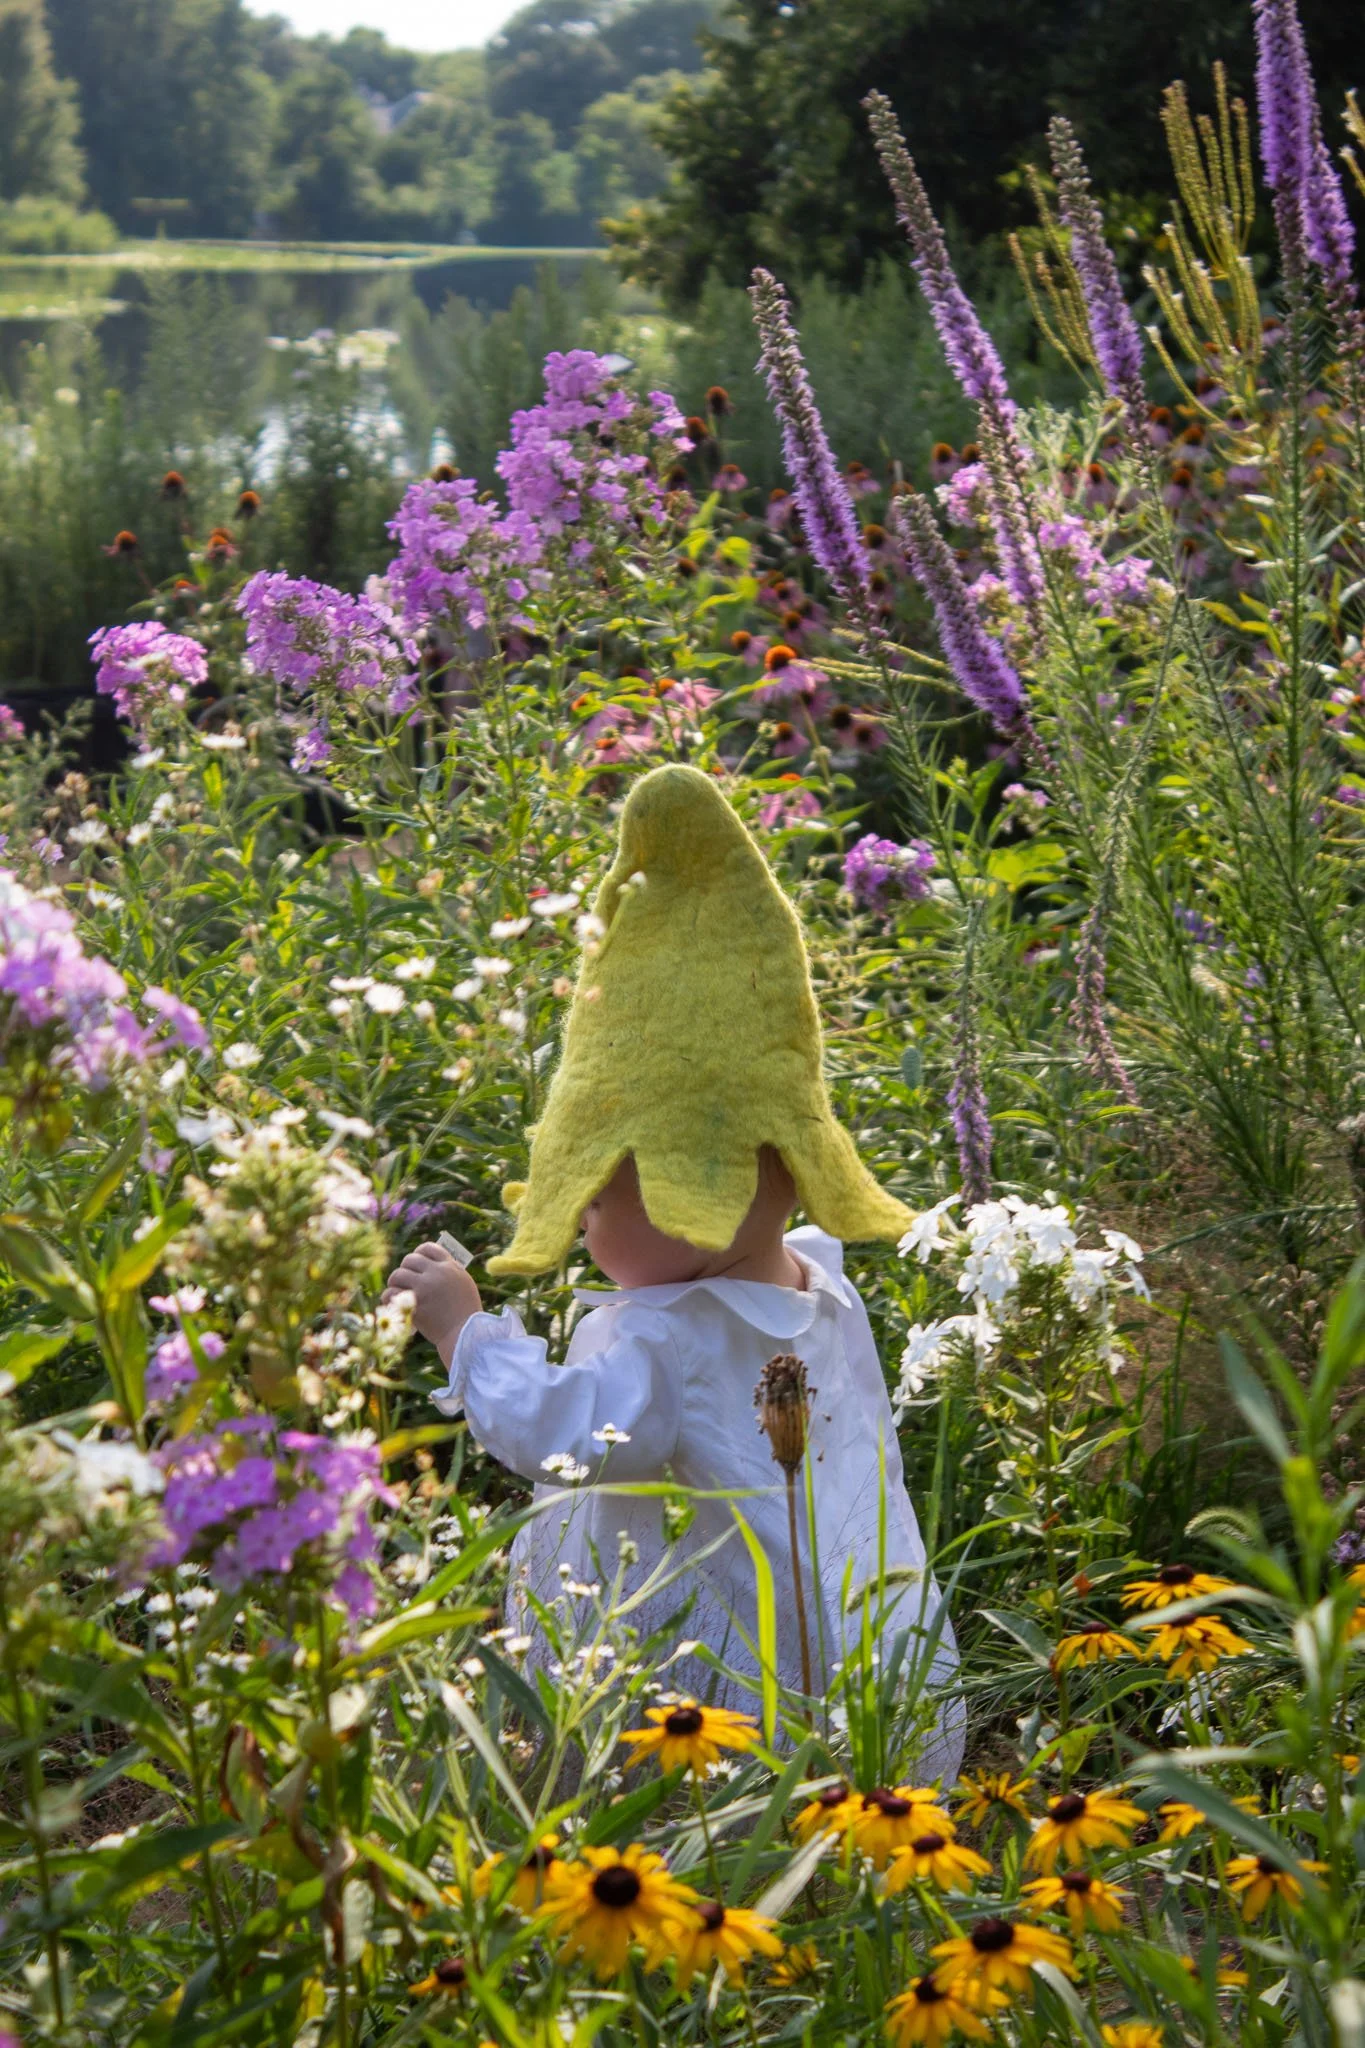
For my son, it was important to have a special outfit because this was such a big milestone. I wanted him to look like the character in the story I wrote for him, so I created a custom costume. I ordered the yellow booties and white tights, then designed the rest of the outfit and worked with a seamstress to bring it to life. I also made his hat from leftover wool batting from his baby quilt and dyed it with vegetable dyes.
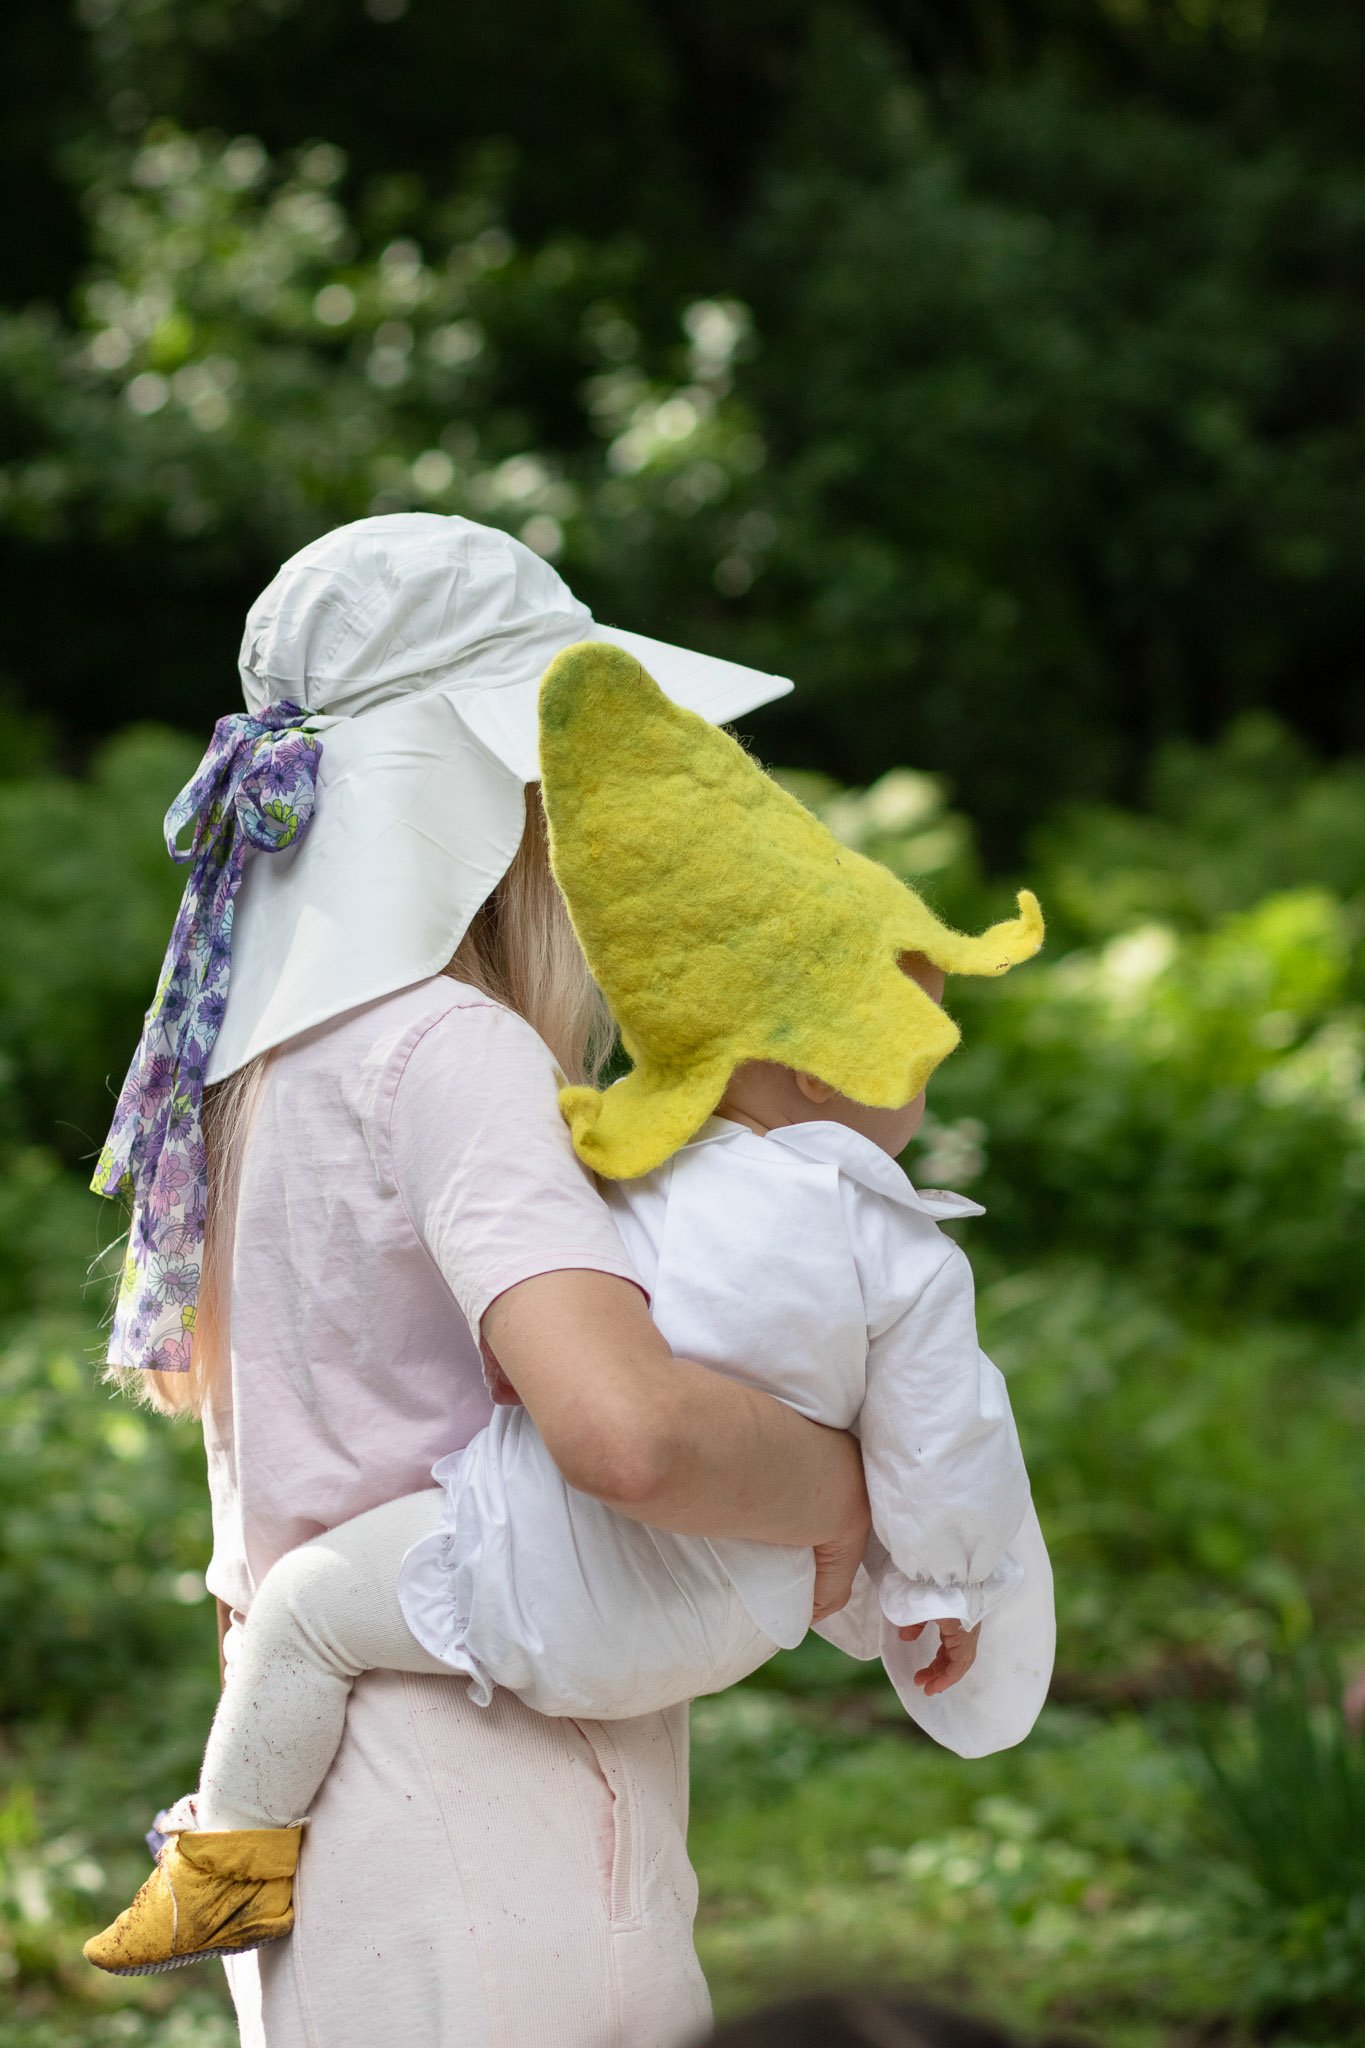
Photo: Nicole Shepherd
I started working on his birthday outfit about six weeks early, and I’m glad I did. A handmade piece can take time when you’re working in small chunks during naps or when someone is over to help. Since I didn’t have time to sew the full outfit myself, making the hat was important to me. It felt similar to making his smash cake myself. I wanted one part of his outfit to come from my hands.
Unless there’s a sentimental reason or strong desire to DIY or have custom clothing, I would focus on choosing from what’s readily available instead. This is an area where you can save time. Check it off the list and be done early.
I planned a backup outfit since the party was outside and had messy stations. I had the seamstress make two identical costumes because it was a specific look I wanted for photos. My son was not walking yet and crawled everywhere, so having a second outfit meant I did not have to stress about cake, food, or outdoor play before later photo moments. A regular backup outfit works perfectly too. The idea is to have something you still want to see them in so you won’t feel pressure to preserve the first outfit at the expense of enjoying the day.
At a Glance
Plan: baby and parent outfits ahead of time
Prepare: wash and lay out outfits before party day
Start early if: ordering custom pieces or making anything by hand
Save time by: purchasing outfits unless DIY feels personally meaningful
Have a backup: especially for custom clothing, outdoor parties, messy activities, or photos later
Prep the Party Space and Guest Comfort
Prepare the yard, garage, or wherever you plan to have the party. I did a deep clean of my garage, gardened, potted plants, laid patio tiles, and hung string lights. Getting ready for this kind of party actually helped me move along some house projects I probably wouldn’t have prioritized otherwise.
Think about pest control early. We used mosquito dunks to help with the mosquito problem in our backyard, trying to avoid harming other insects and wildlife. This works best if done early enough because it interrupts the mosquito life cycle. We did this 3–4 weeks before the party, and that noticeably helped keep the yard more comfortable. You can also consider fans, since mosquitoes are weak fliers, or set out a table with bug spray and handheld fans for guests.
Bugs in general are something to be mindful of with outdoor parties. Beyond mosquitoes biting, the main thing to plan for is food protection. I had a fan near the food to help keep bugs away because I used the back benches of my garage as the food table. I also used food nets and aluminum trays with lids so the food would further stay protected from pests.
I used leaf litter bags with the tops folded down a few inches to keep them open. These makeshift trash cans were placed around the party space. They kept people from leaving trash around, and because they were garden bags, they worked with the party decor.
I have a decent amount of shade in my yard, but it can still get uncomfortable during midday sun. I kept this in mind when planning party zones and thinking about where people would likely gather. I used my patio umbrella from my front deck to create shade where there was no coverage, and I placed other seating areas in shaded spots like the garage or under trees. Not everything was covered, but there were plenty of places for guests to retreat when they needed a break from the sun.
At a Glance
Prep early: yard, garage, garden, lighting, and any outdoor projects
Plan for pests: mosquito control, fans, bug spray, and food covers
Protect food: use fans, food nets, trays with lids, or covered serving areas
Add trash stations: place easy-to-see trash bags or bins around the party space
Think about shade: create seating zones under trees, umbrellas, tents, or garage coverage
Remember: guests can’t fully enjoy the party if they’re uncomfortable
Make a Weather Back-up Plan
Weather is a variable you can’t control, only plan around. Always have a backup plan in case the weather doesn’t cooperate on party day. You could move the party inside, use a garage, reserve a tent, or choose a rain date. If a tent is your only realistic backup option, plan to rent it regardless of the forecast. Tent rentals are often set up a day or two before the party, so this is not usually a last-minute decision. If the forecast suddenly shows rain the night before, you might not be able to secure one in time. Even if it doesn’t rain, a tent can still be useful for shade, heat, and food protection.
For smaller parties, you might also consider buying a simple pop-up canopy if it fits your budget and you can safely set it up yourself. Just check the return policy first if you’re hoping to return it unused. A small canopy is not the same as a commercial event tent, but it can still help with shade, brief light rain, or protecting a food table.
Make a general plan for where food, outdoor decor, seating, and activities will go if it rains. It doesn’t have to be overly detailed, but having a basic idea ahead of time will make it easier to pivot if needed. About a week before the party, start checking the forecast more seriously so you can decide whether your backup plan needs to become the real plan.
You can also make a scaled-down weather version of the party by deciding which zones matter most and which activities or decor can be cut if rain, heat, or wind changes the setup. Not everything has to exist in the same space either. Some activities might move inside, others might move to the garage, and a small canopy could go over one outdoor kid zone, like the sensory garden or mud kitchen. That way, the party can still have an outdoor element without relying on the entire yard being usable.
For anything that cannot hold up well in rain, wait to put it out until the morning of the party. Even if the party day looks clear, the night before could still bring rain. For that reason, avoid planning a setup so complicated that it depends on perfect weather or lots of help. Try to keep the morning-of setup manageable enough that you could do the essentials yourself if needed.
At a Glance
Make a backup plan: indoors, garage, tent, or rain date
Rent early: if a tent is your only backup option, reserve it regardless of the forecast
Consider a canopy: for one small covered zone
Plan the pivot: decide what moves, what stays covered, and what gets cut
Watch the forecast: start checking seriously about a week before the party
Wait to set out: anything that cannot handle overnight rain
Keep setup realistic: plan morning-of essentials you could handle yourself if needed
Remember: not everything has to exist in the same space
Create the Party Zones
Break the party into zones and think about where each section should live and why. For example, I placed the memory book station right near the entryway so guests passed it when they arrived and again when they left. It wasn’t tucked into a far corner. I also made sure there was seating nearby so anyone sitting there would be more likely to contribute.
You don’t need to decorate every corner of the party space. Designated zones create atmosphere without requiring the entire yard, garage, or house to be fully styled. I had my party backbone: storytime, cake smash, and milk bath. Seating was a necessary zone too, and then I added other activity ideas around that structure as time, energy, and space allowed.
You are a parent, not a production team. Resources are limited, help is limited. The more elaborate the ideas, the earlier you’ll need to start. Use the zones to decide what matters most, what can be simplified, and what can be cut if needed.
Storytime
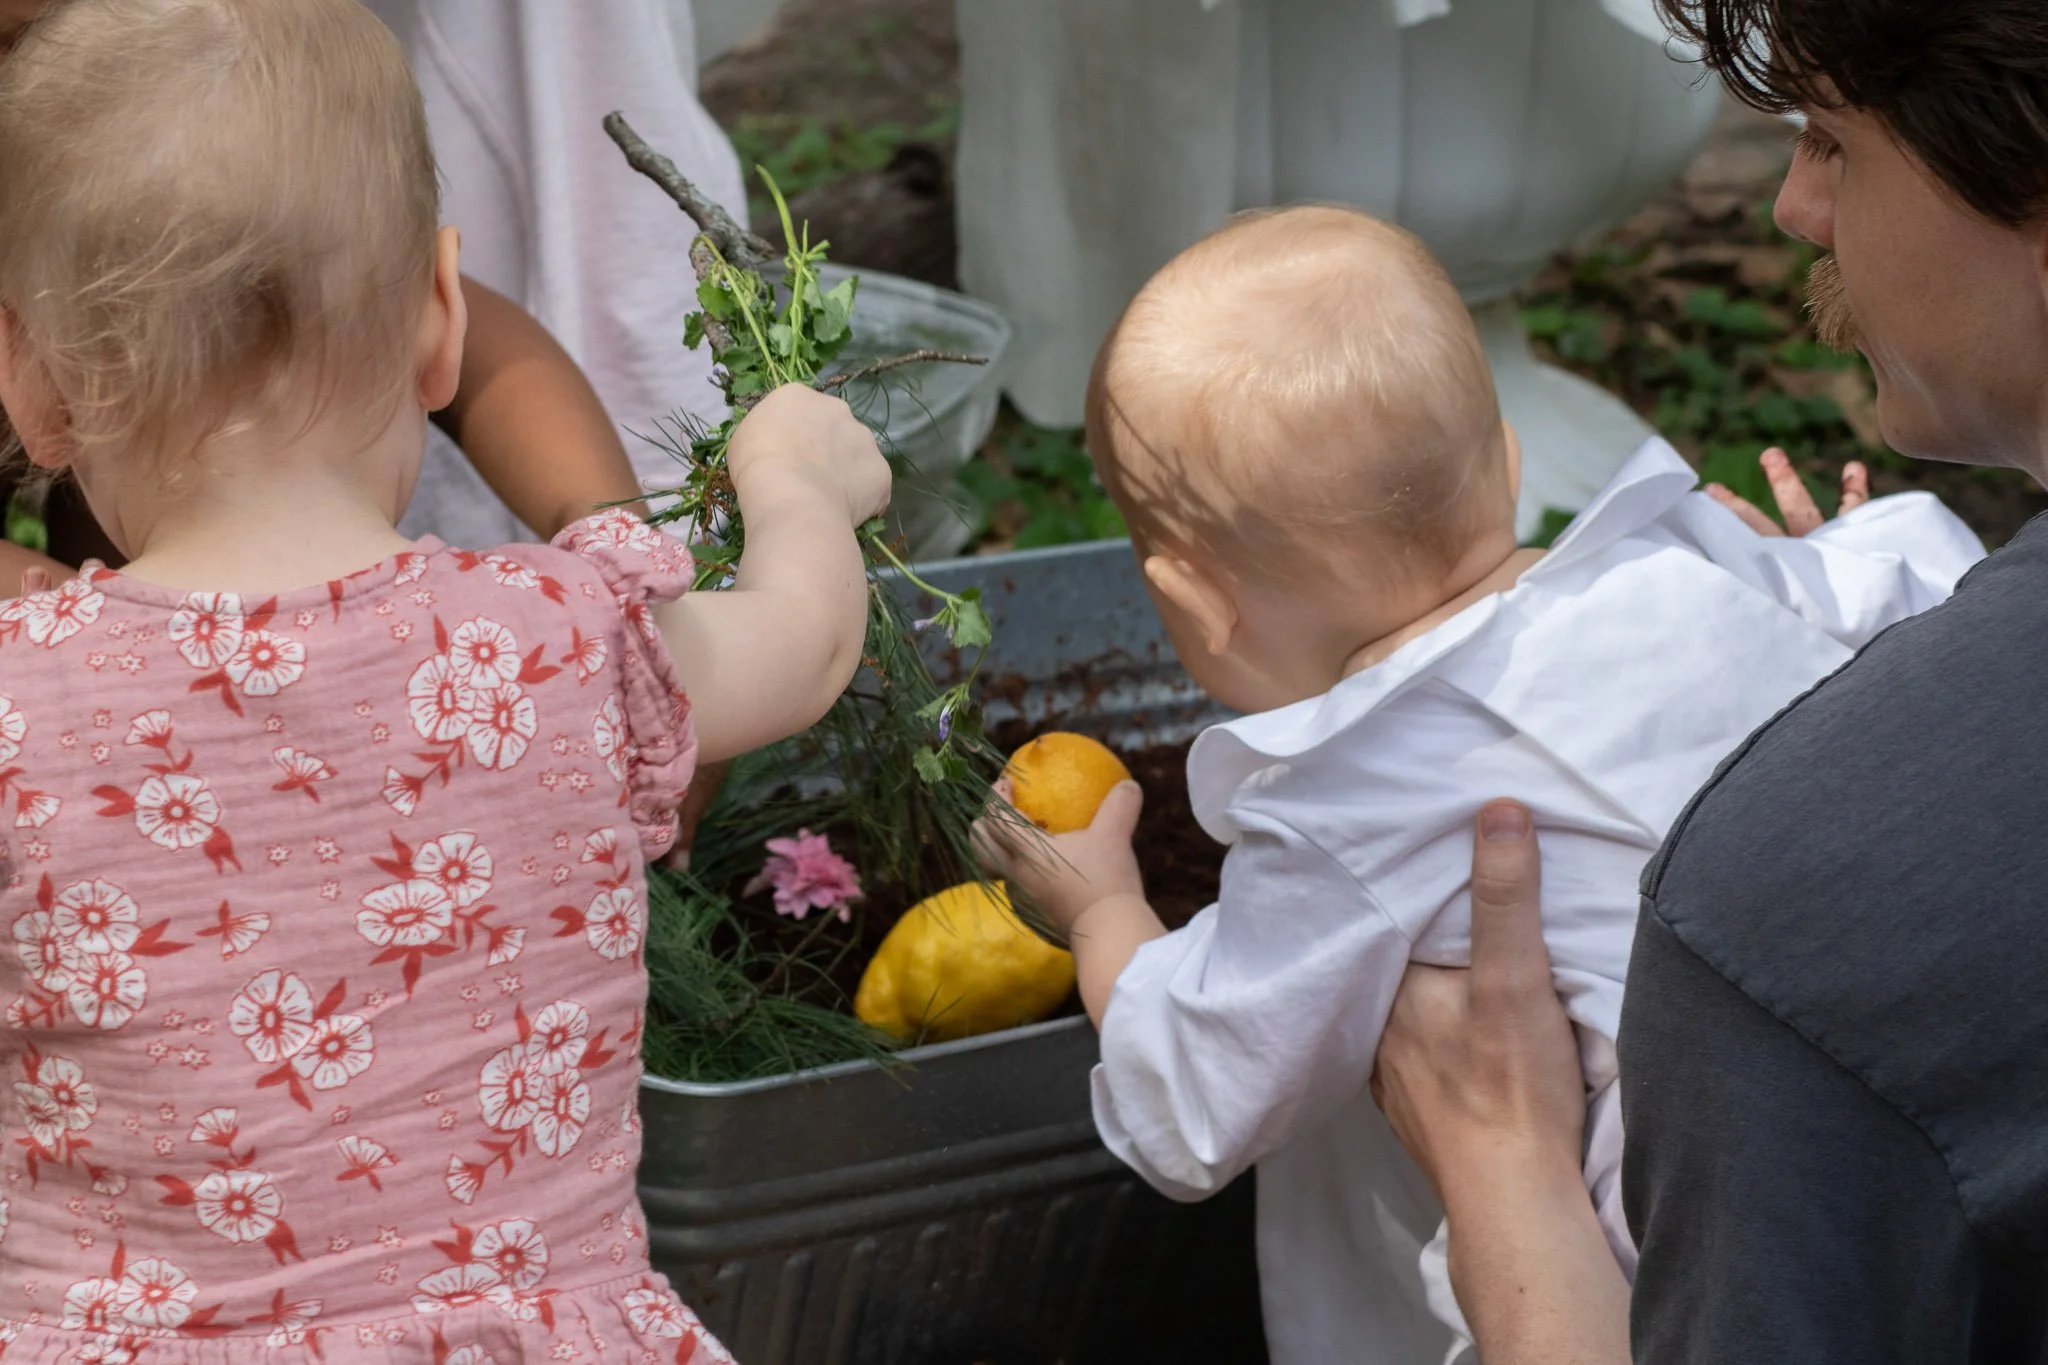
Photo: Nicole Shepherd
I wrote a story for my son’s first birthday as a gift and created the party theme around it. I read it to him for the first time on his birthday and turned that moment into a party activity. You could use any garden-inspired children’s book for this.
To make the reading interactive and engaging, I paired it with a sensory garden activity where the children built the garden as the story progressed. You could simplify the idea by letting them freely explore the garden tub while you read instead of giving them specific tasks.
I bought a steel tub and filled it with coco coir. You could also use regular soil, but I preferred coco coir because I was less worried if some accidentally got into his mouth. I gathered natural materials from around the yard, including pine needles, twigs, leaves, stones, and flowers.
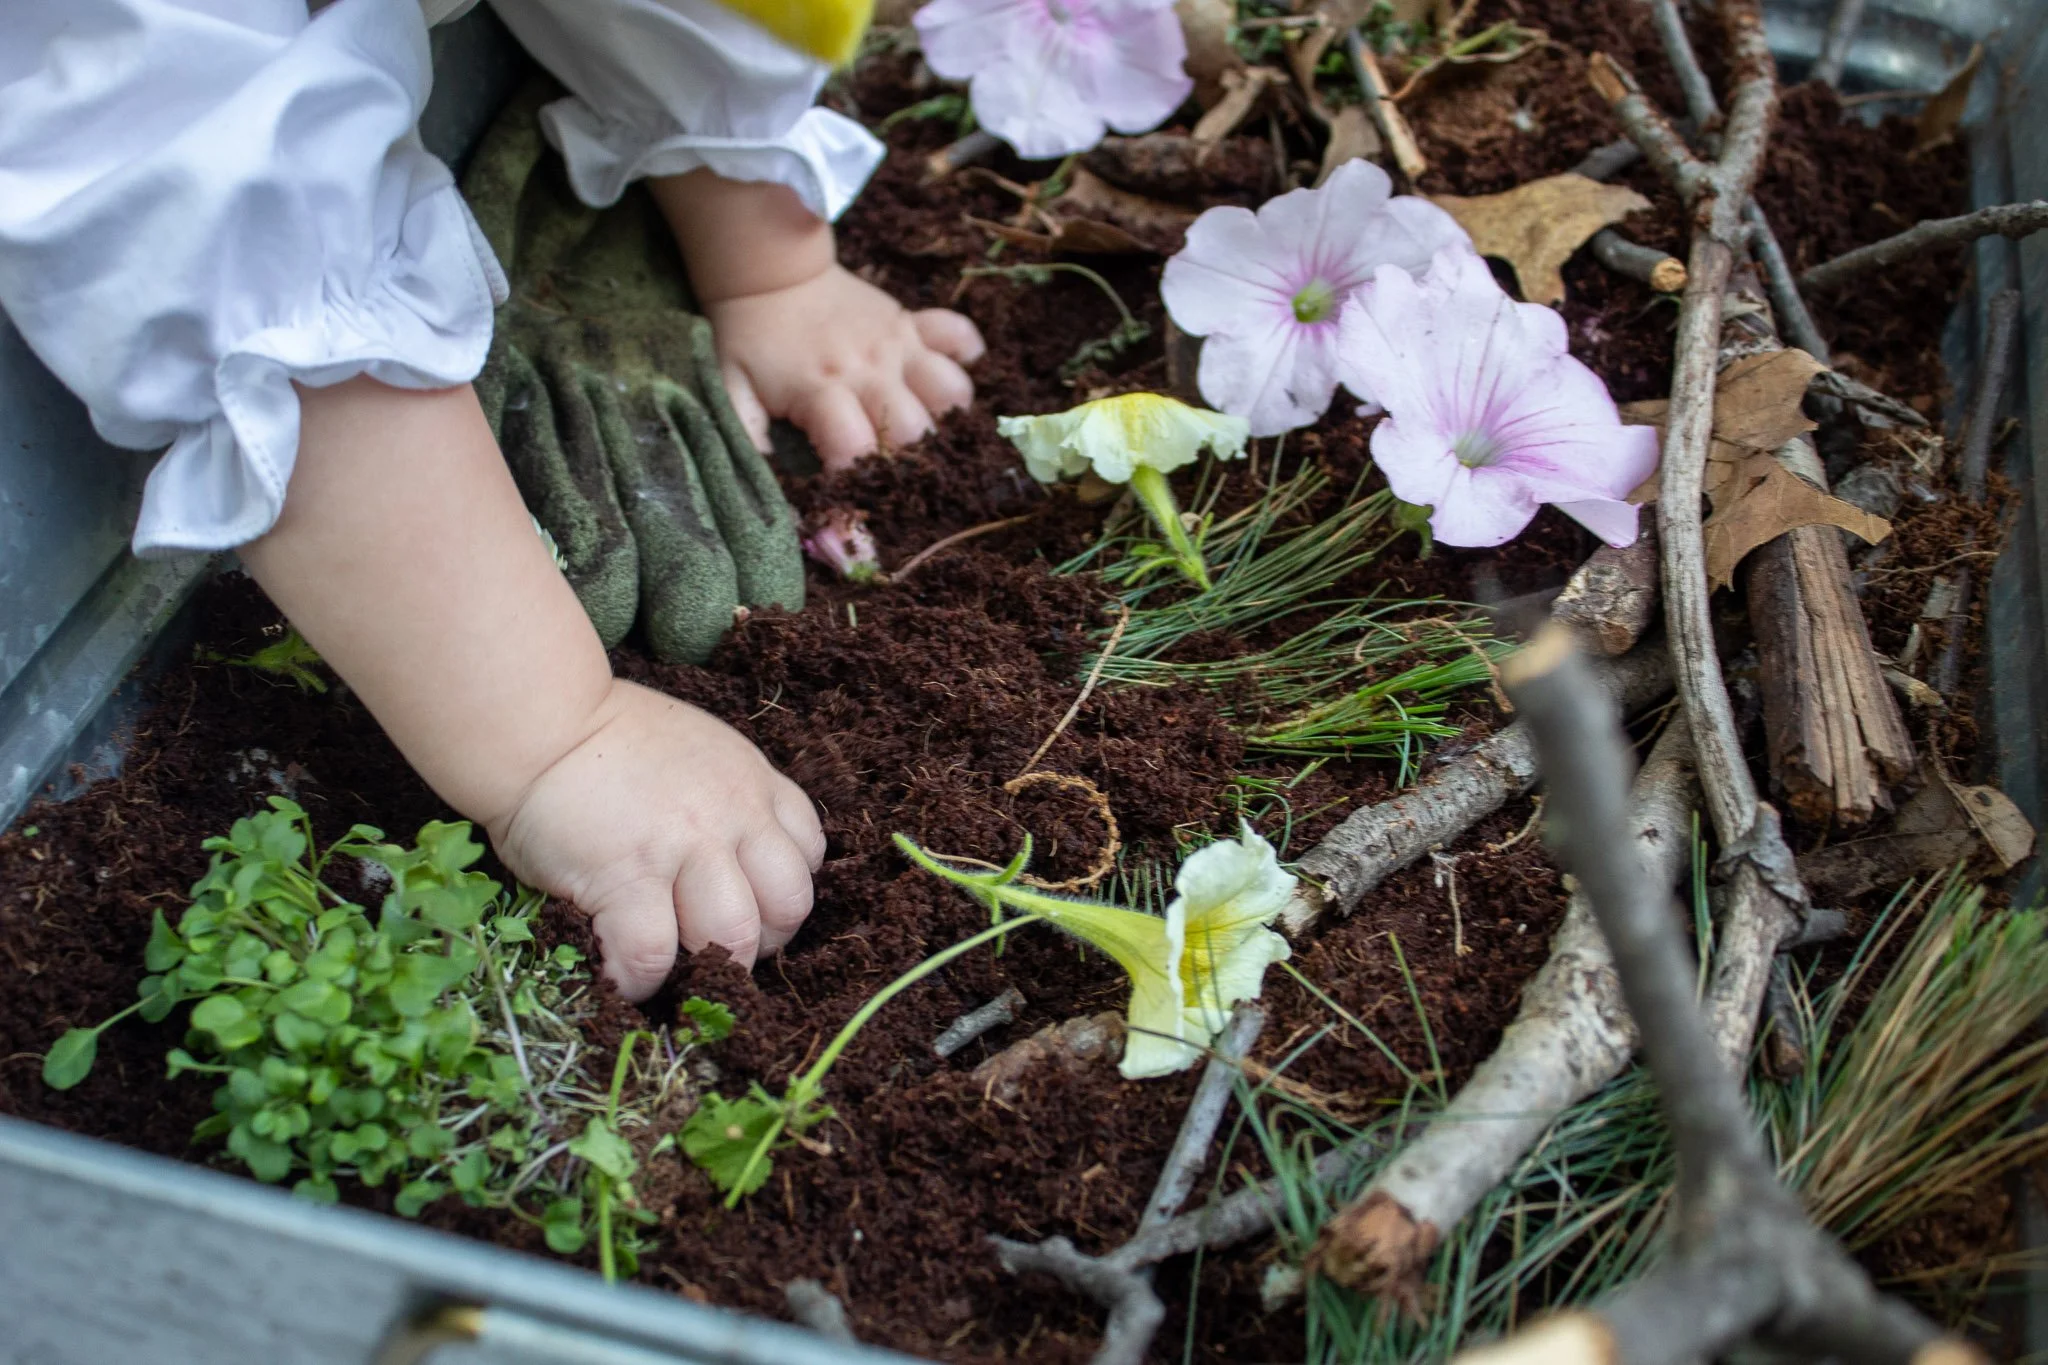
This activity worked across a surprisingly wide range of ages. It kept children from one to seven years old engaged in the story, and even some adults wanted to participate. It was a really special moment to read to my son while his dad held him and watch him interact with the story by touching and playing with the sensory materials.
When planning activities, remember to include something your baby can enjoy too. It’s their big day, after all.
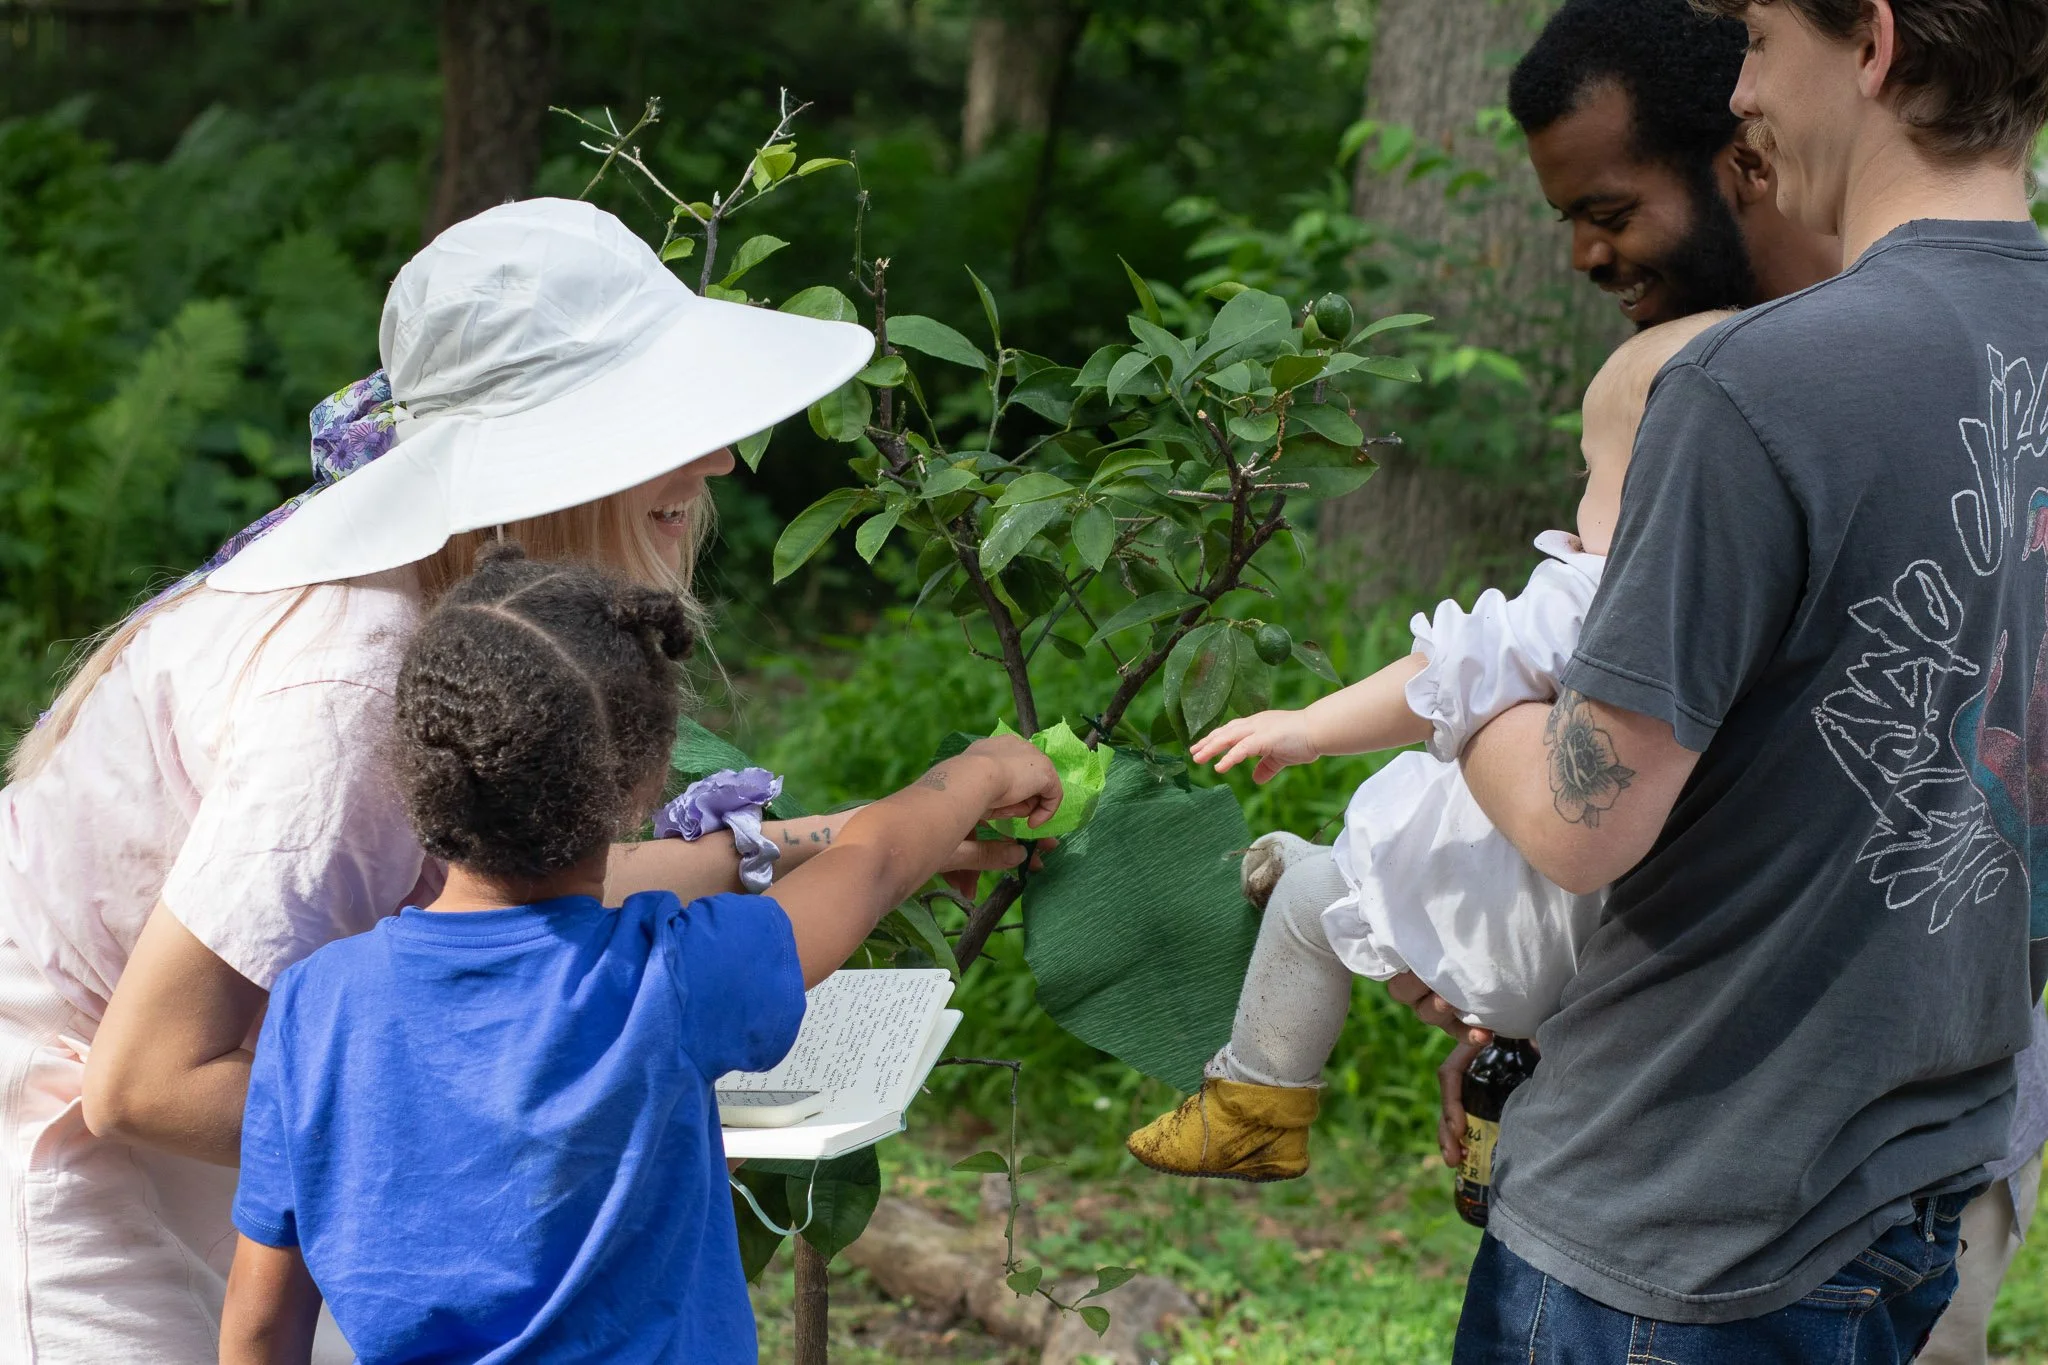
Photo: Nicole Shepherd
I ended storytime with a song played by my brother on guitar. It felt like a miniature performance just for my son. You could recreate this more simply by playing one of your baby’s favorite songs or lullabies on a speaker, or by having everyone sing together.
After storytime, I left the tub out on a large canvas drop cloth in the yard so guests could continue exploring it. Parents and children returned to it throughout the party and it functioned as an open-ended sensory activity long after the reading ended.
At a Glance
What it is: an interactive storytime paired with a sensory garden tub
Supplies: garden-themed book, tub, coco coir or clean soil, natural materials, and a drop cloth
Why it worked: babies, older children, and adults could participate together
Simplify it: let children free-play in the tub while you read any garden-themed book
Add another sensory experience: finish with a favorite song, lullaby, or group singalong
Keep it out: let guests return to the sensory tub for open-ended play after storytime
Remember: include something your baby can enjoy too. It’s their big day, after all
Mud Kitchen
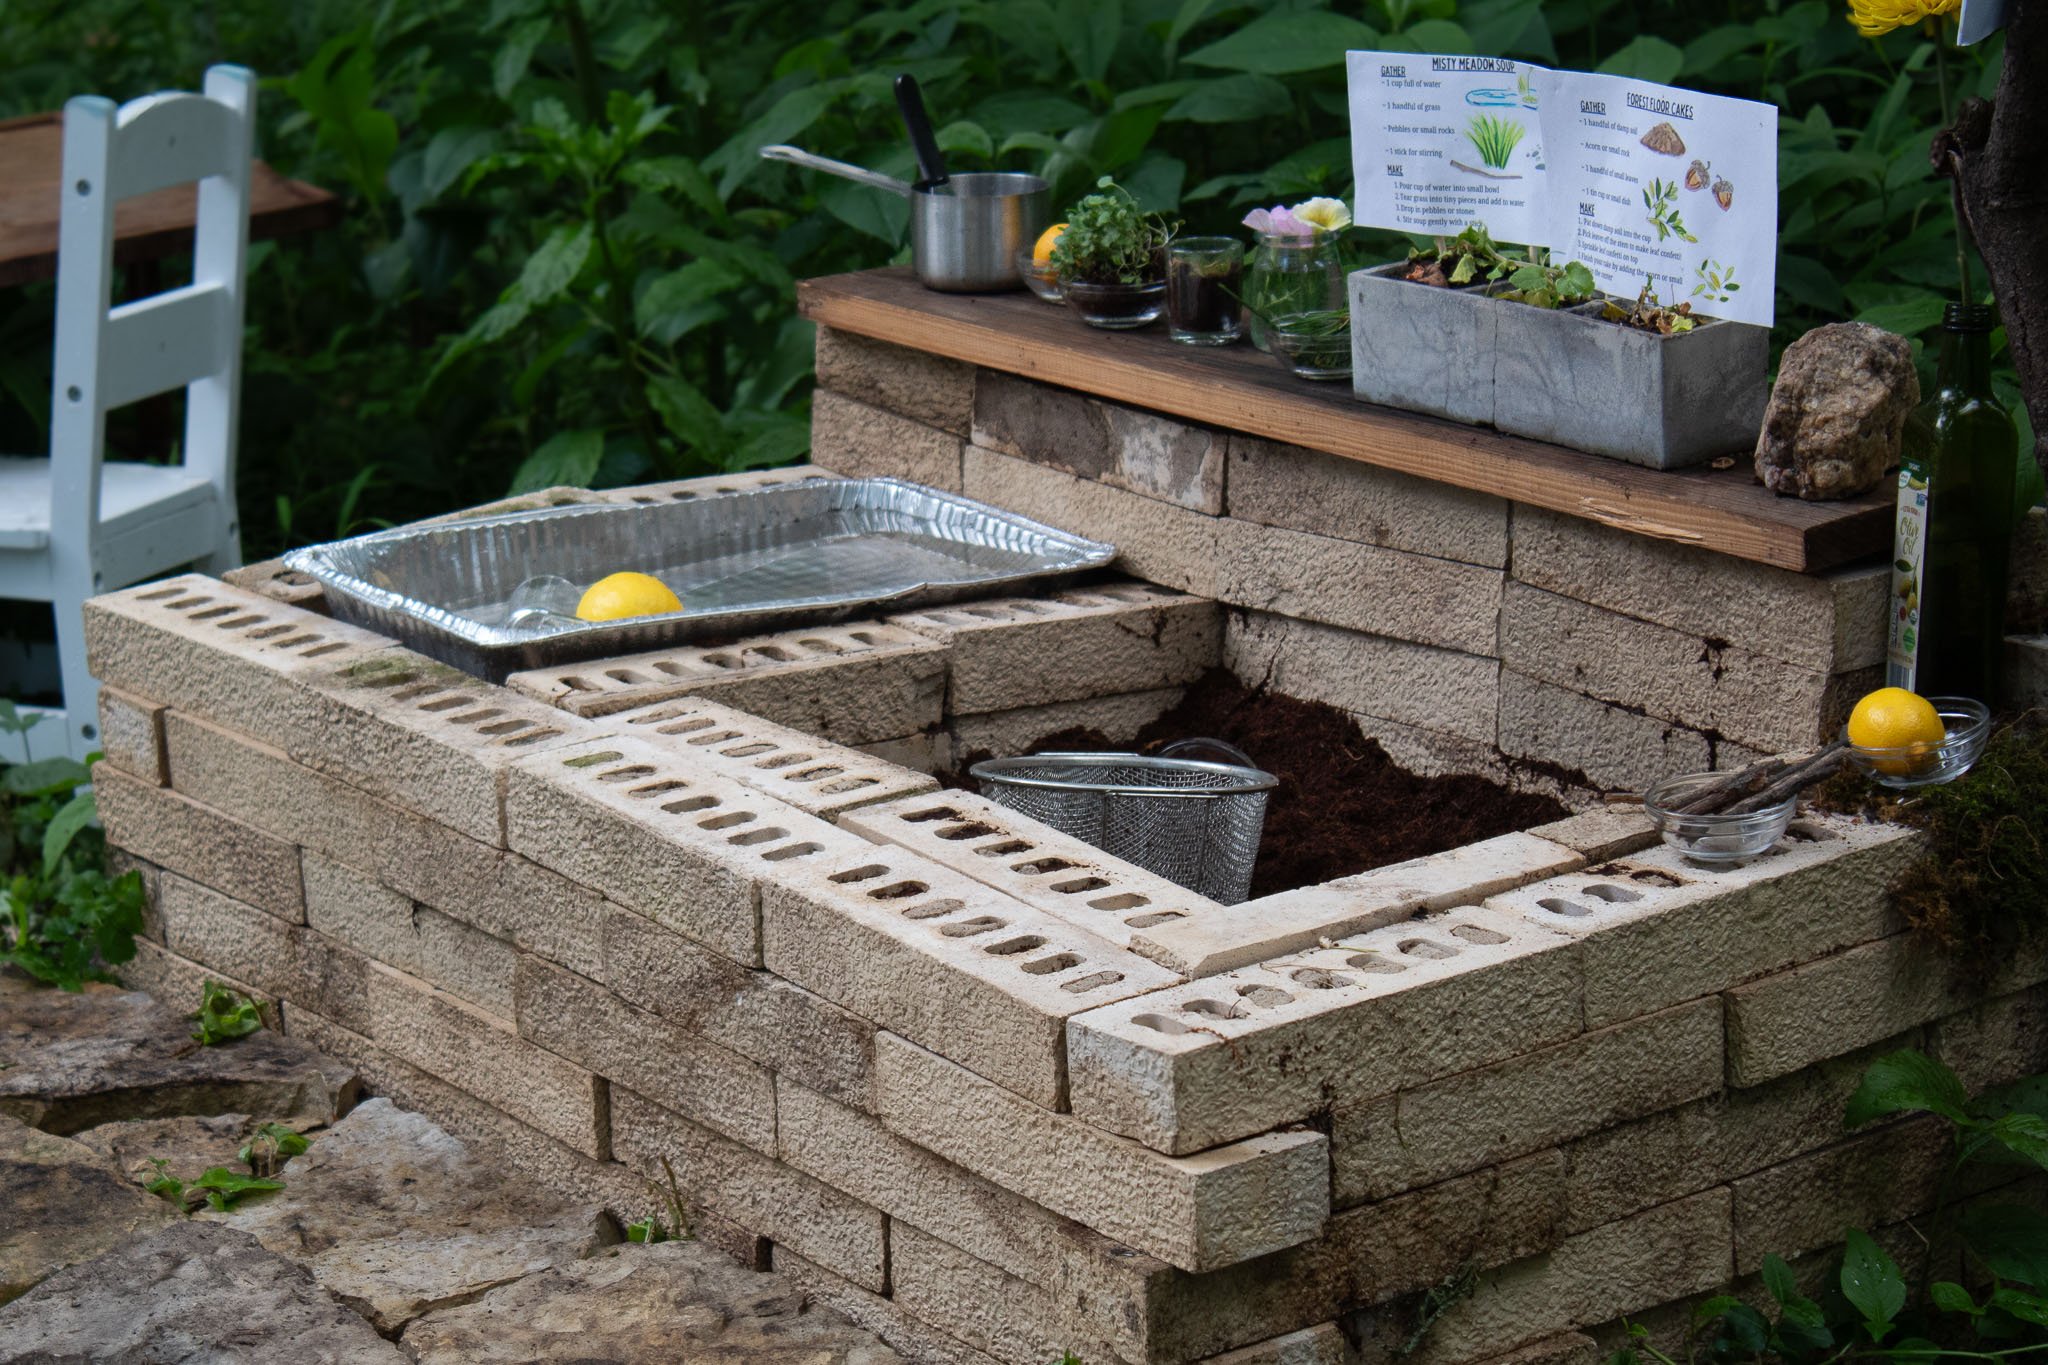
I originally considered buying a mud kitchen for my son’s birthday, but some leftover bricks lying in our yard sparked the idea to make one using what I already had.
A friend helped me dry-stack the bricks. We added a divider to create separate spaces for water and dirt. Just like the sensory garden, I used coco coir instead of soil. I used flagstone from our property to create a small stepping area in front of the kitchen. I also found a scrap piece of wood in the garage and used it as a back ledge for dishes, planters, and recipe cards.
I found a low table on the curb and added it to the mud kitchen area. My mom brought over two small wooden chairs and white picket fence pieces for me to borrow. These little touches made the space feel like an entire experience rather than just an activity station.
I liked the idea of having mud kitchen recipe cards, but they were not a high-priority item. My sister-in-law was looking for a crafty party project, so I asked if she wanted to make them. They were a cute addition, but low-stakes if they didn’t get completed.
A simplified version could be as easy as two shallow trays. Have one filled with water and the other with soil or coco coir. Add cups, bowls, strainers, twigs, stones, and flowers, then let the children create the rest.
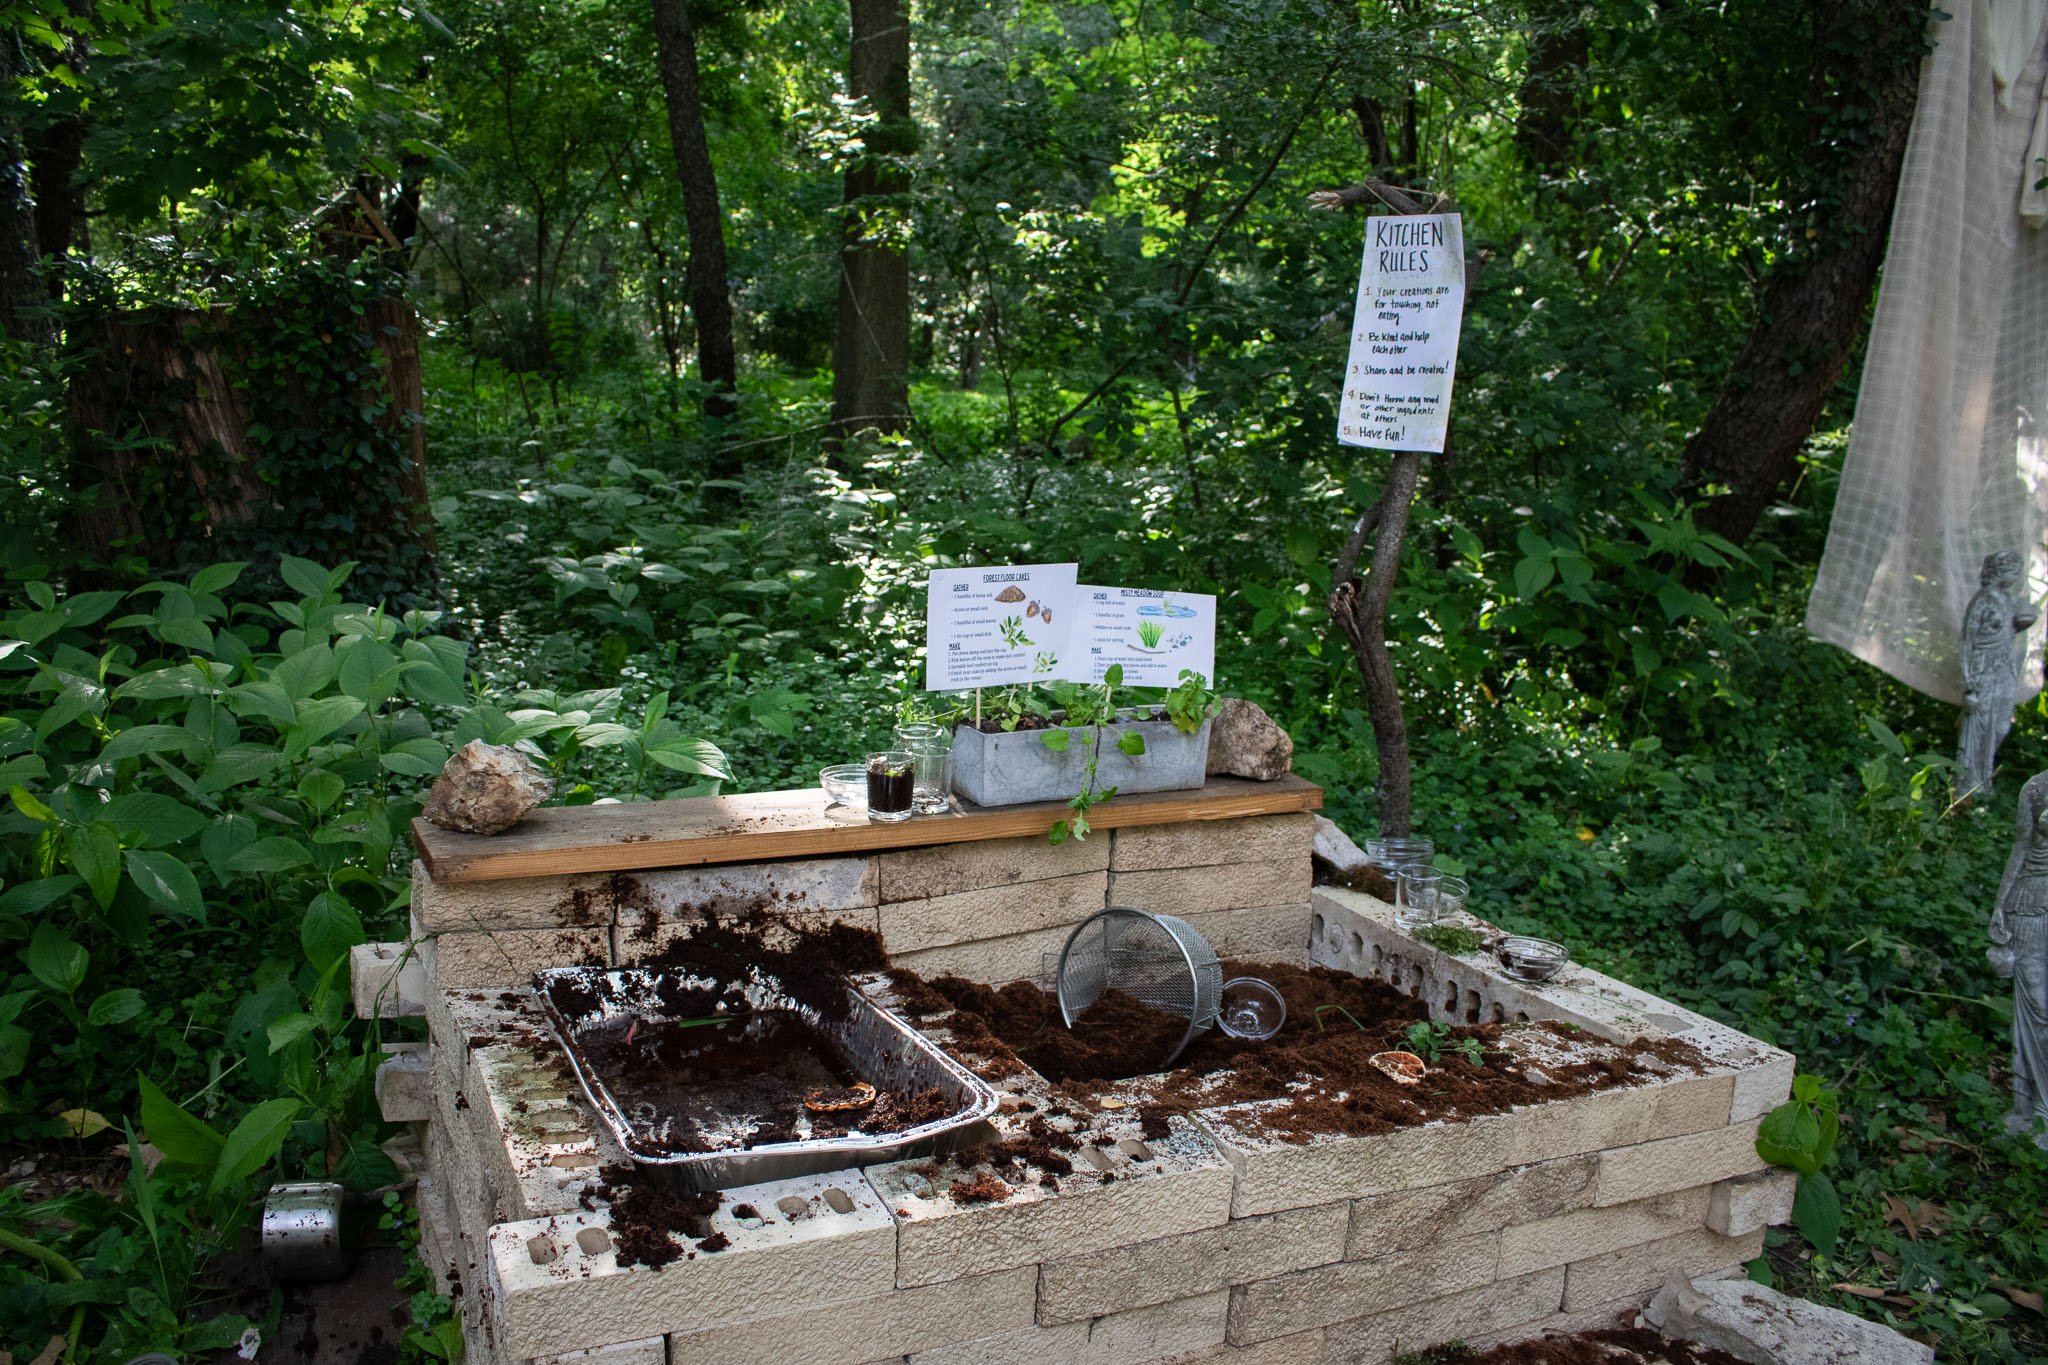
Photo: Nicole Shepherd
At a Glance
What it is: an open-ended outdoor pretend kitchen
Use what you have: bricks, trays, scrap wood, a low table, cups, and bowls
Add natural materials: water, soil or coco coir, twigs, stones, and flowers
Optional detail: mud kitchen recipe cards
Simplify it: use two shallow trays instead of building a full kitchen
Potting Station
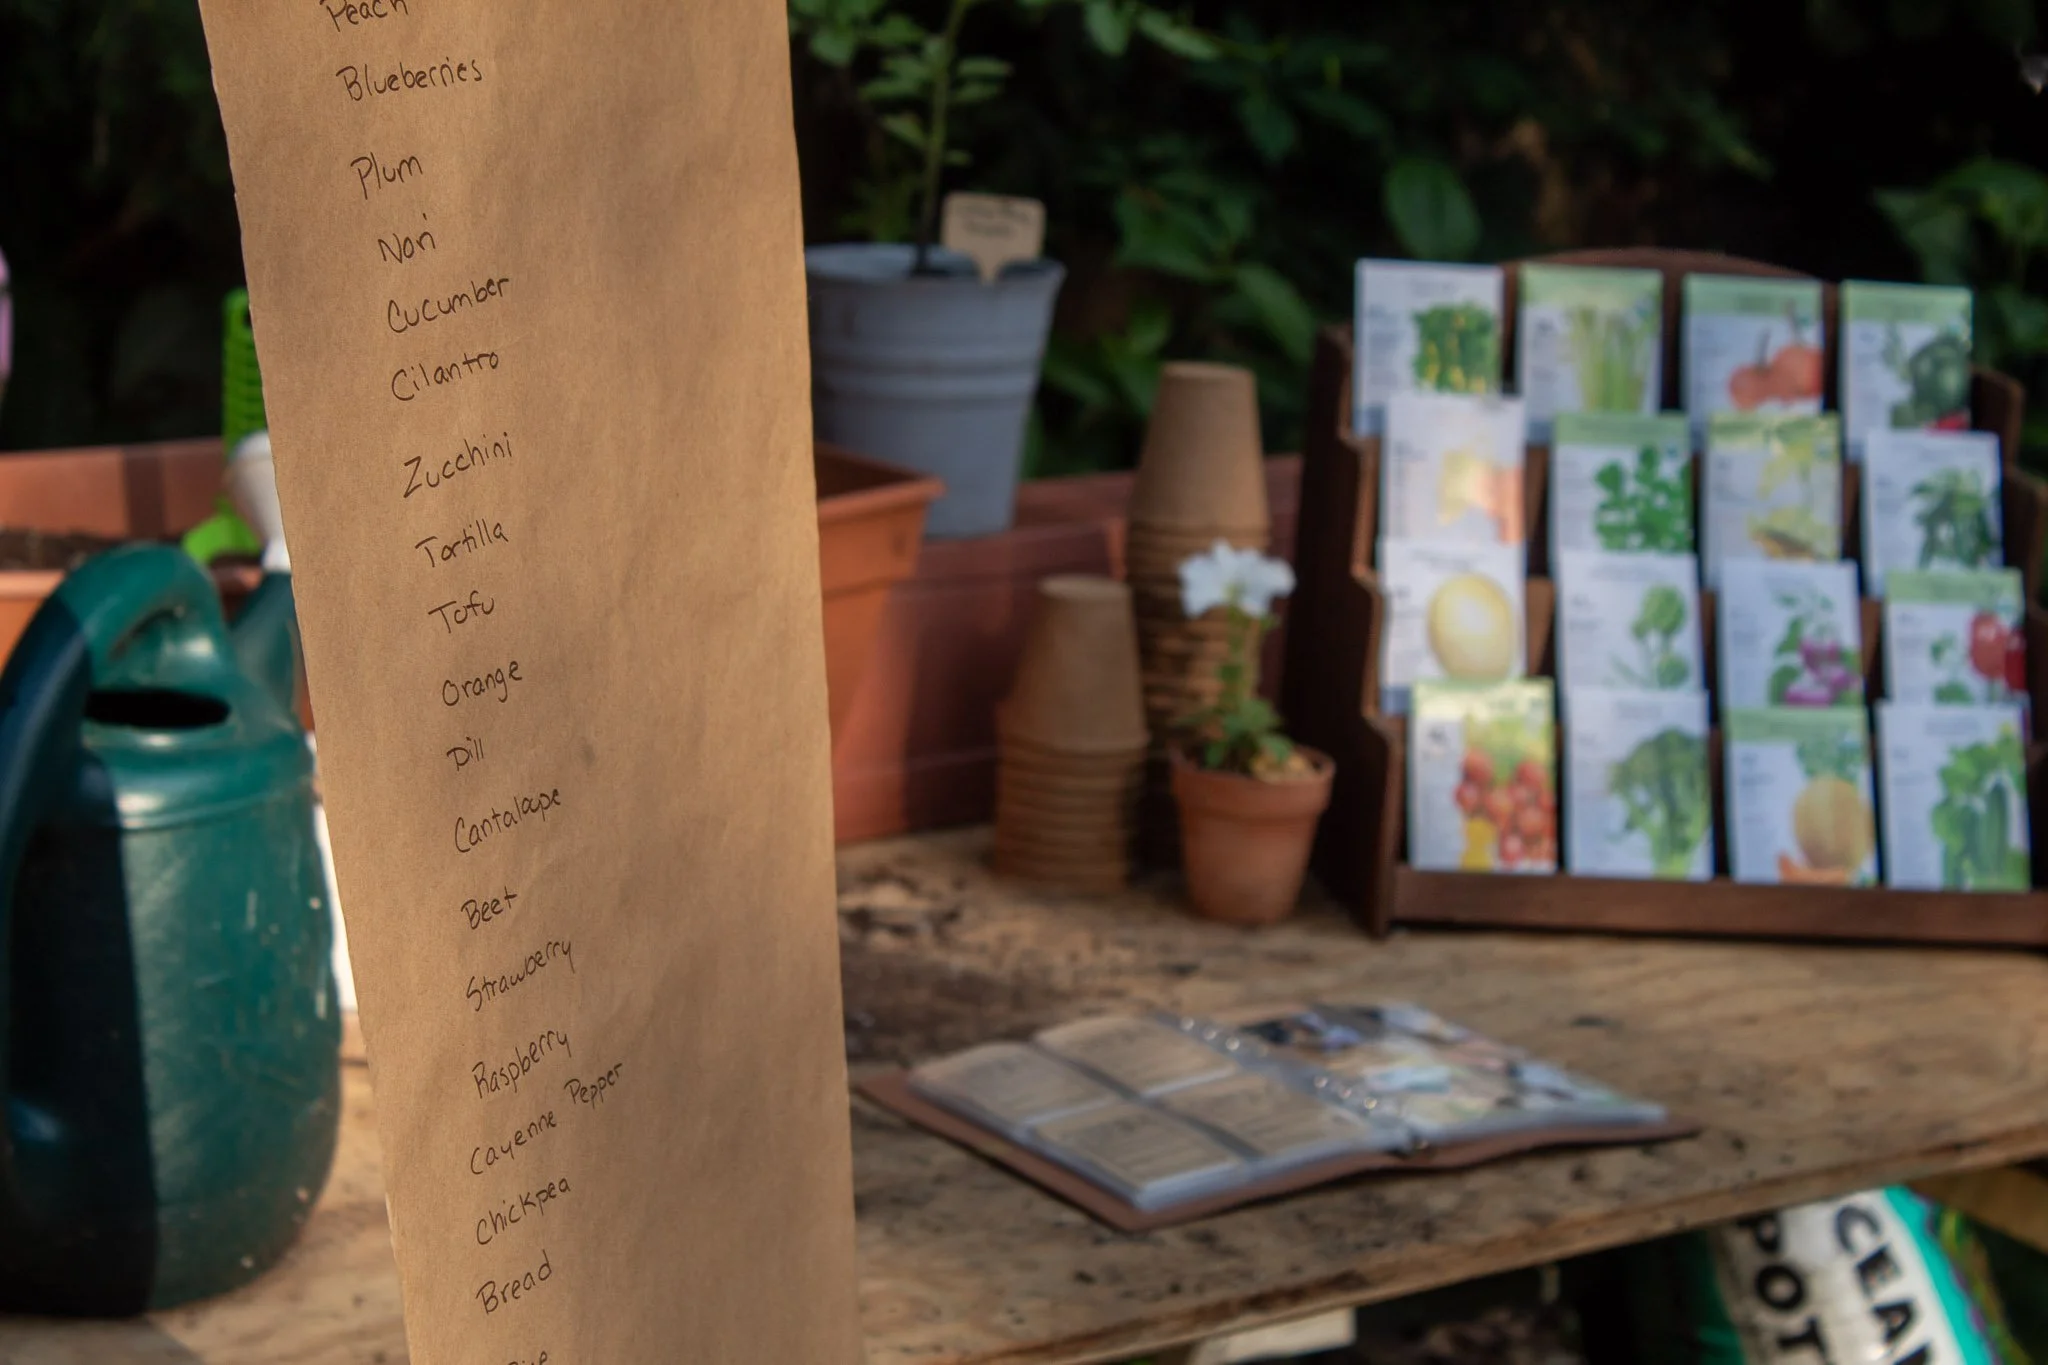
The potting station was a good all-ages activity for guests. It fit the garden theme, gave everyone a small keepsake to take home, and let me share part of my son’s first year in a sentimental way.
I hung a list of all the foods he had tried during his first year and filled a display rack with seed packets representing some of those foods. Guests could choose what they wanted to plant. I set out one long rectangular planter filled with soil, small shovels, coco coir pots, and a watering can.
I also made a seed packet binder with photos of my son trying different foods throughout his first year, arranged in chronological order. My original plan was to label each photo with the food and the date, but I ran out of time. That would have been an easy project to build gradually over several months if I had thought of it earlier, but the simplified version was still just as cute. It only took about 20 minutes to cut out and insert the photos and seed packets.
I had also intended to make the list of foods more decorative, but with time running short, I chose to quickly list them rather than leave the idea out entirely. It was another reminder that a simple version completed is often better than an elaborate version abandoned. I really enjoyed sharing this part of my son’s first year with the people who love him.
After the party, guests sent us photos and updates as their plants began to grow. I loved that the activity continued beyond the celebration and gave them a small, living reminder of my son’s first birthday.
At a Glance
What it is: a seed-planting activity inspired by baby’s first foods
Supplies: seed packets, small pots, soil, shovels, plant labels, a watering can, and a display rack
Make it personal: add a list and/or photos of foods your baby tried during the first year
Why it worked: guests of different ages could participate and take home a keepsake to enjoy after the party
Simplify it: offer three or four seed packets, pots, and soil
Remember: a simple version completed is often better than an elaborate idea left unfinished
Fort
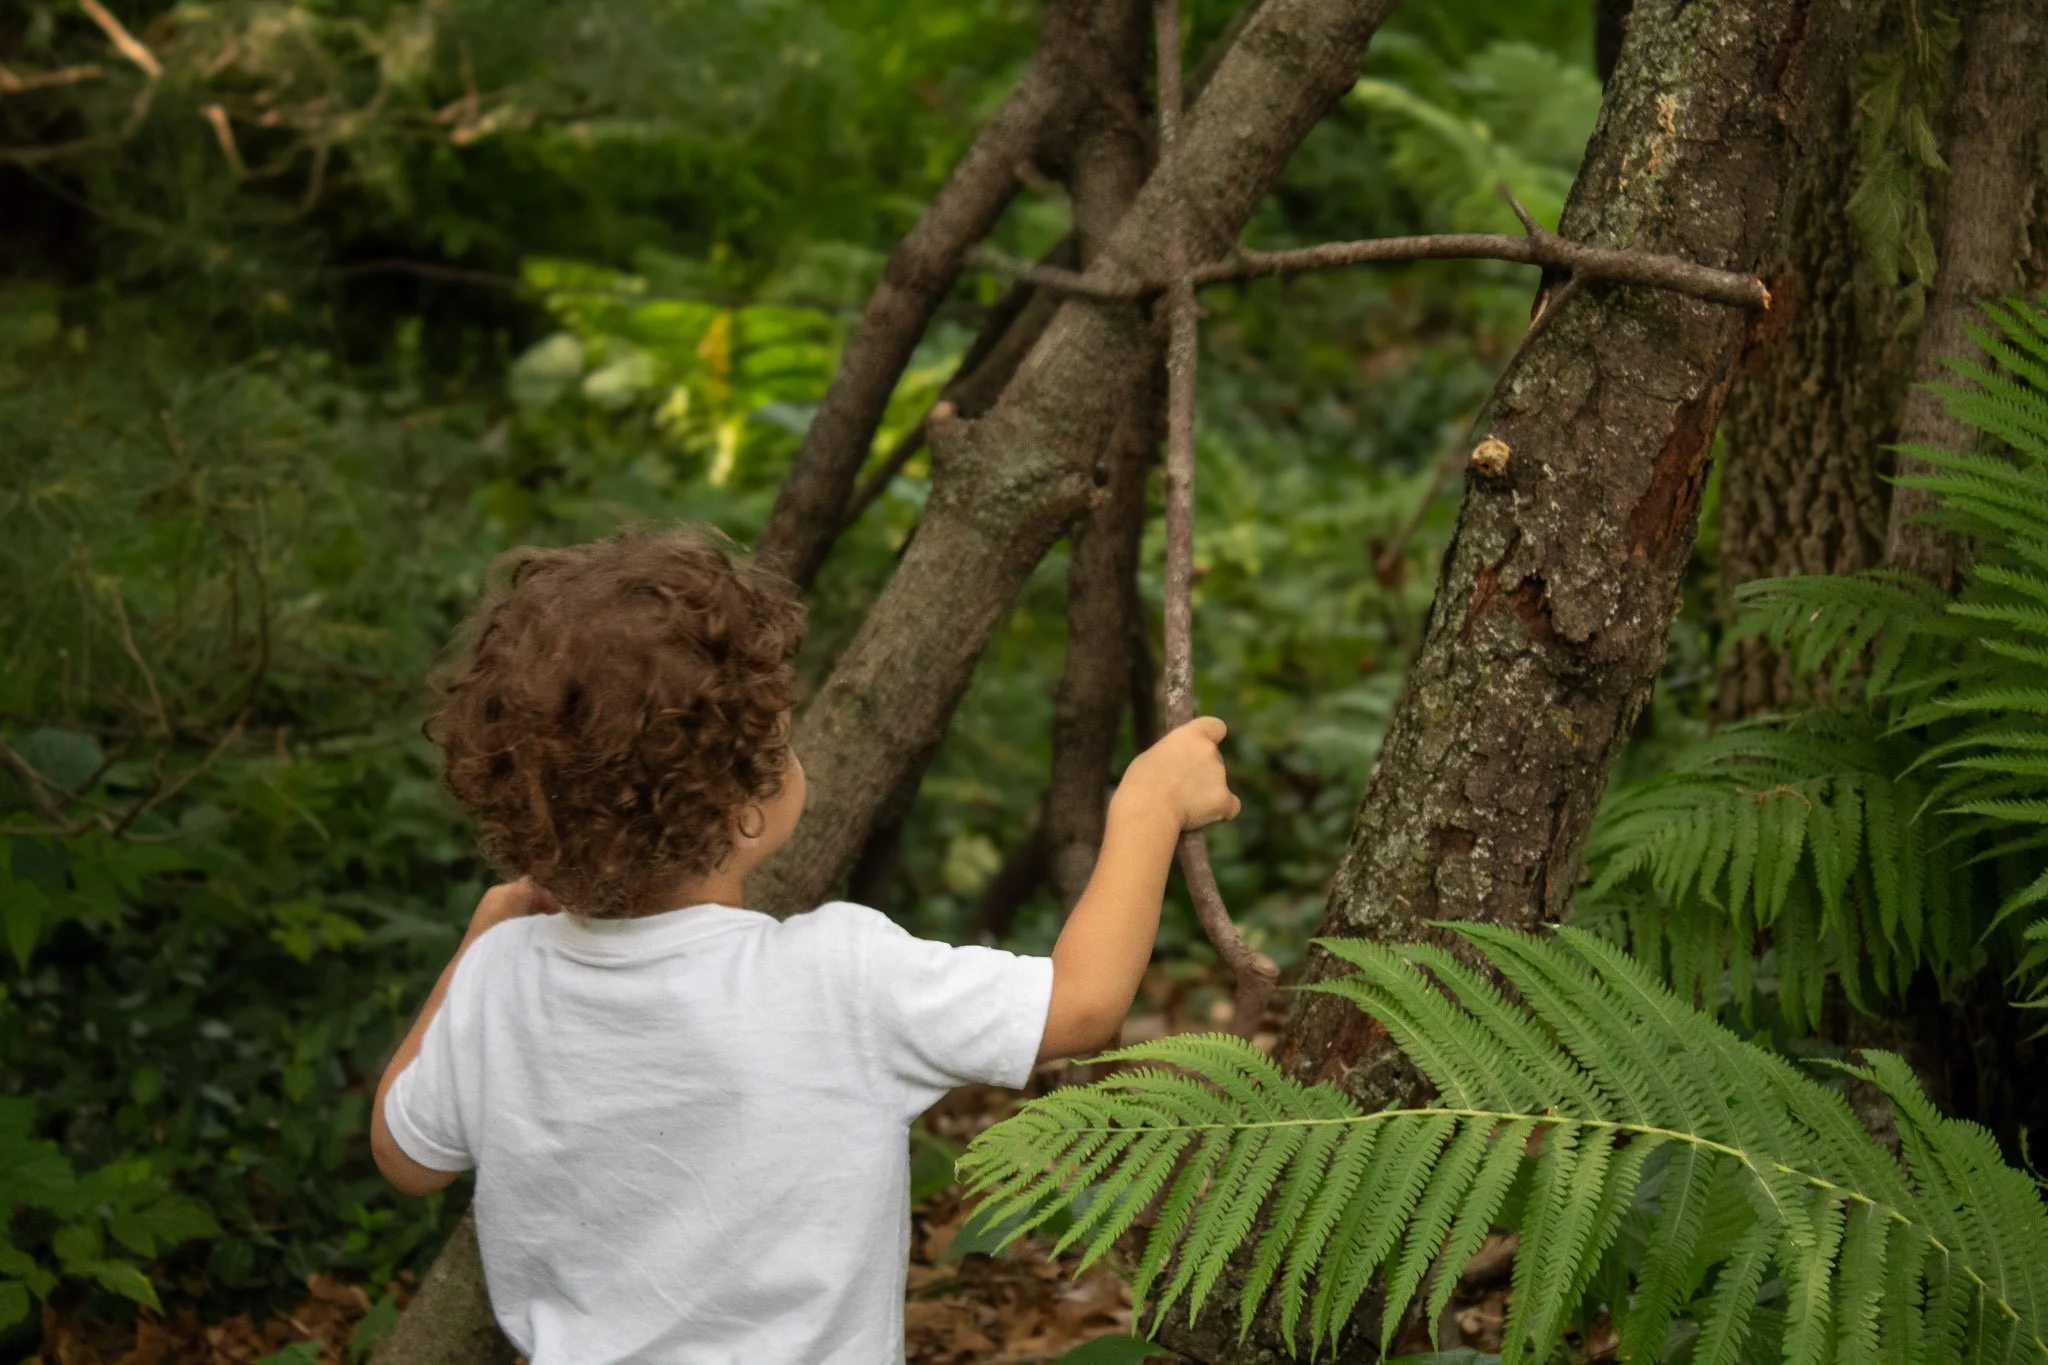
A relatively low-effort zone I created was a space for building a fort. I gathered large branches from around my property and leaned them against a tree, then left a pile of additional branches nearby to encourage the children to add to it. My original plan was to gather more branches for a fuller structure and make a trail-map sign for the activities, but I ran out of time and scaled it down.
I remember how much fun it was to build forts as a child or discover ones tucked into the woods, so it felt like a perfect activity for a nature-inspired kids’ party. The simpler version may have worked in its favor. I created enough of a structure to spark their imaginations but left it unfinished so they could decide what the fort would become.
At a Glance
What it is: an unfinished fort made from branches that children can continue building
Supplies: sturdy branches and a tree or stable support
Why it worked: it encouraged imaginative, collaborative, open-ended play
Simplify it: create a small starter structure and let the kids scavenge for supplies
Flower Photo Spot
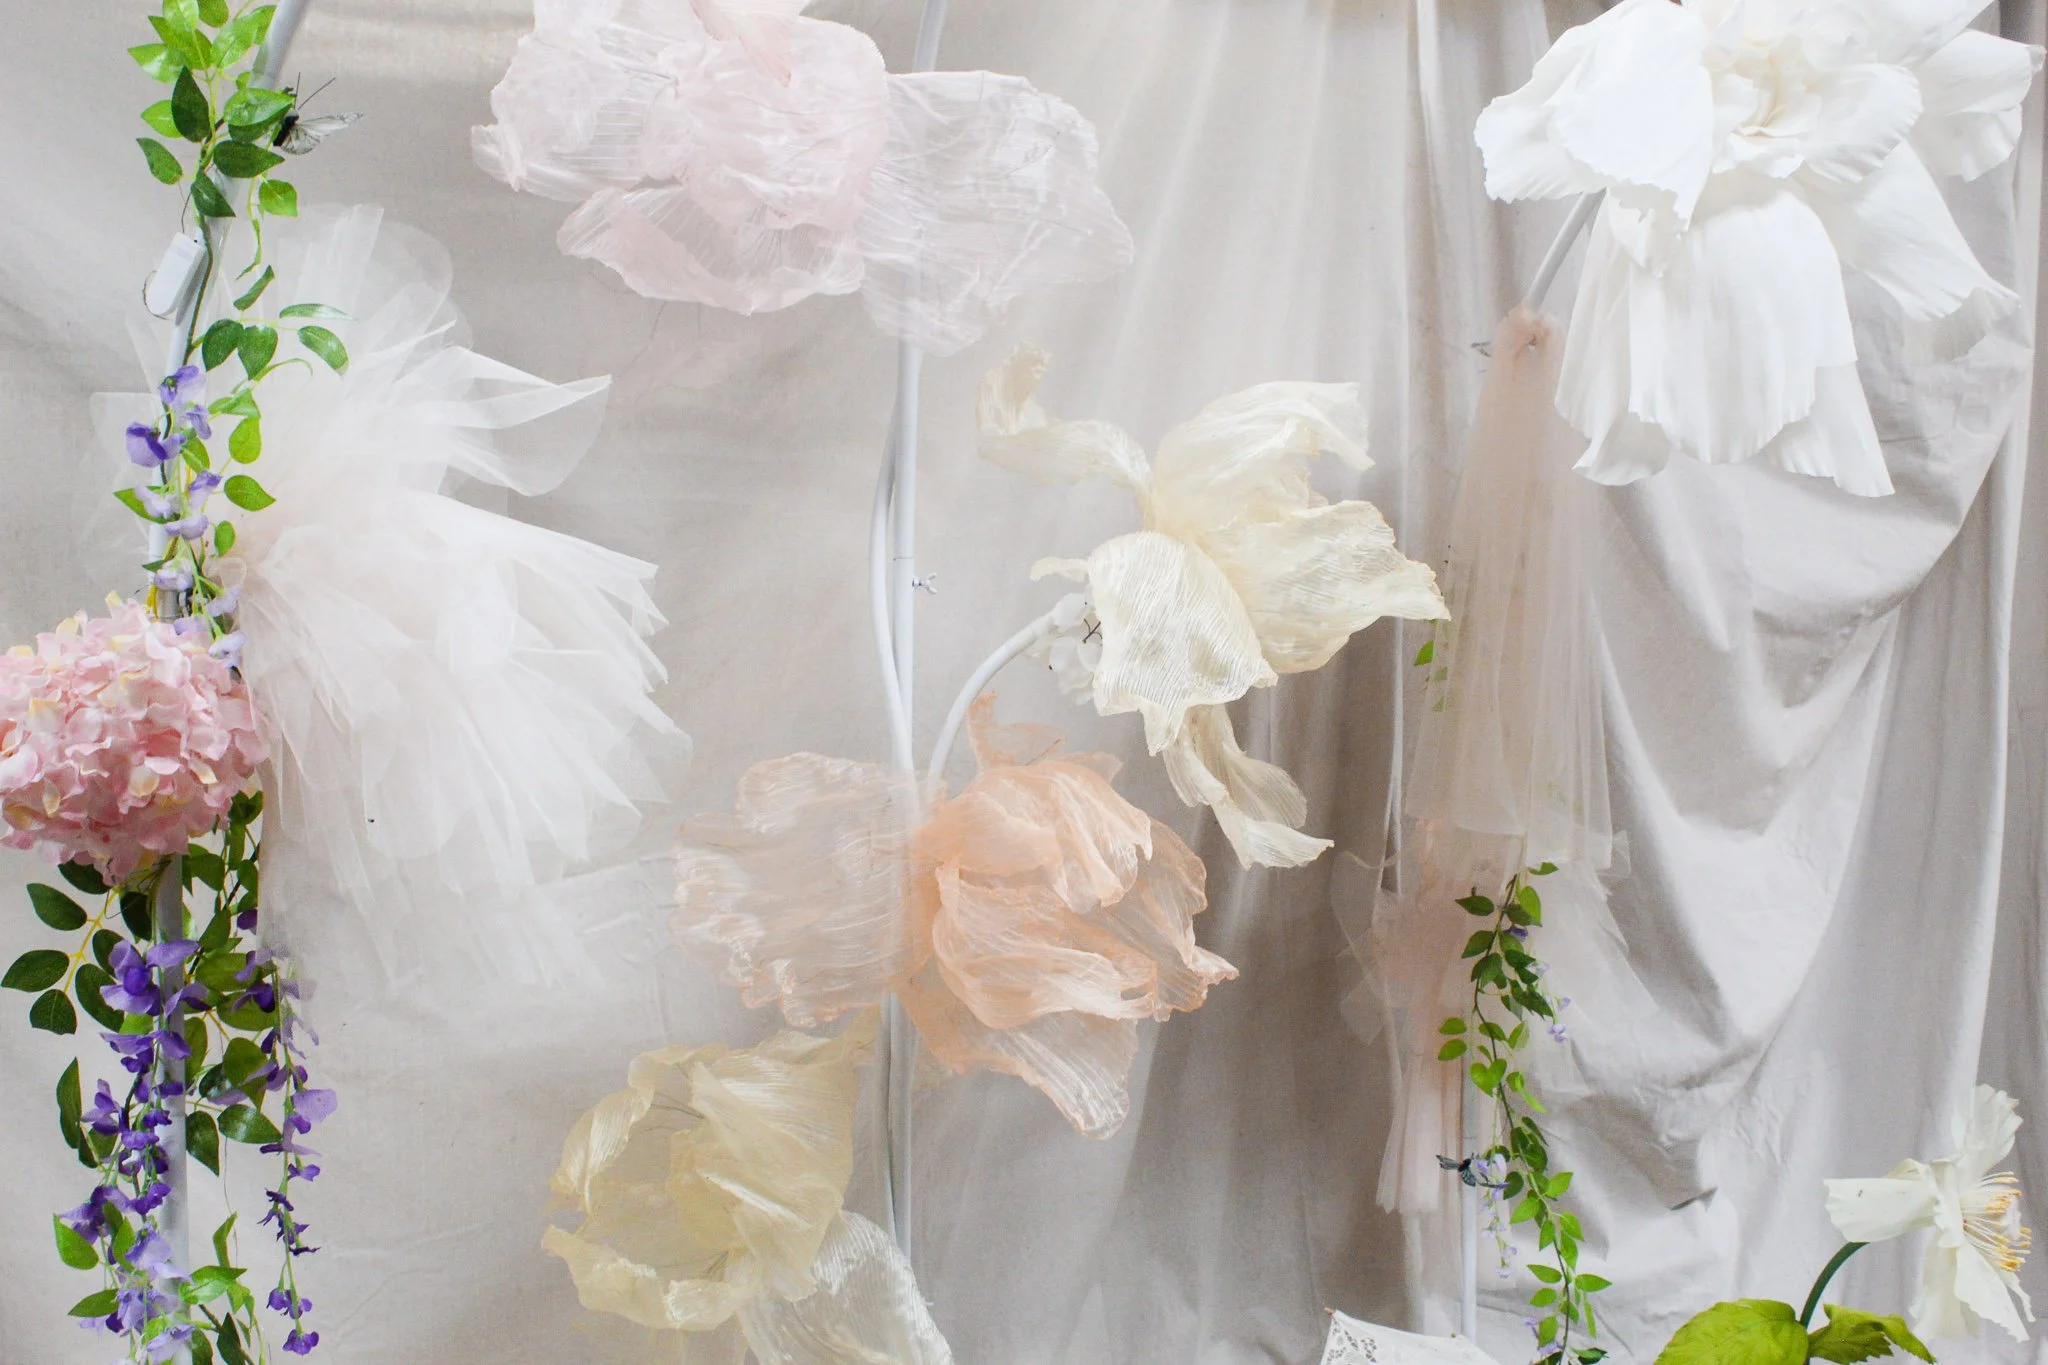
As I mentioned earlier, I reused the oversized flowers I originally created for my wedding. They were extremely labor-intensive to make, but I loved them so much that I now look for opportunities to include them in other events. They suited the party theme especially well because their oversized scale echoed the perspective of the tiny character in my story and created the feeling of being immersed in the garden.
This is not a project I would have prioritized for the birthday party if I didn’t already own them. If oversized flowers are important to your vision and you have room in the budget, I recommend renting or buying them. You can also find premade options on Etsy.
DIYing them is possible, but only if you have plenty of time and begin well in advance. I made mine gradually over several months, and a few friends helped with the repetitive parts once I had figured out the patterns and developed a system.
At a Glance
What it is: an oversized flower backdrop for photos
Why it worked: the scale created an immersive garden effect
Supplies: oversized flowers, a metal arch, flexible piping used as stems to support the flowers, and a canvas drop cloth
Simplify it: arrange a few regular flowers around one chair or rug
Save time: rent or buy premade flowers; if DIYing, start months ahead
Memory Book
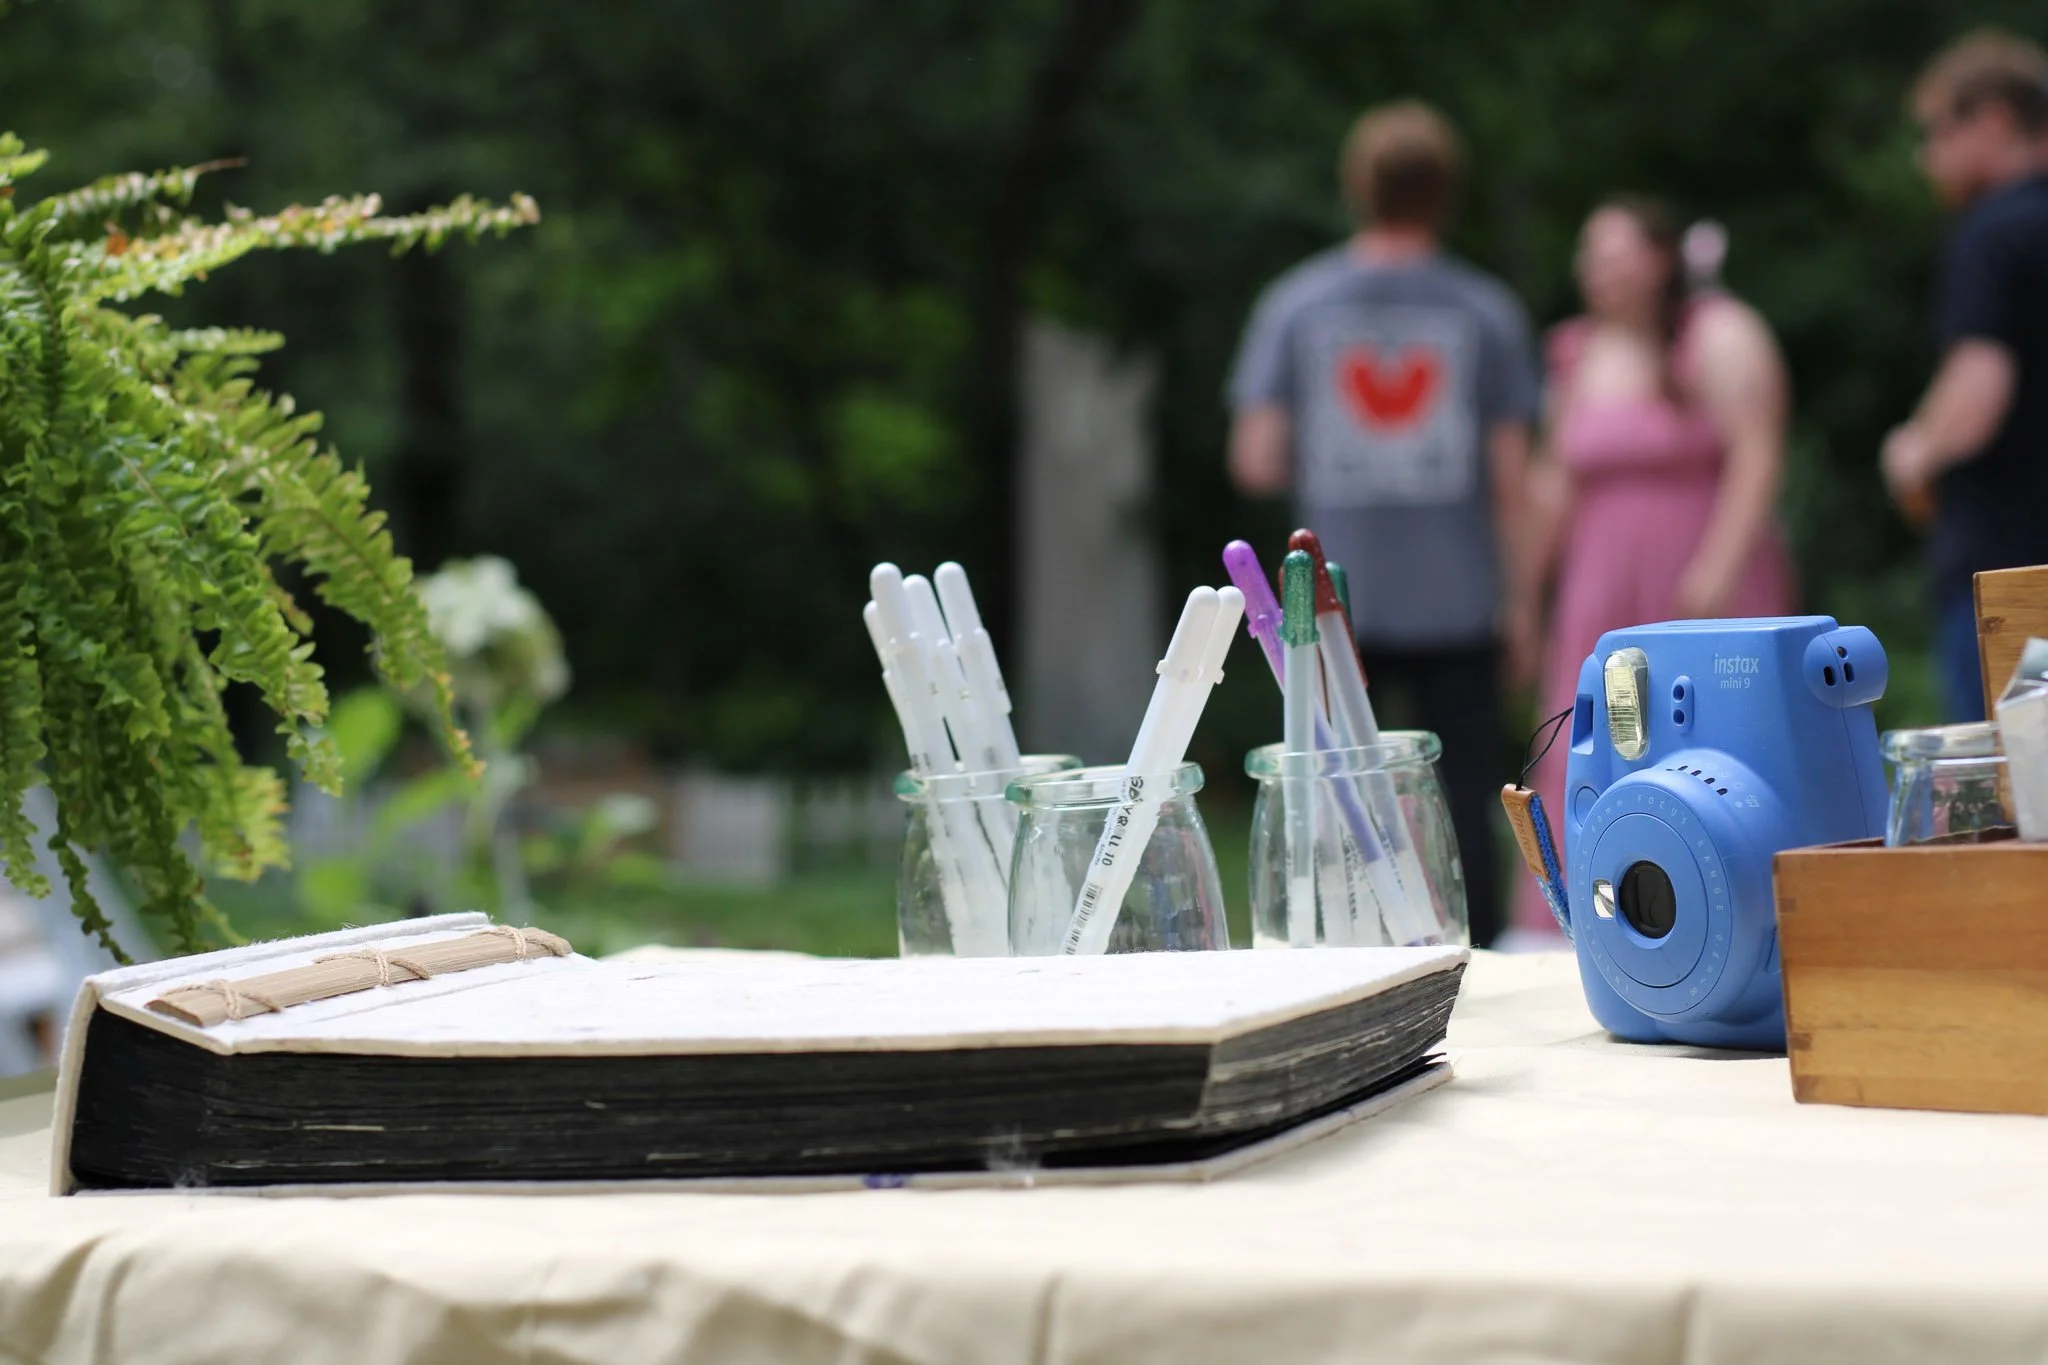
Photo: Juan Rodriguez
I placed the memory book station near the entrance, where guests would naturally pass it as they arrived and left. It was also beside a seating area so it wouldn’t be tucked into a corner away from the party. A first birthday is such a meaningful milestone, and I wanted my son to be able to later experience the day through the eyes of the people who were there. He may not explicitly remember the celebration, but he will be able to read about its moments and see who was there with him.
I left an instant camera with extra film on the table, along with pens, scrap paper, and photo corners for attaching the pictures. A handwritten sign explained the basic idea, then guests were free to decide how to use the supplies and format their pages. I liked keeping it open-ended, but if you want the book to follow a particular format, include very clear instructions and complete the first page as an example.
The trickiest part of this station is getting people to participate. I recommend assigning one or two people to remind guests throughout the party. At minimum, mention the book when someone says they’re leaving.
I invited guests to share a moment from the party or a wish for the birthday boy, but even a simple prompt can make some people feel put on the spot. Let them know they can just take a photo or simply sign their name. Sometimes people just need permission to keep it simple.
At a Glance
What it is: a memory book where guests can add photos, notes, or wishes
Supplies: a blank book, instant camera, extra film, pens, scrap paper, adhesive photo corners, and an instruction sign
Best placement: near the entrance and seating area where guests will naturally pass
Why it worked: it preserved the party through the eyes of the people who were there
Encourage participation: assign one or two people to remind guests, and mention the book yourself as guests leave
Simplify it: skip the camera and provide a blank book and pens
Remember: even just a signature works
Cake Smash
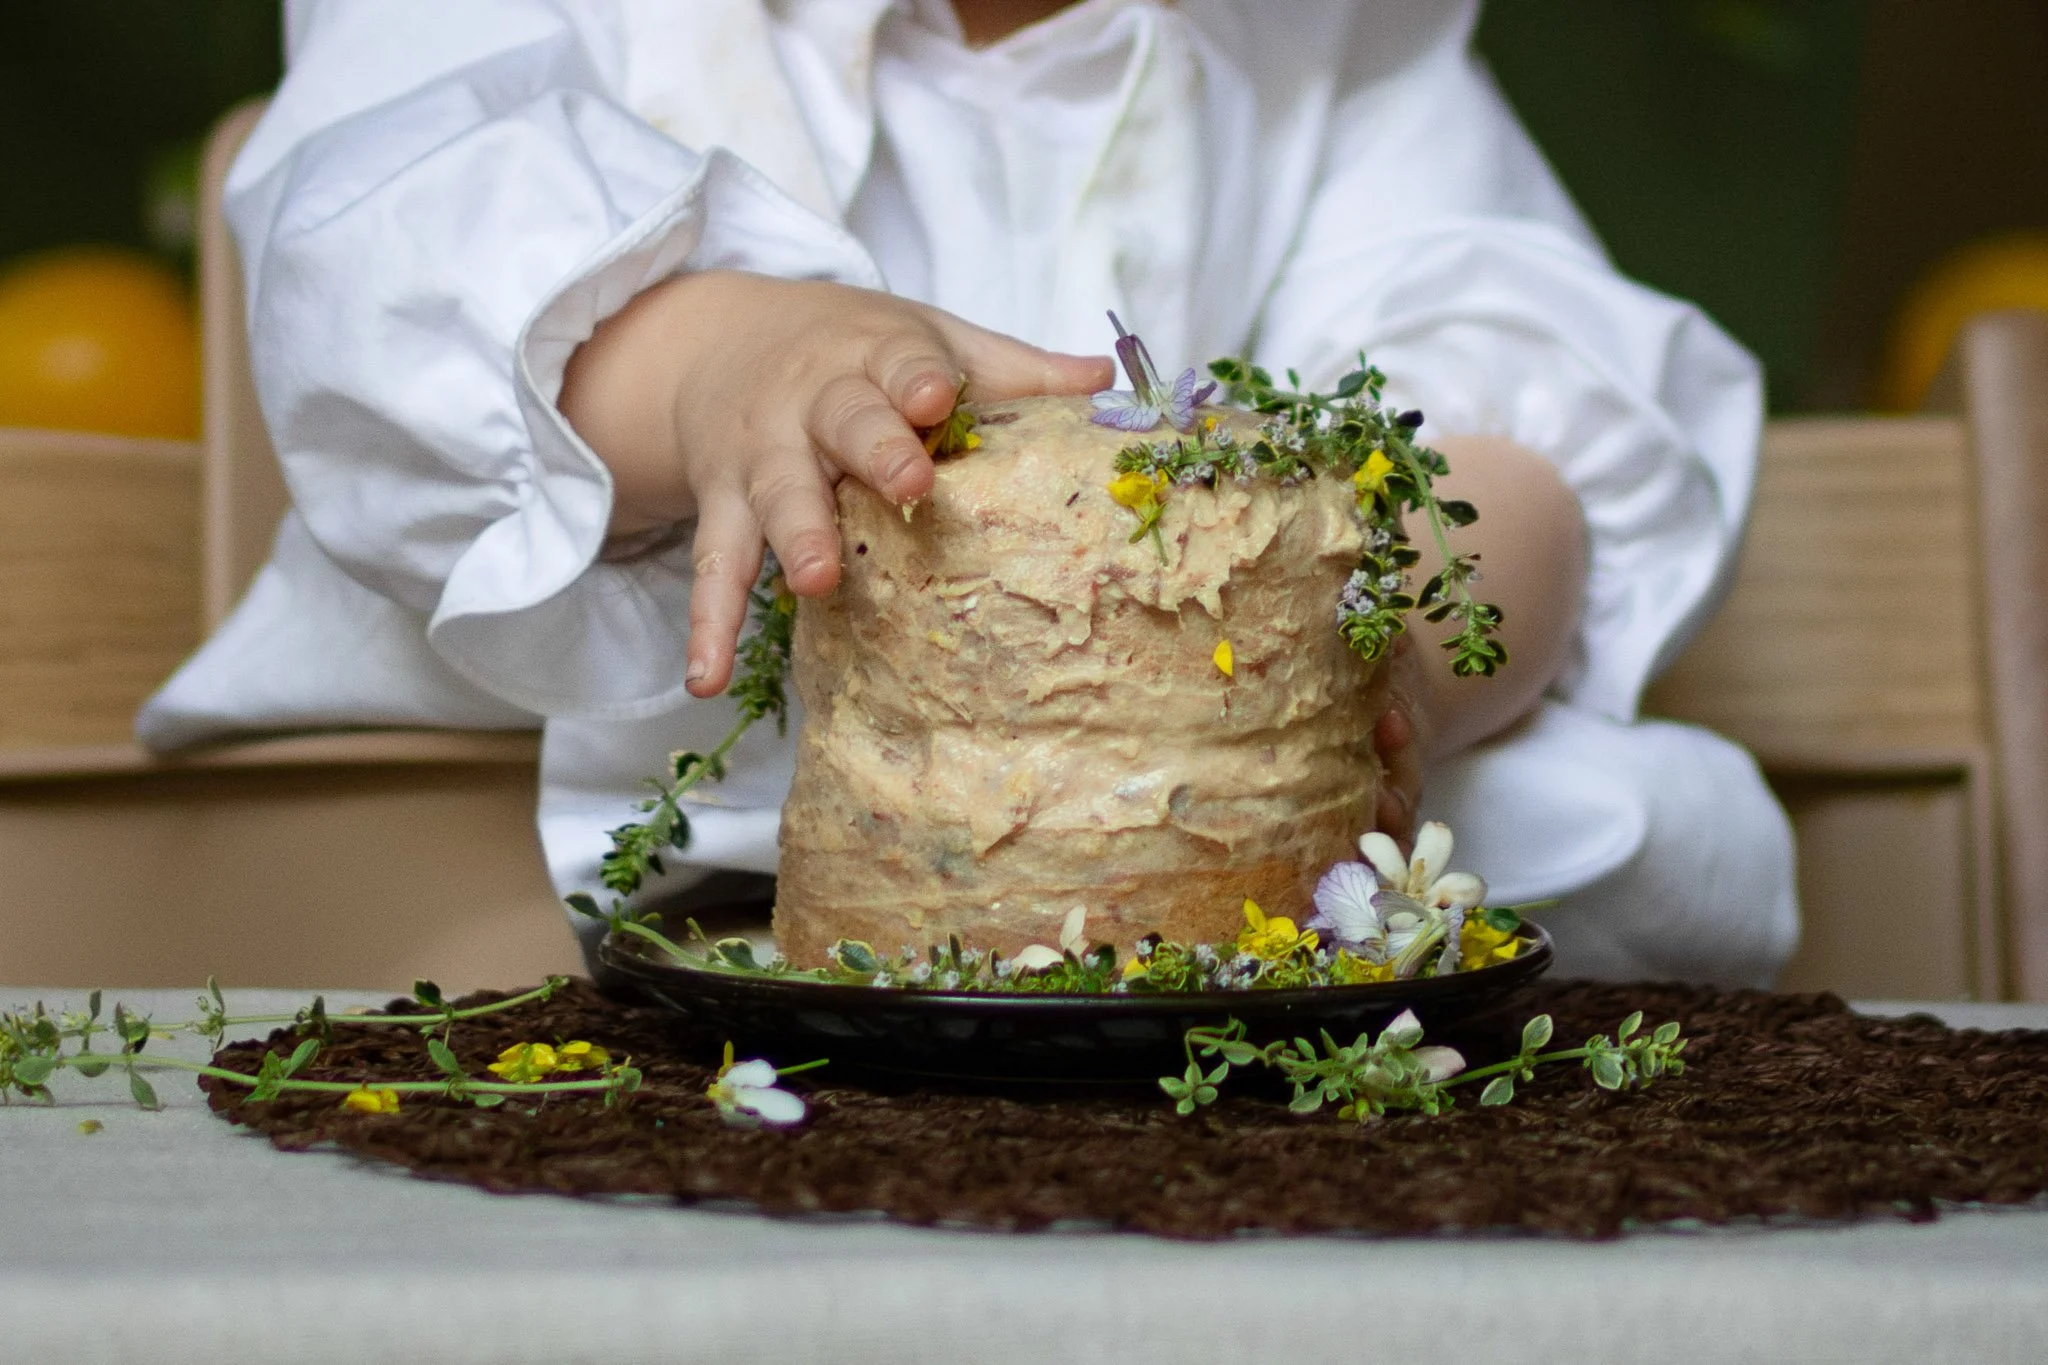
Photo: Nicole Shepherd
A key moment at any first birthday party is the cake smash. I wanted to make the cake myself because I enjoy cooking, and making my son’s first foods has always felt sentimental to me. If you’re not interested in baking or are short on time, this is something that can easily be delegated.
I’m avoiding giving my son added sugar for the time being, so I created a sugar-free cake. I still wanted it to taste good to him, however, so I researched ways to sweeten it naturally and made a couple of test cakes to work out the consistency. Earlier in the month, I even let him do a little “cake tasting” to see whether he liked the flavor.
I was worried he might not be interested in a sugar-free cake and that we would miss the classic cake-smash moment, but he really liked it. I think he especially enjoyed the muffin-like consistency. I made a lemon-thyme cake to match the story and the main party theme. A naturally sweeter flavor, such as strawberry, could also work well if you’re concerned about whether your baby will enjoy it.
Creating the Cake-Smash Photo Area
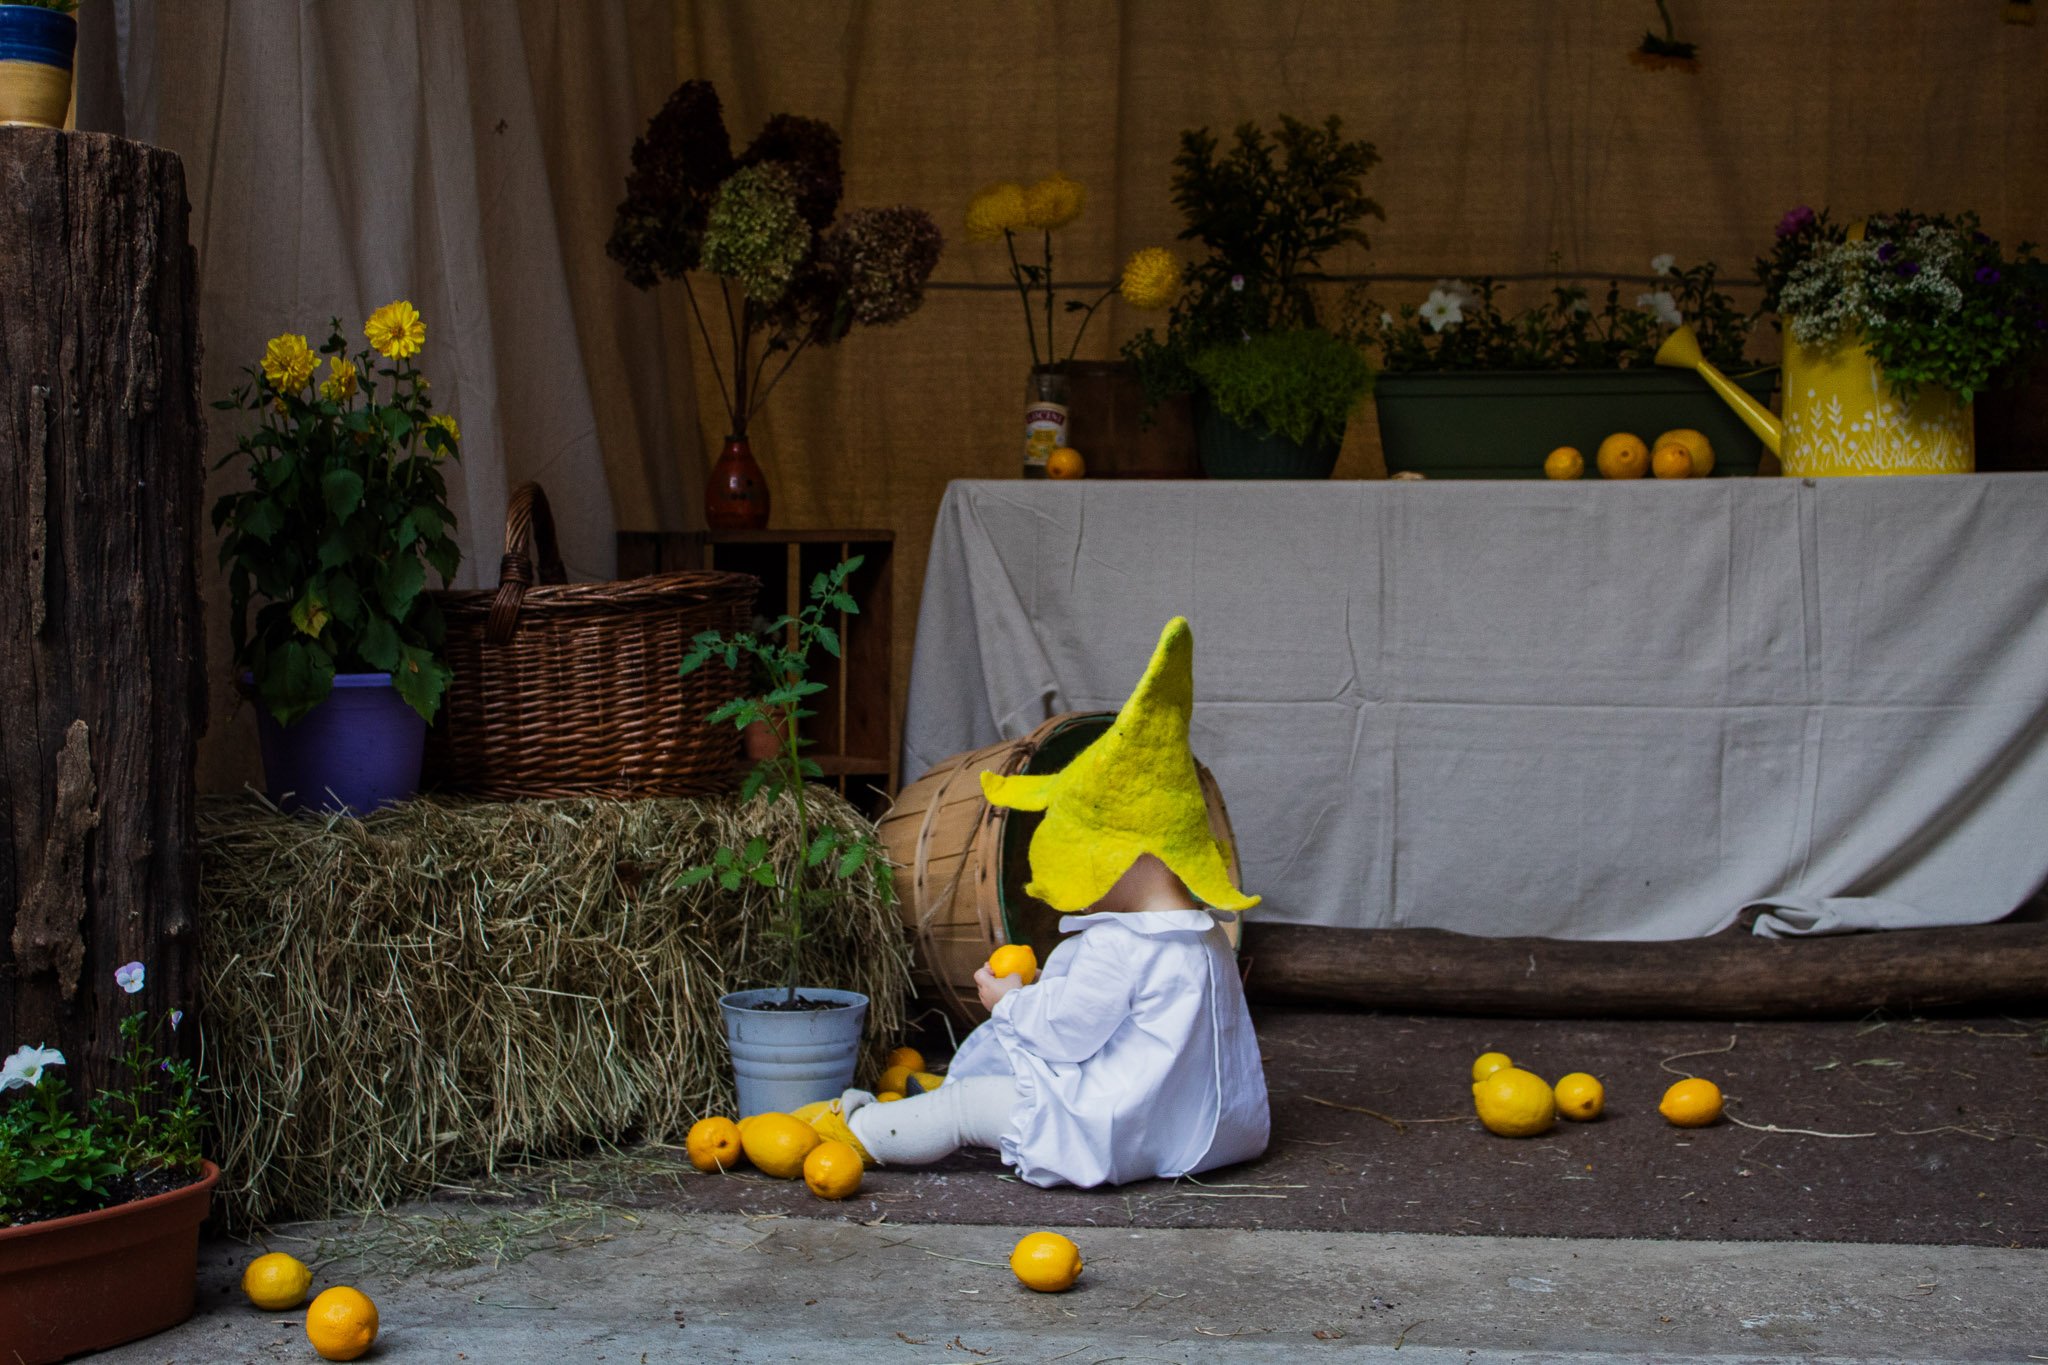
I turned the cake-smash area into a photo spot so it would look thematic in the photos of him eating his birthday cake while also doubling as a place for guests to take pictures. The high chair could easily be moved aside so guests could use the backdrop either before or after the cake smash.
To create the space, I secured canvas drop cloths over the garage door using twine and magnets. I tied another drop cloth along the top edge of the door to create a curtain wall when the garage was opened. I placed a rented table in front of it, covered the table with another drop cloth, and used it to add height behind the photo area. I also laid down an old rug my neighbor gave me and decorated the nook with lemons, baskets, crates, plants, and a hay bale.
The final setup was not as full or finished as I had originally envisioned, but it was still adorable and communicated the theme. Before the cake-smash and milk-bath photos, I gathered lemons from tables and other stations and temporarily used them to make each space look fuller. I had originally planned to buy many more lemons, but time and budget were limited.
Improvising with the lemons gave me a useful party idea: move potted plants and other props from around the party into the areas being used for important moments and photos. Concentrating your decor in one place temporarily can create a fuller effect without requiring you to buy enough decorations to fill the entire party space.
At a Glance
What it is: a cake-smash moment with a reusable photo backdrop
Cake: make or order a flavor your baby is likely to enjoy, and consider testing it out
Match the theme: use the cake flavor, colors, or decorations to connect it to the rest of the party
Backdrop supplies: canvas drop cloths, twine, magnets, a table, a rug, and decorative props
Why it worked: the backdrop made the cake-smash photos feel special and doubled as a guest photo spot
Save time: delegate or order the cake
Save money: move lemons, plants, baskets, and other props into the photo area as needed
Simplify it: place the high chair in a naturally appealing area and skip the backdrop
Remember: move decor between moments to create a fuller effect with less
Milk Bath
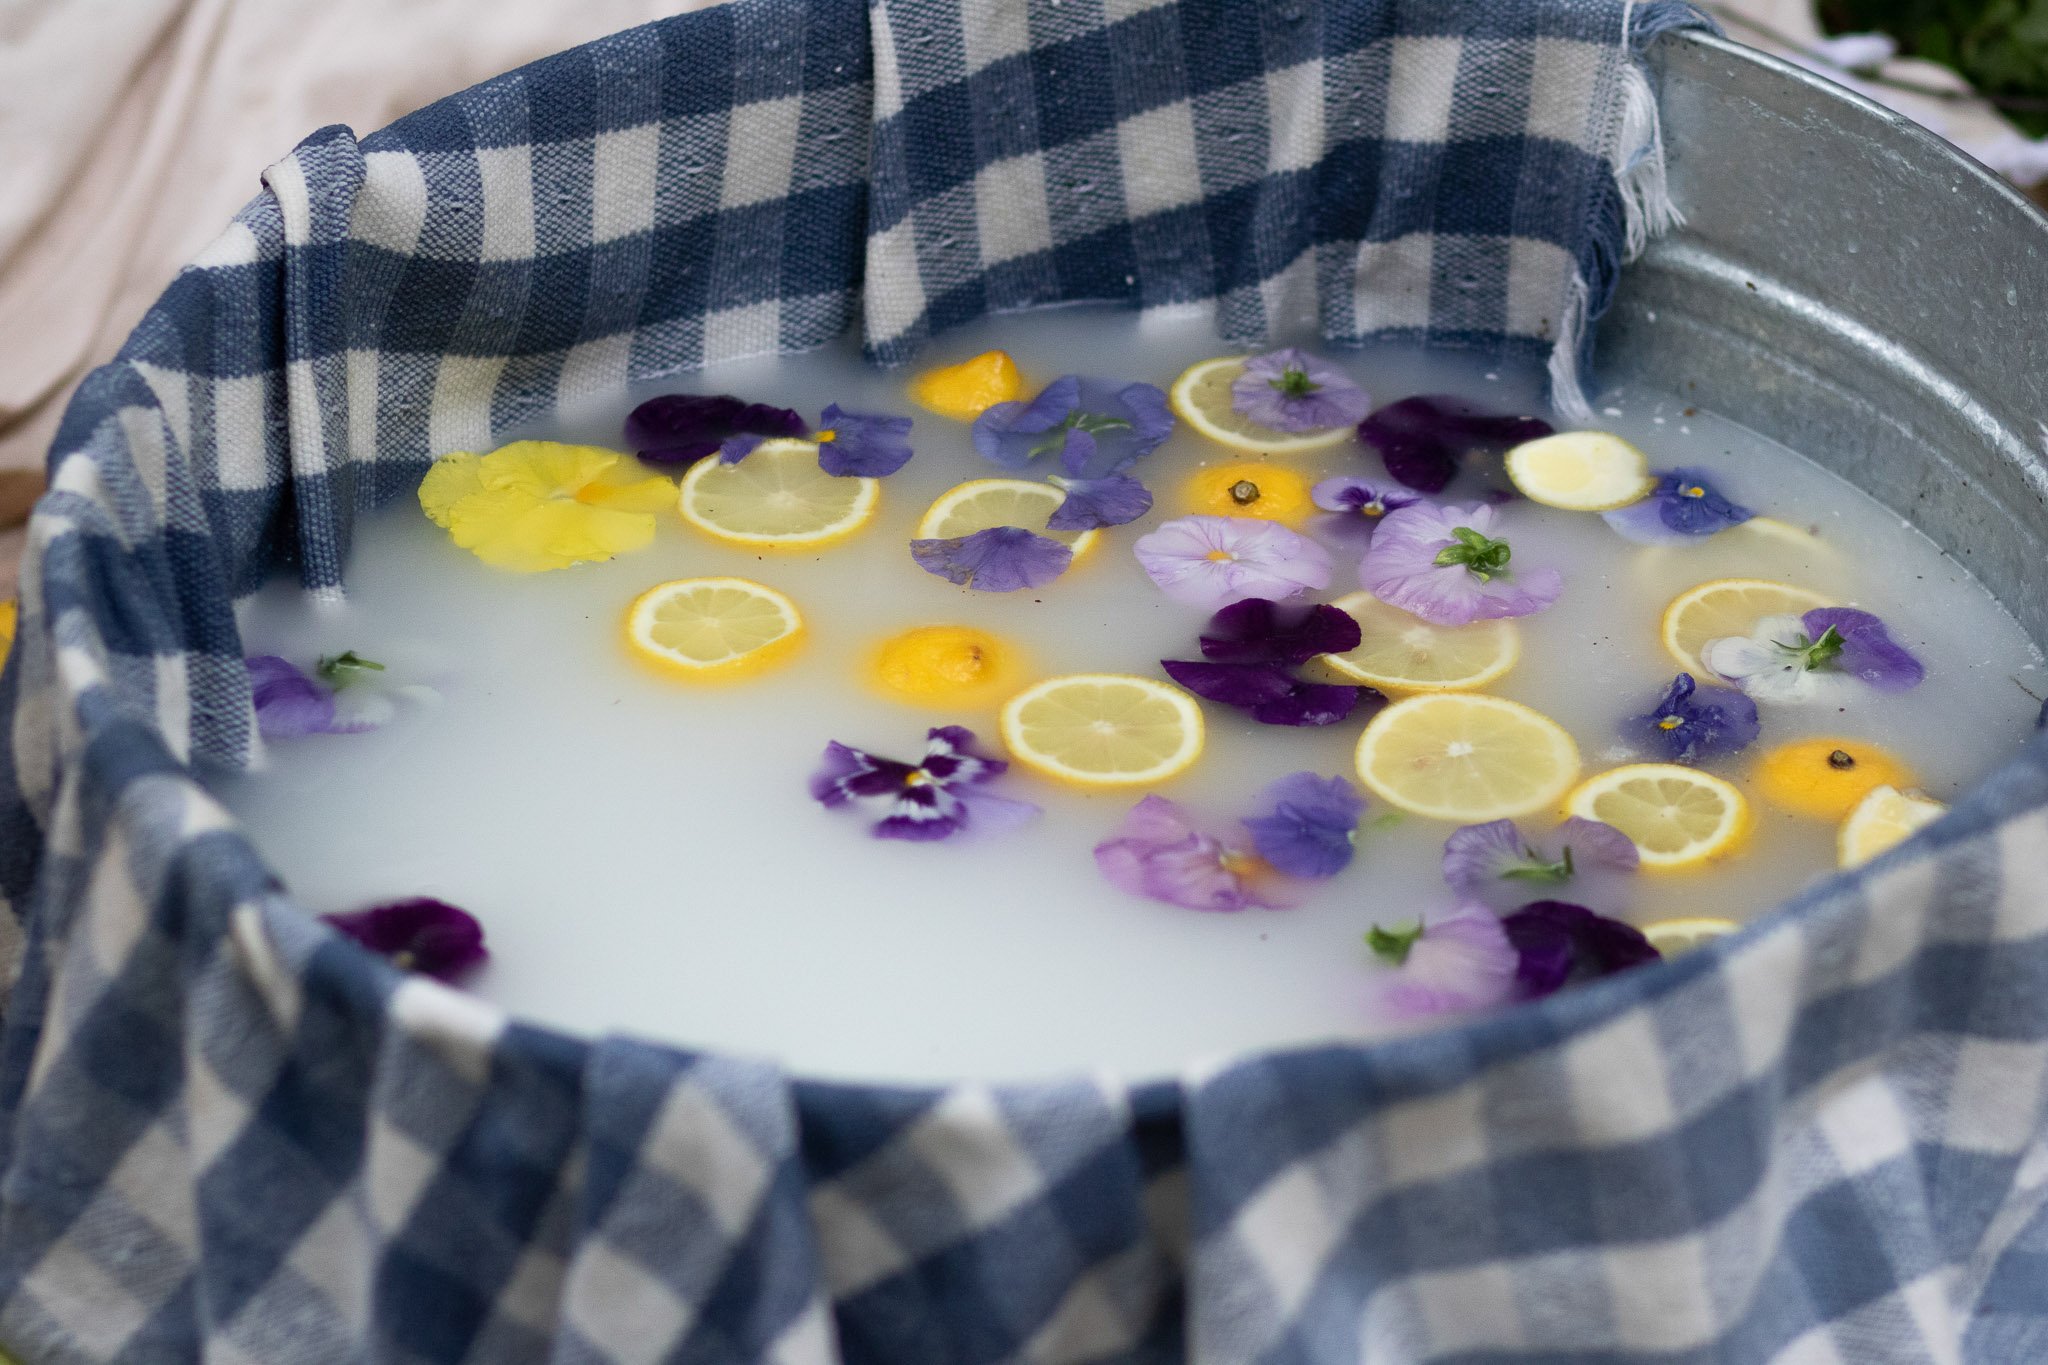
Photo: Nicole Shepherd
Immediately following the cake smash, we moved into a milk-bath photoshoot. I made sure the station was mostly prepared before we sang “Happy Birthday” since I knew the two moments would happen back to back. After cake, I only needed to gather a few lemons from other areas to use as props and sprinkle edible flowers into the bath.
The milk bath was a sweet moment to capture and he loved splashing around. It was also functional because it helped clean him up after the cake smash.
One benefit of setting up the photoshoot in advance was that the area also added ambiance throughout the party. Like the decorated garage doors, the station functioned as part of the overall decor. I hung curtains to create a nook and added a clothesline displaying some of my favorite outfits of my son’s that suited the atmosphere.
For the bath, I used a large round metal tub and lined it with a picnic tablecloth I already owned. Be aware that if the lining drapes over the edge, it can carry water onto the ground and soak any fabric underneath. I placed a linen tablecloth below the tub to make the space feel more intentional, then decorated the surrounding area with baskets, plants, and lemons.
I was especially excited to create this zone because I had seen so many variations of milk-bath photoshoots on Pinterest. It’s so satisfying when you can take something that inspired you and bring your own version of it to life.
I delegated filling the tub and opening the cans of coconut milk so I could remain present elsewhere during the party. Since the hose water was cold, we combined it with heated water to make the bath comfortably warm.
At a Glance
What it is: a milk-bath photoshoot immediately after the cake smash
Why it worked: it created a sweet photo moment, gave the baby time to splash around, and helped clean up the cake
Supplies: a large tub, coconut milk, lemons, edible flowers, curtains, linens, baskets, baby clothes, and plants
Set up early: prepare the station before cake so only shared props need to move afterward
Simplify it: skip the full backdrop and use a tub with a few lemons and coconut milk
Remember: delegate setup so you can stay present elsewhere
Snow Cone Machine
If you’re already renting party items such as tables, chairs, or a bounce house, a snow cone machine can be an easy add-on that gives guests an interactive treat without requiring a full activity.
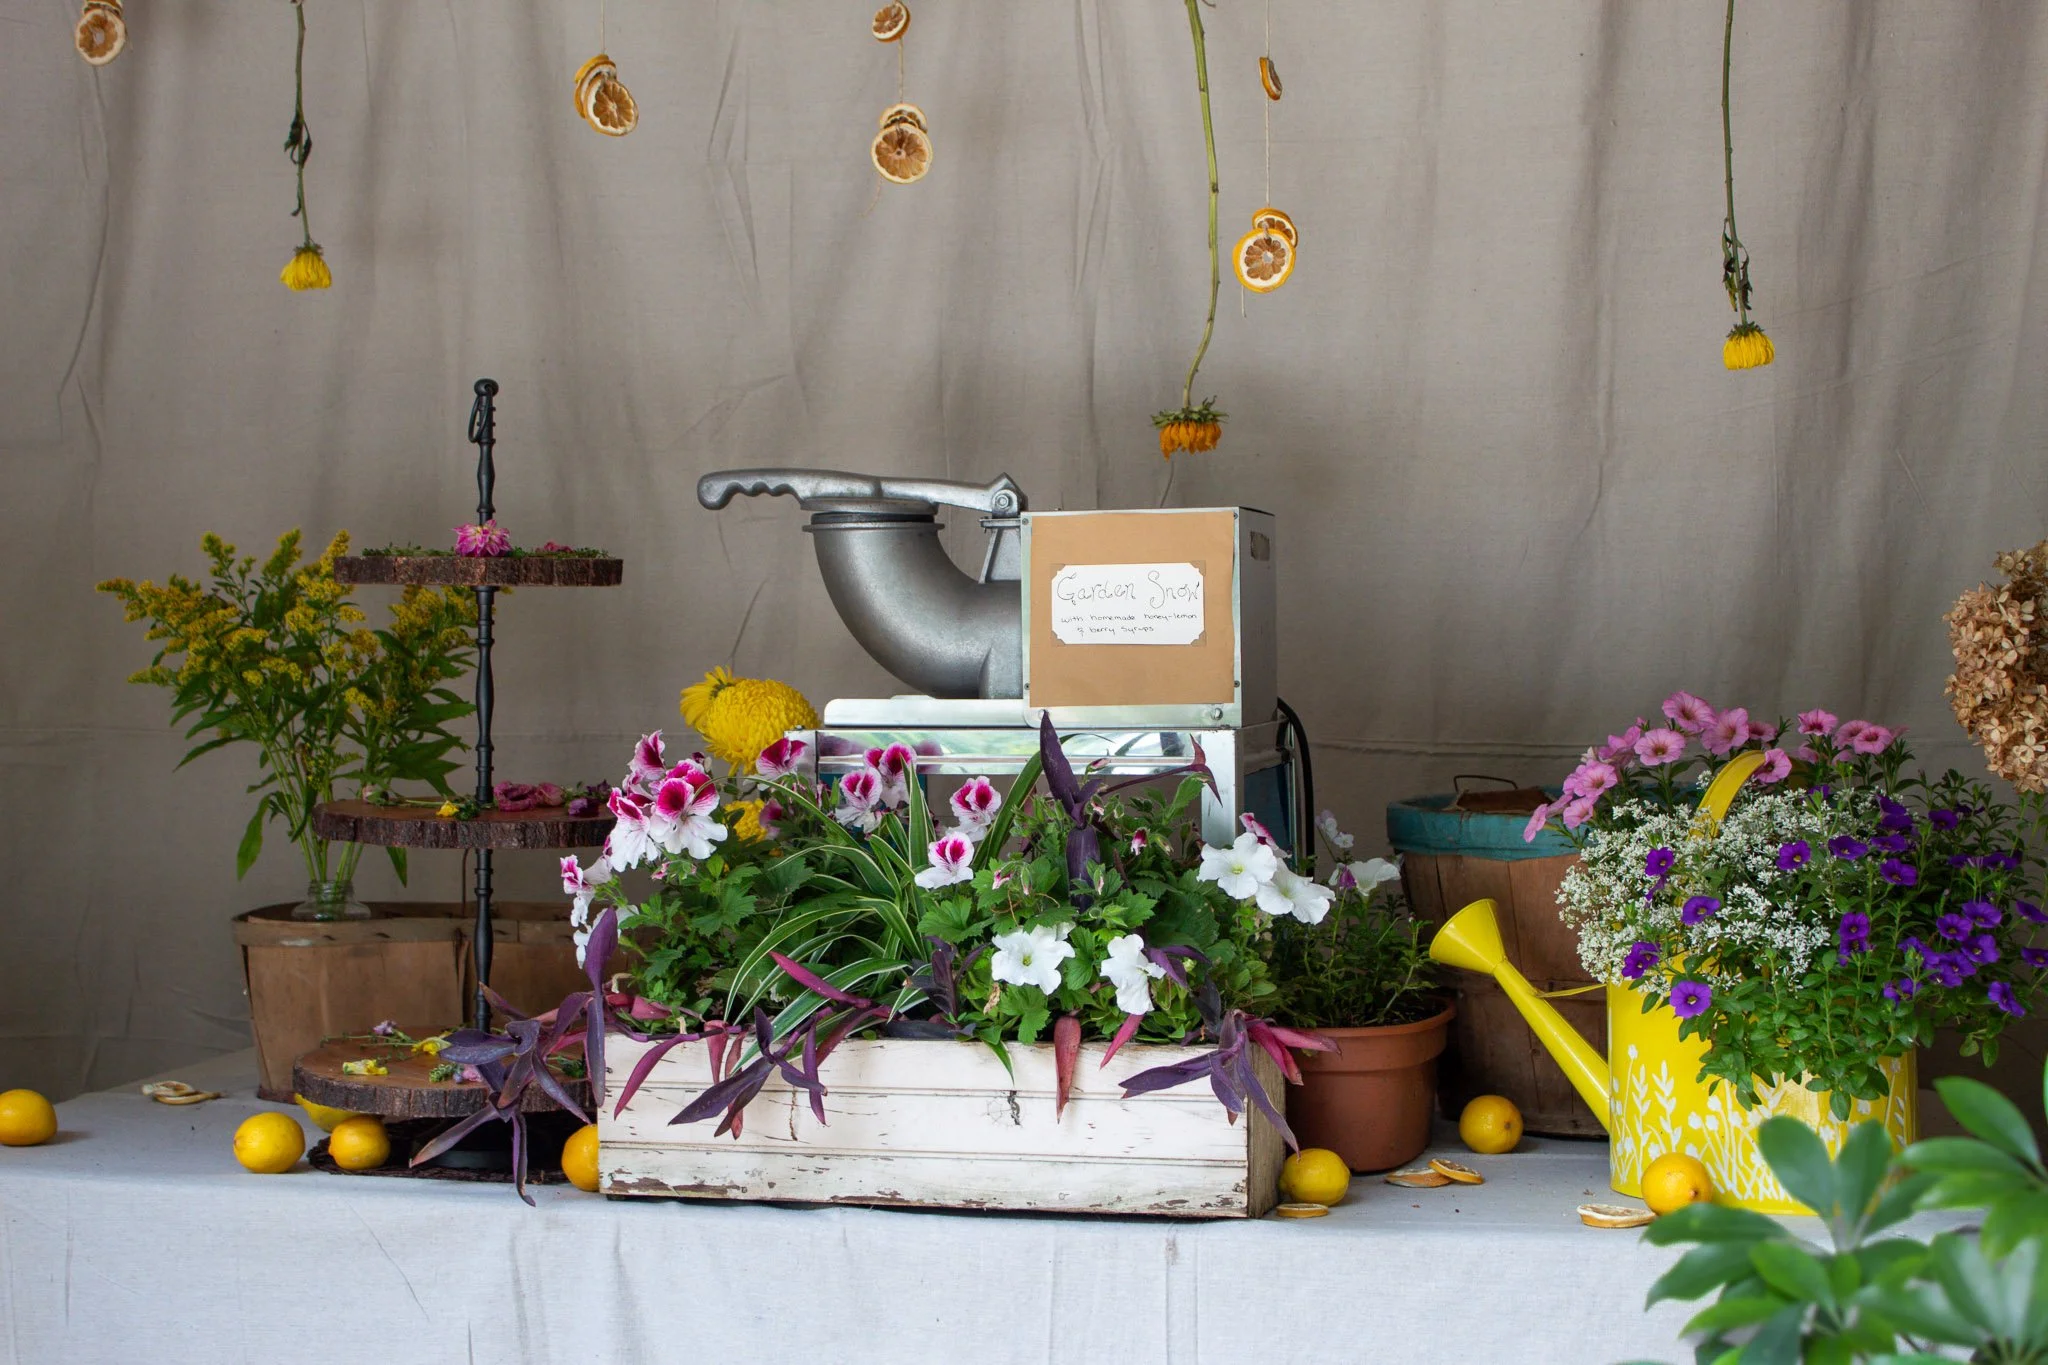
On its own, however, a snow cone machine can lean more toward a carnival aesthetic than a garden party. I wanted the station to feel cohesive with the rest of the celebration, so I decorated it and made homemade syrups.
I arranged planters around the base to conceal the parts that did not fit the look and added a sign across the front to cover the machine’s label. This helped the concession feel like part of the setting rather than rental equipment placed in the middle of the party.
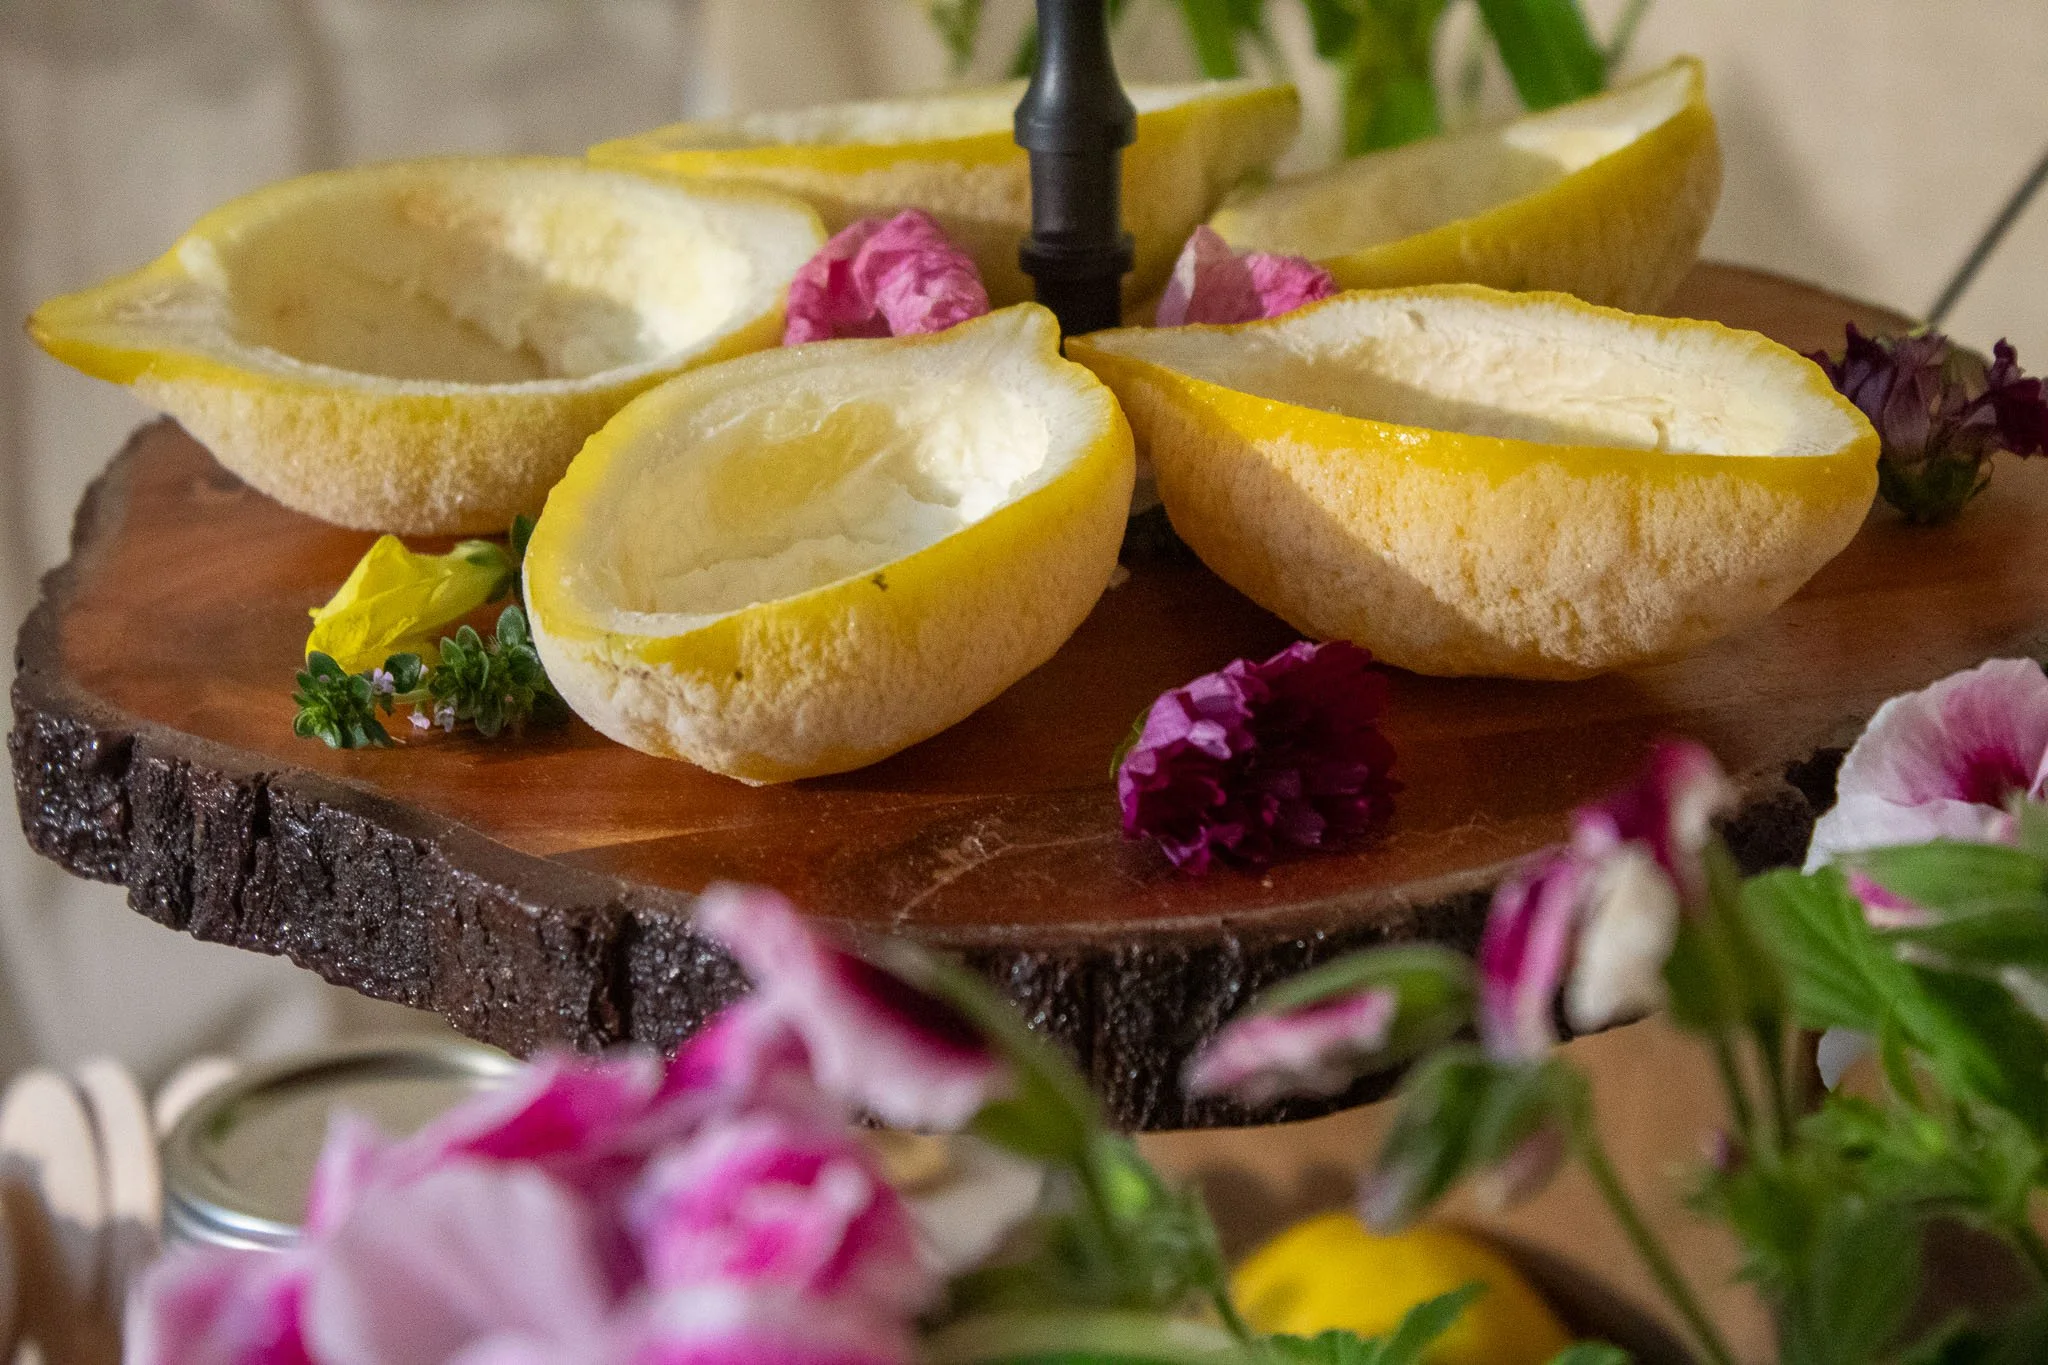
I hollowed out lemons, used the fruit to make a lemon-honey syrup, and served the shaved ice inside the lemon shells. I stacked the lemon bowls on a cupcake stand I had and set out bamboo spoons for guests. I also kept paper cups nearby for anyone who wanted a larger serving or more syrup with their ice.
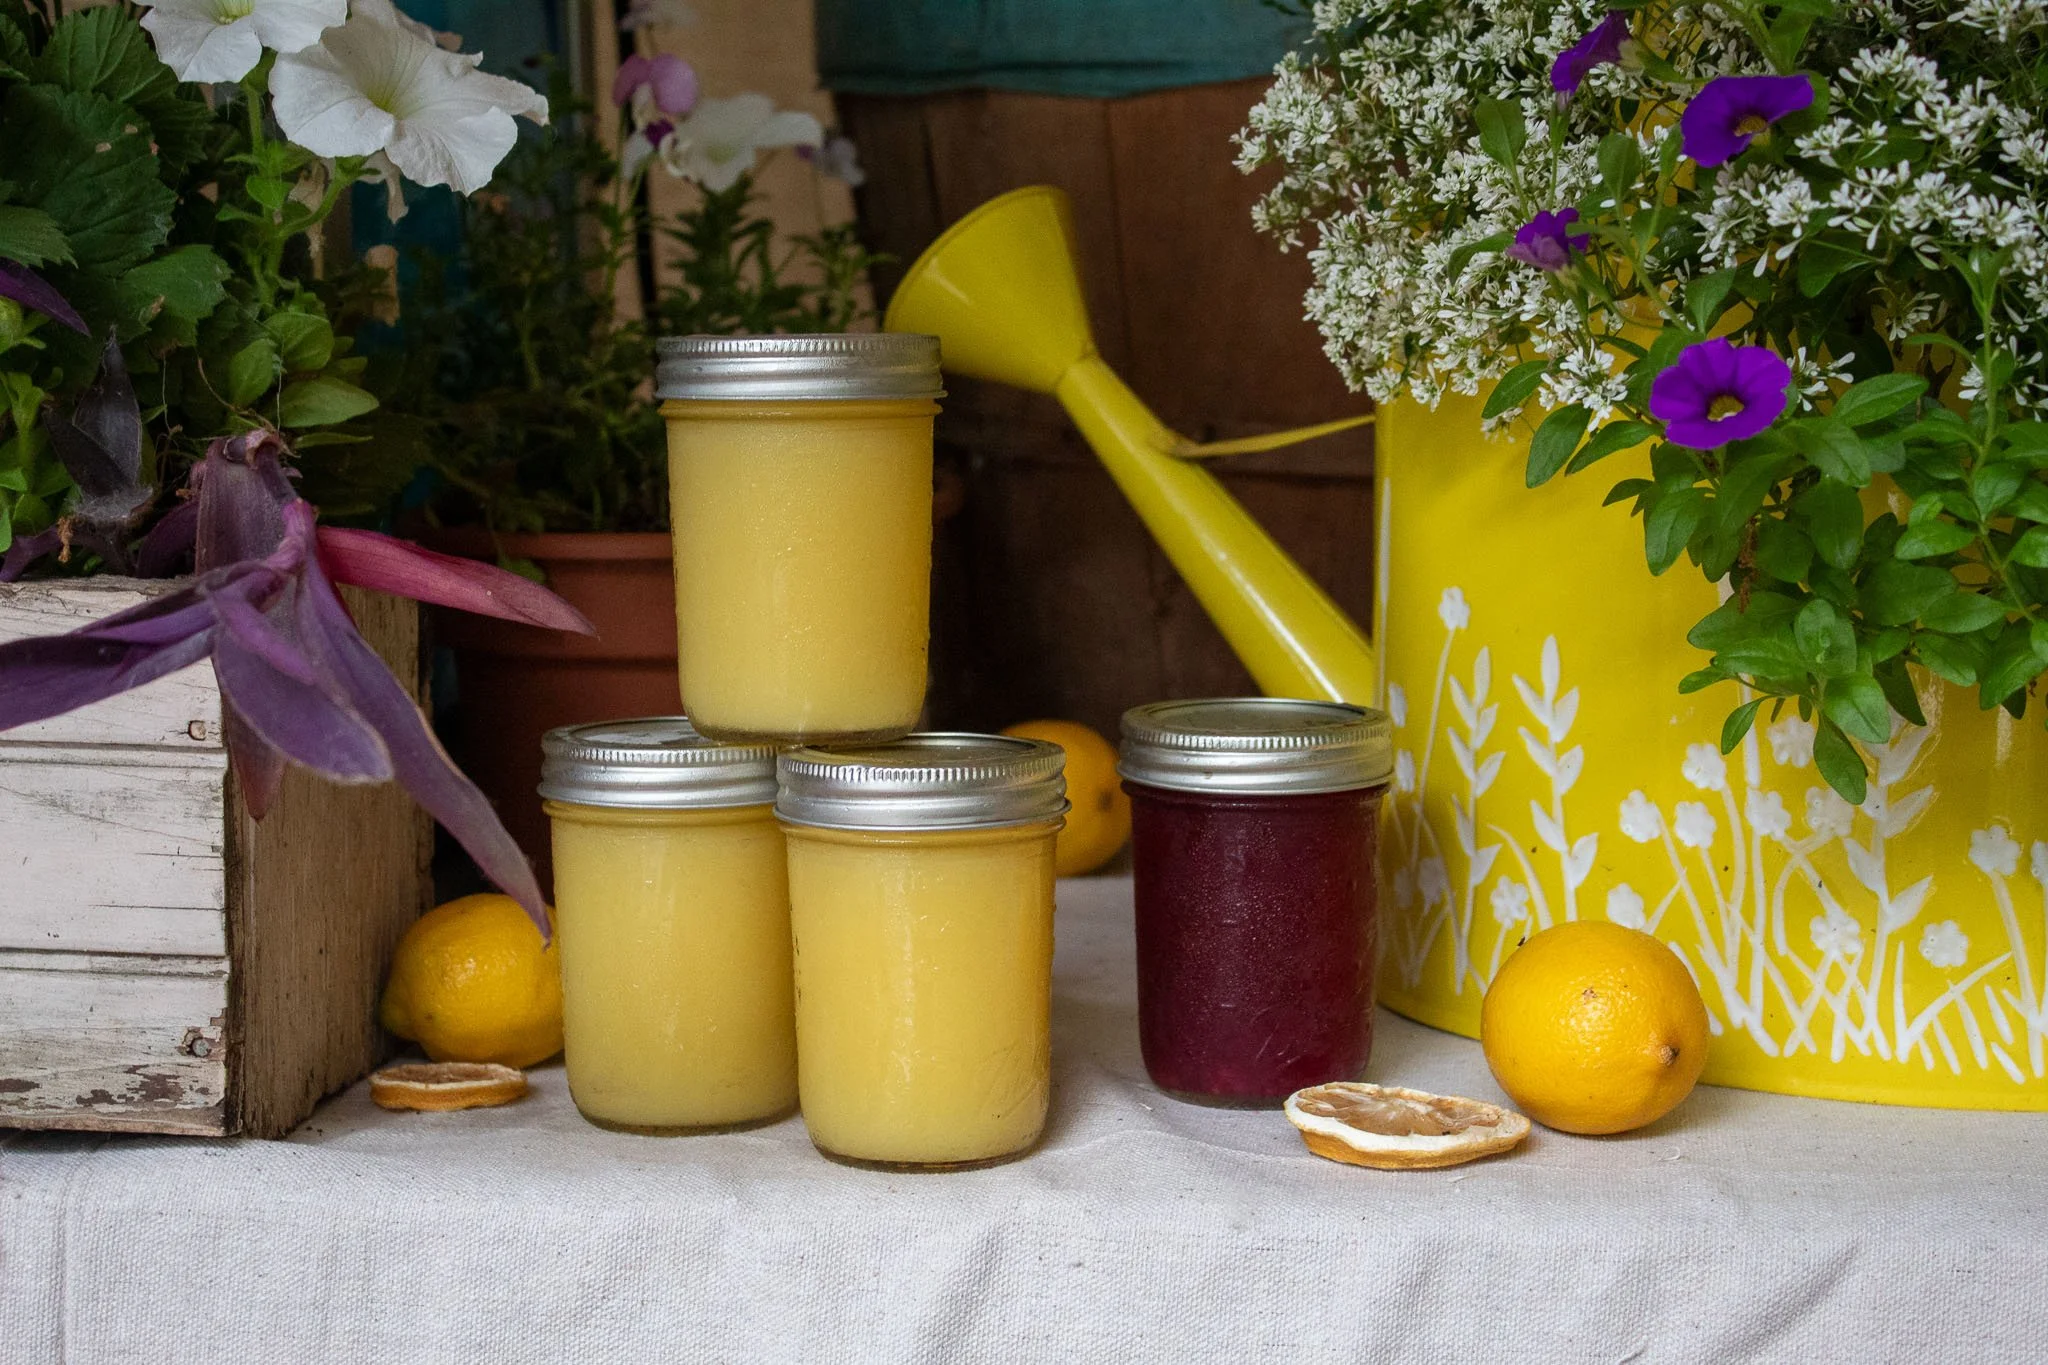
For more variety, I made a mixed-berry syrup with raspberries and blackberries and stored it, along with the lemon-honey syrup, in mason jars. Together with the lemons, planters, and handmade sign, the station had a homemade farmers’ market or homestead feel. I finished the lemon cups with edible flowers.
At a Glance
What it is: a garden-inspired snow cone station
Supplies: a snow cone machine, ice, syrups, cups, spoons, mason jars, a serving stand, planters, and a sign
Make it special: use homemade syrups, hollowed lemon cups, and edible flowers
Why it worked: it added an interactive treat without disrupting the garden theme
Style the rental: use planters, props, and a sign to conceal labels or equipment
Simplify it: use the included syrups and cups, or pair the included syrups with brown paper cups
Remember: rental equipment can be styled and elevated to fit your party theme
Lemon Harvest
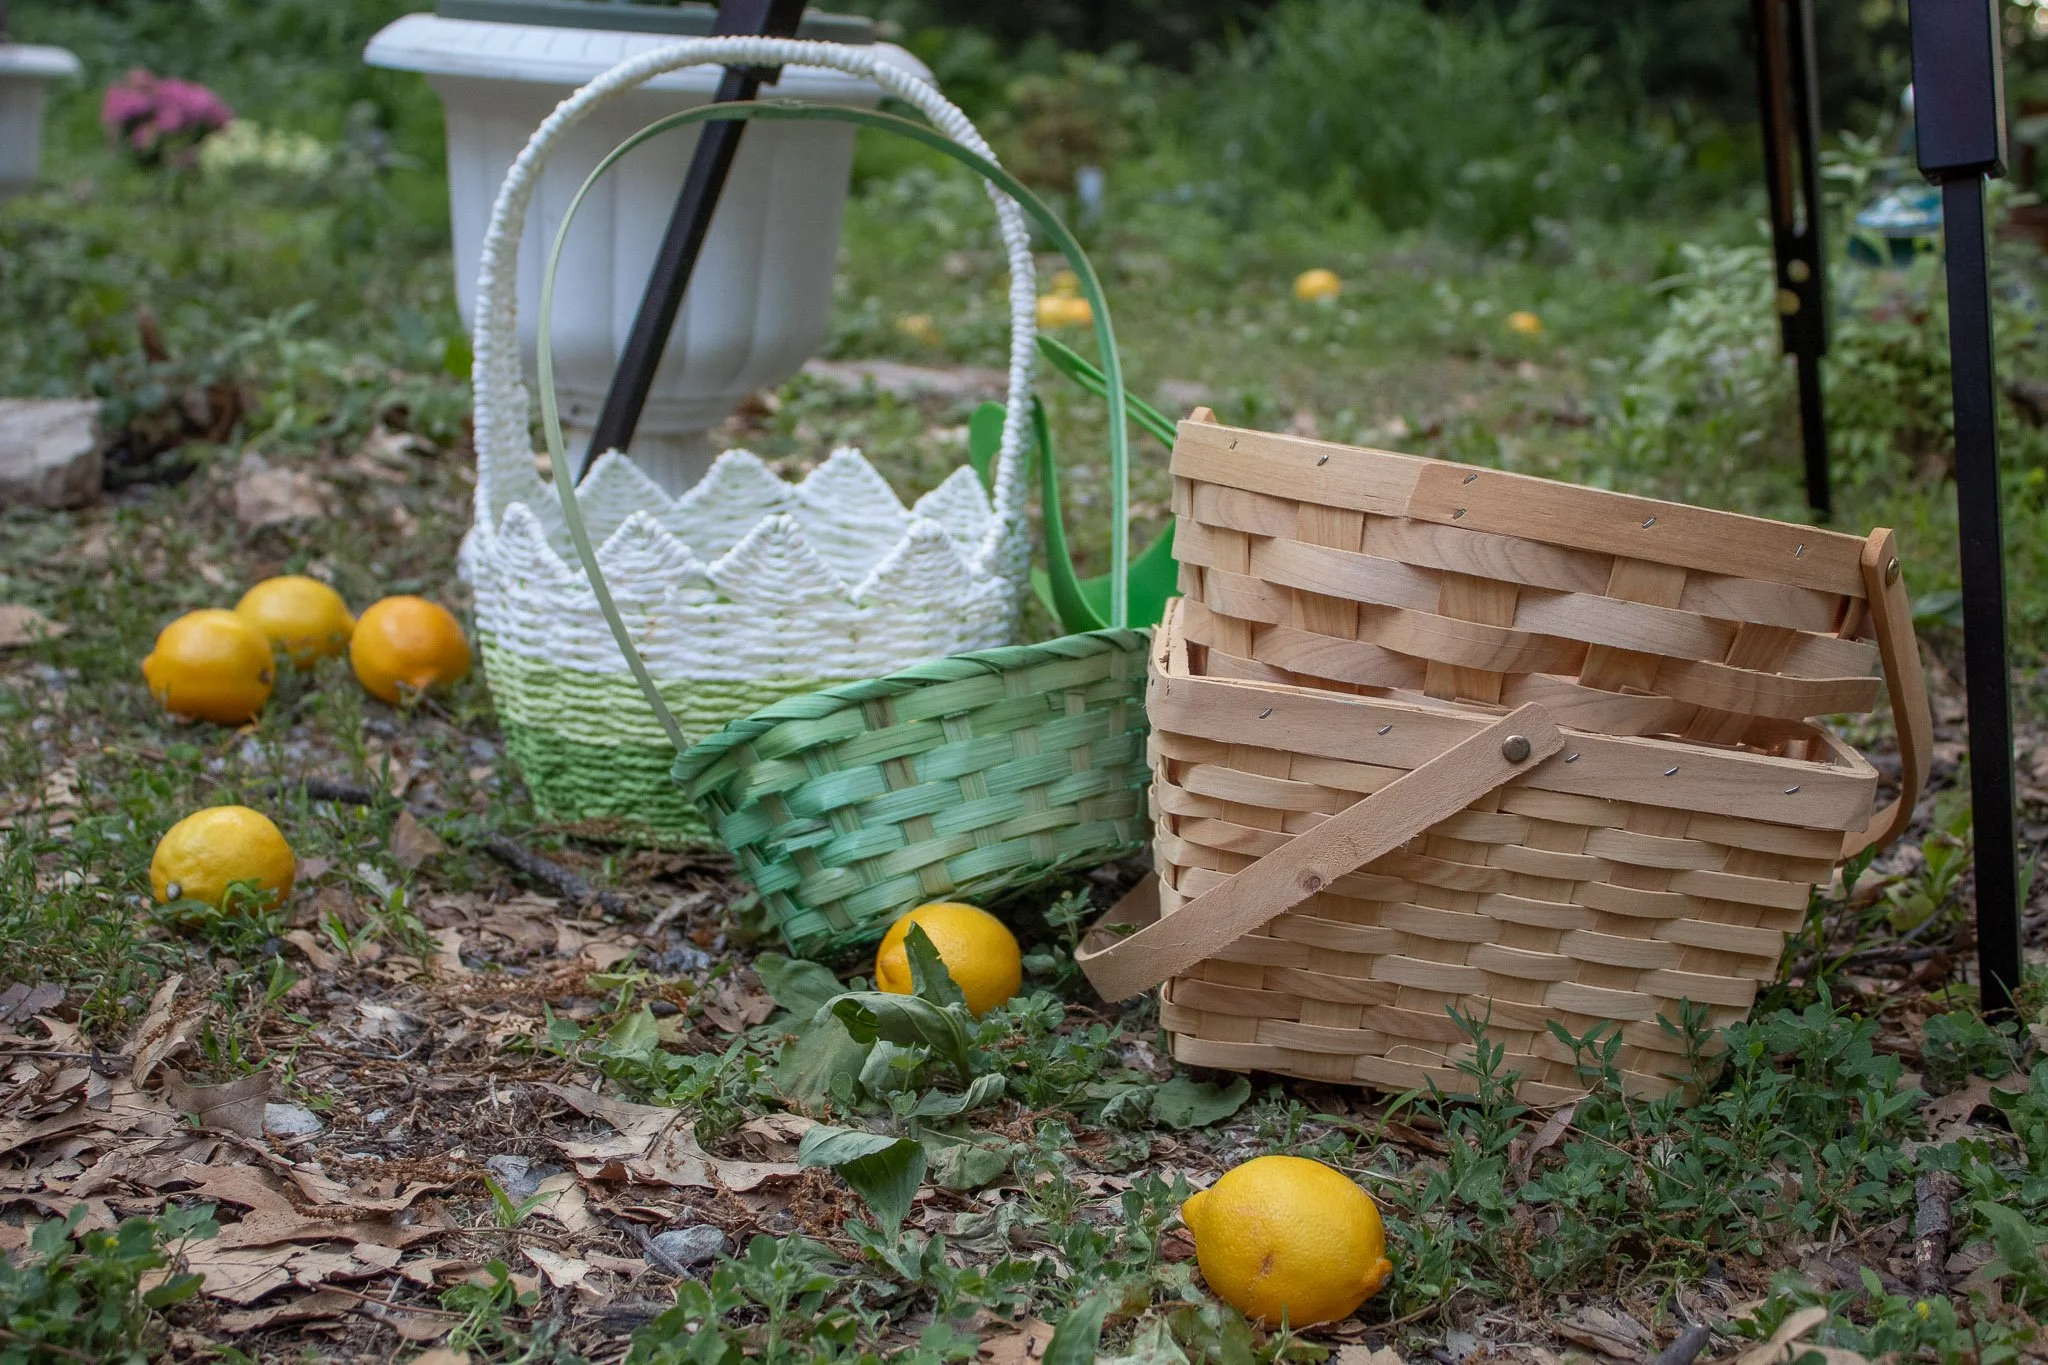
I created a lemon-harvest activity by hiding lemons throughout the backyard like Easter eggs and arranging them as a trail that led to a small fairy-garden scene. At the end, the children found a Lemon Baby figurine I had sculpted.
I placed a sign on my painting easel at the beginning of the trail, with a few baskets at the base for the children to use to collect the lemons. Most of the kids participated, and a few excitedly came to show me that they had found Lemon Baby.
You could create your own version using any small figurine, character, or food-themed surprise that fits your party.
At a Glance
What it is: a backyard lemon hunt that leads children to a small surprise scene
Supplies: lemons, baskets, a sign, an easel or stand, and a small figurine or themed surprise
Why it worked: it was a simple activity that interested most of the children and worked across a wide range of ages
Simplify it: skip the baskets, easel, and fairy garden; just hide a few lemons for children to find
Kids’ Corner
I installed modular wood flooring to create a small patio surface and brought a playpen outside from the house so younger babies would have a safe place to crawl if their parents needed a break. I also placed a low curbside-find table nearby where children could eat or play. My son later used the same table for finger painting with art supplies he received as birthday gifts.
I had originally imagined setting out coloring pages or covering the tables with butcher paper for the children to draw on, but I didn’t gather the supplies in advance. This was a good reminder that even a very simple project may not happen if it’s left until the end.
The simplest version ended up creating itself. My nephews took scrap paper and gel pens from the memory book station and sat at the low table to doodle. Children often need less setup than we think they do.
I really liked the modular wood patio flooring because I’ll be able to enjoy it long after the party, and it was very easy to put together. You can simplify the flooring, though, by using a safe surface you already have or laying down a canvas drop cloth like a rug. Instead of a playpen, you could also create a small perimeter with hay bales and cover them with blankets or drop cloths. The bales could provide seating for adults while babies play in the contained space. Keep in mind that this version would require a parent nearby, since mobile babies may crawl over the bales or pull out loose straw and put it in their mouths.
At a Glance
What it is: a designated play area for babies and toddlers
Supplies: a playpen, modular flooring or another safe surface, a low table, paper, and drawing supplies
Why it worked: younger children had a safe space when parents needed a break
Simplify it: place a playpen on a safe surface with seating for adults nearby
Alternative setup: use hay bales as a supervised perimeter that doubles as adult seating
Remember: simple extras still require preparation. You don't have to include them all
Seating
It’s important to create places where guests can sit down and retreat throughout the party. Not every seating area has to look the same, and you don’t have to rely only on rows of folding chairs and tables, although it’s helpful to include some traditional seating too.
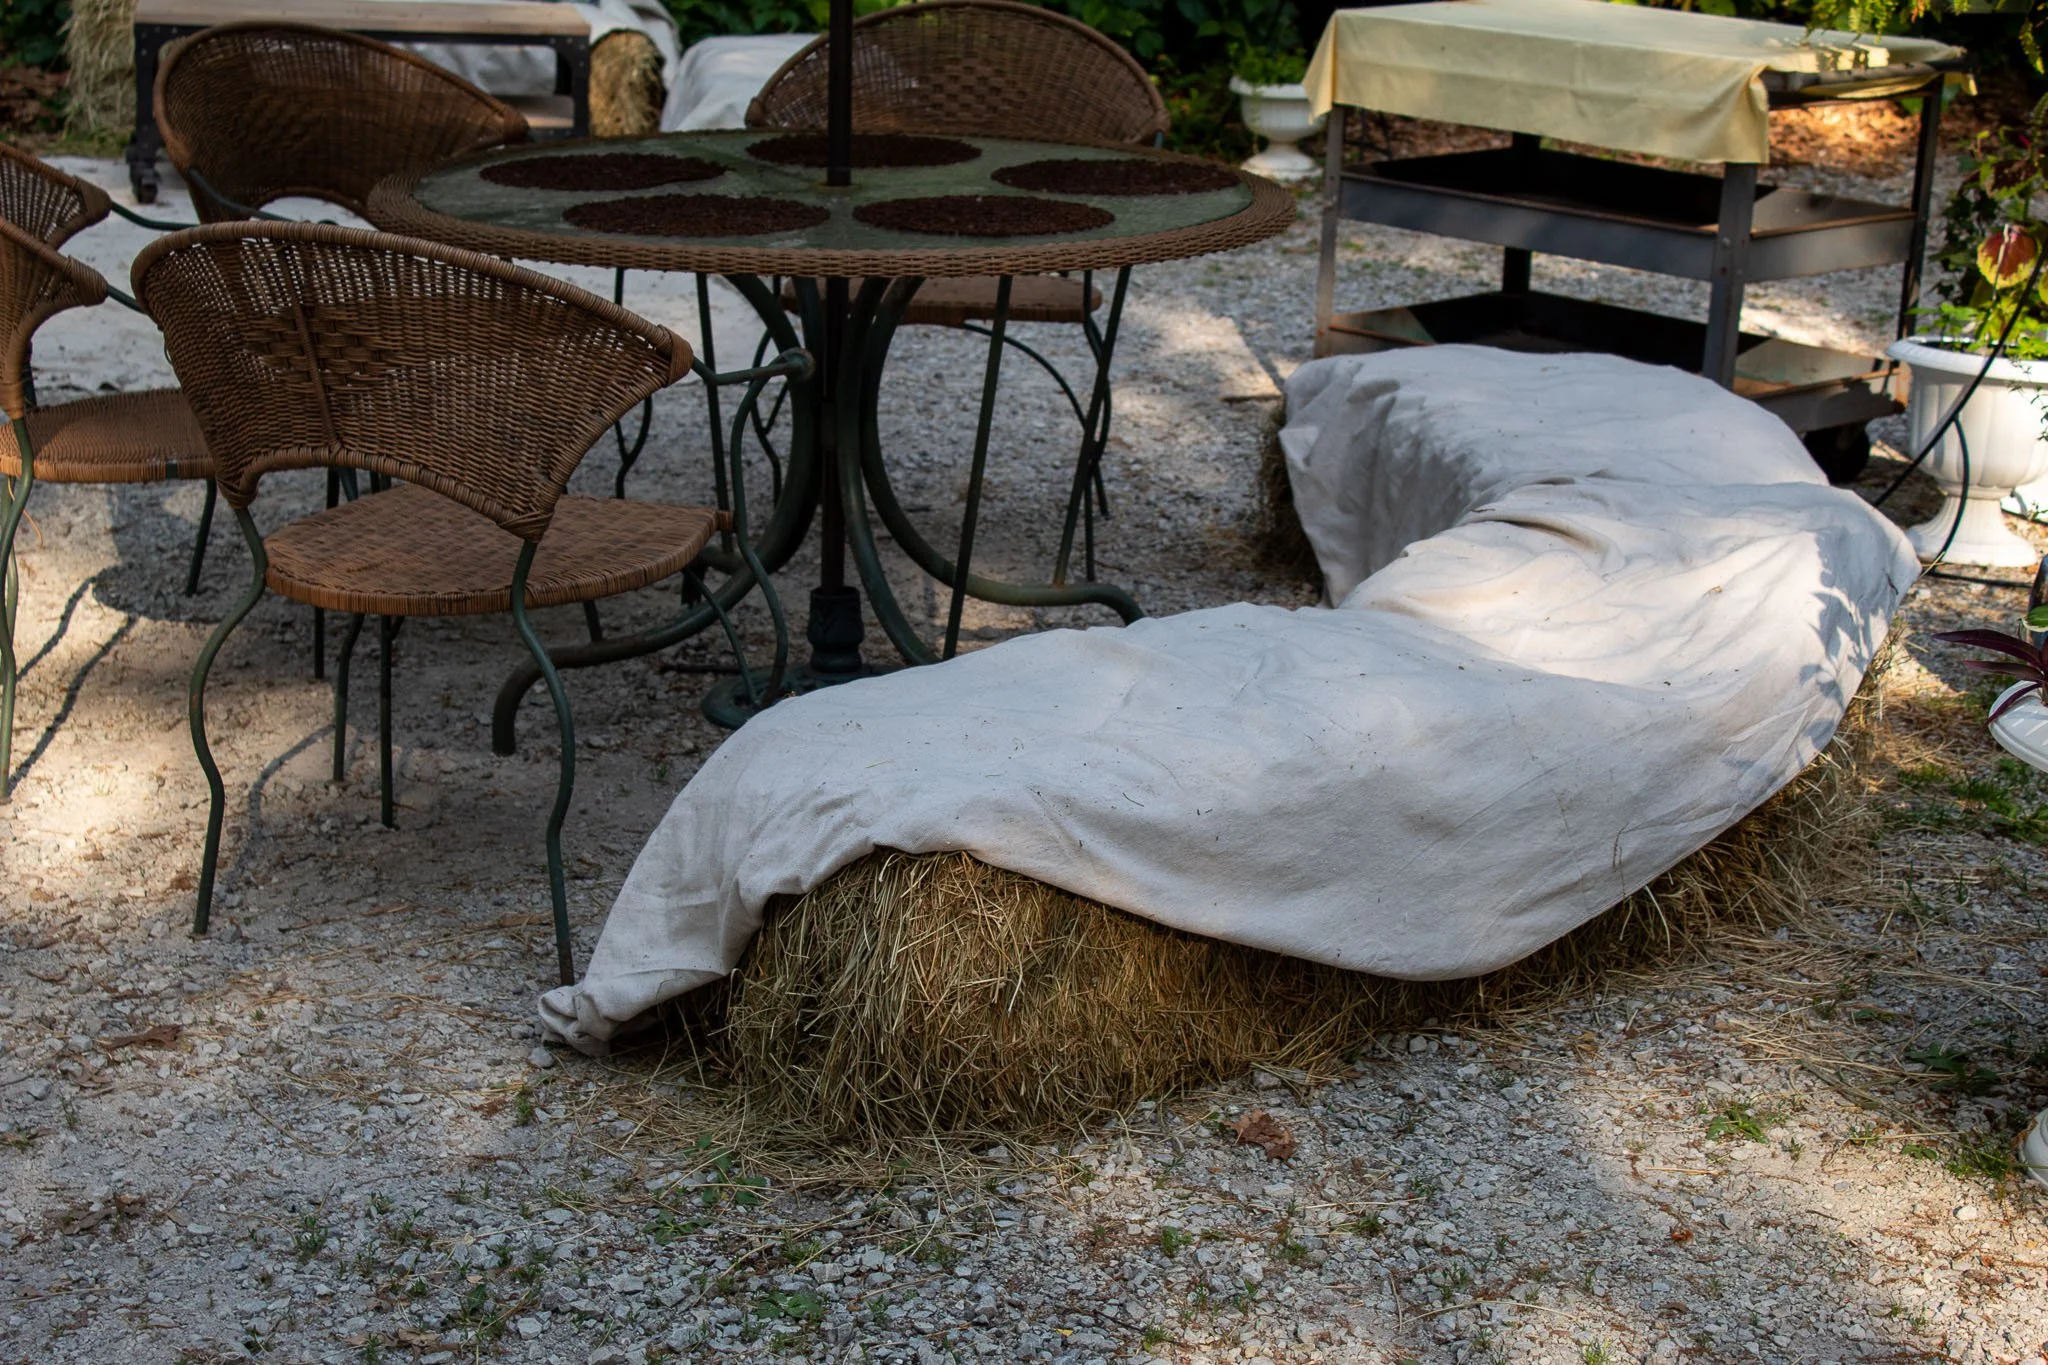
I moved the patio table and chairs from my front porch into the party area. The patio set was another curbside find—you may have noticed by now that we have quite a few of those, which is why I affectionately call my husband a raccoon. I expanded the seating around the table by placing hay bales along one side as a bench.
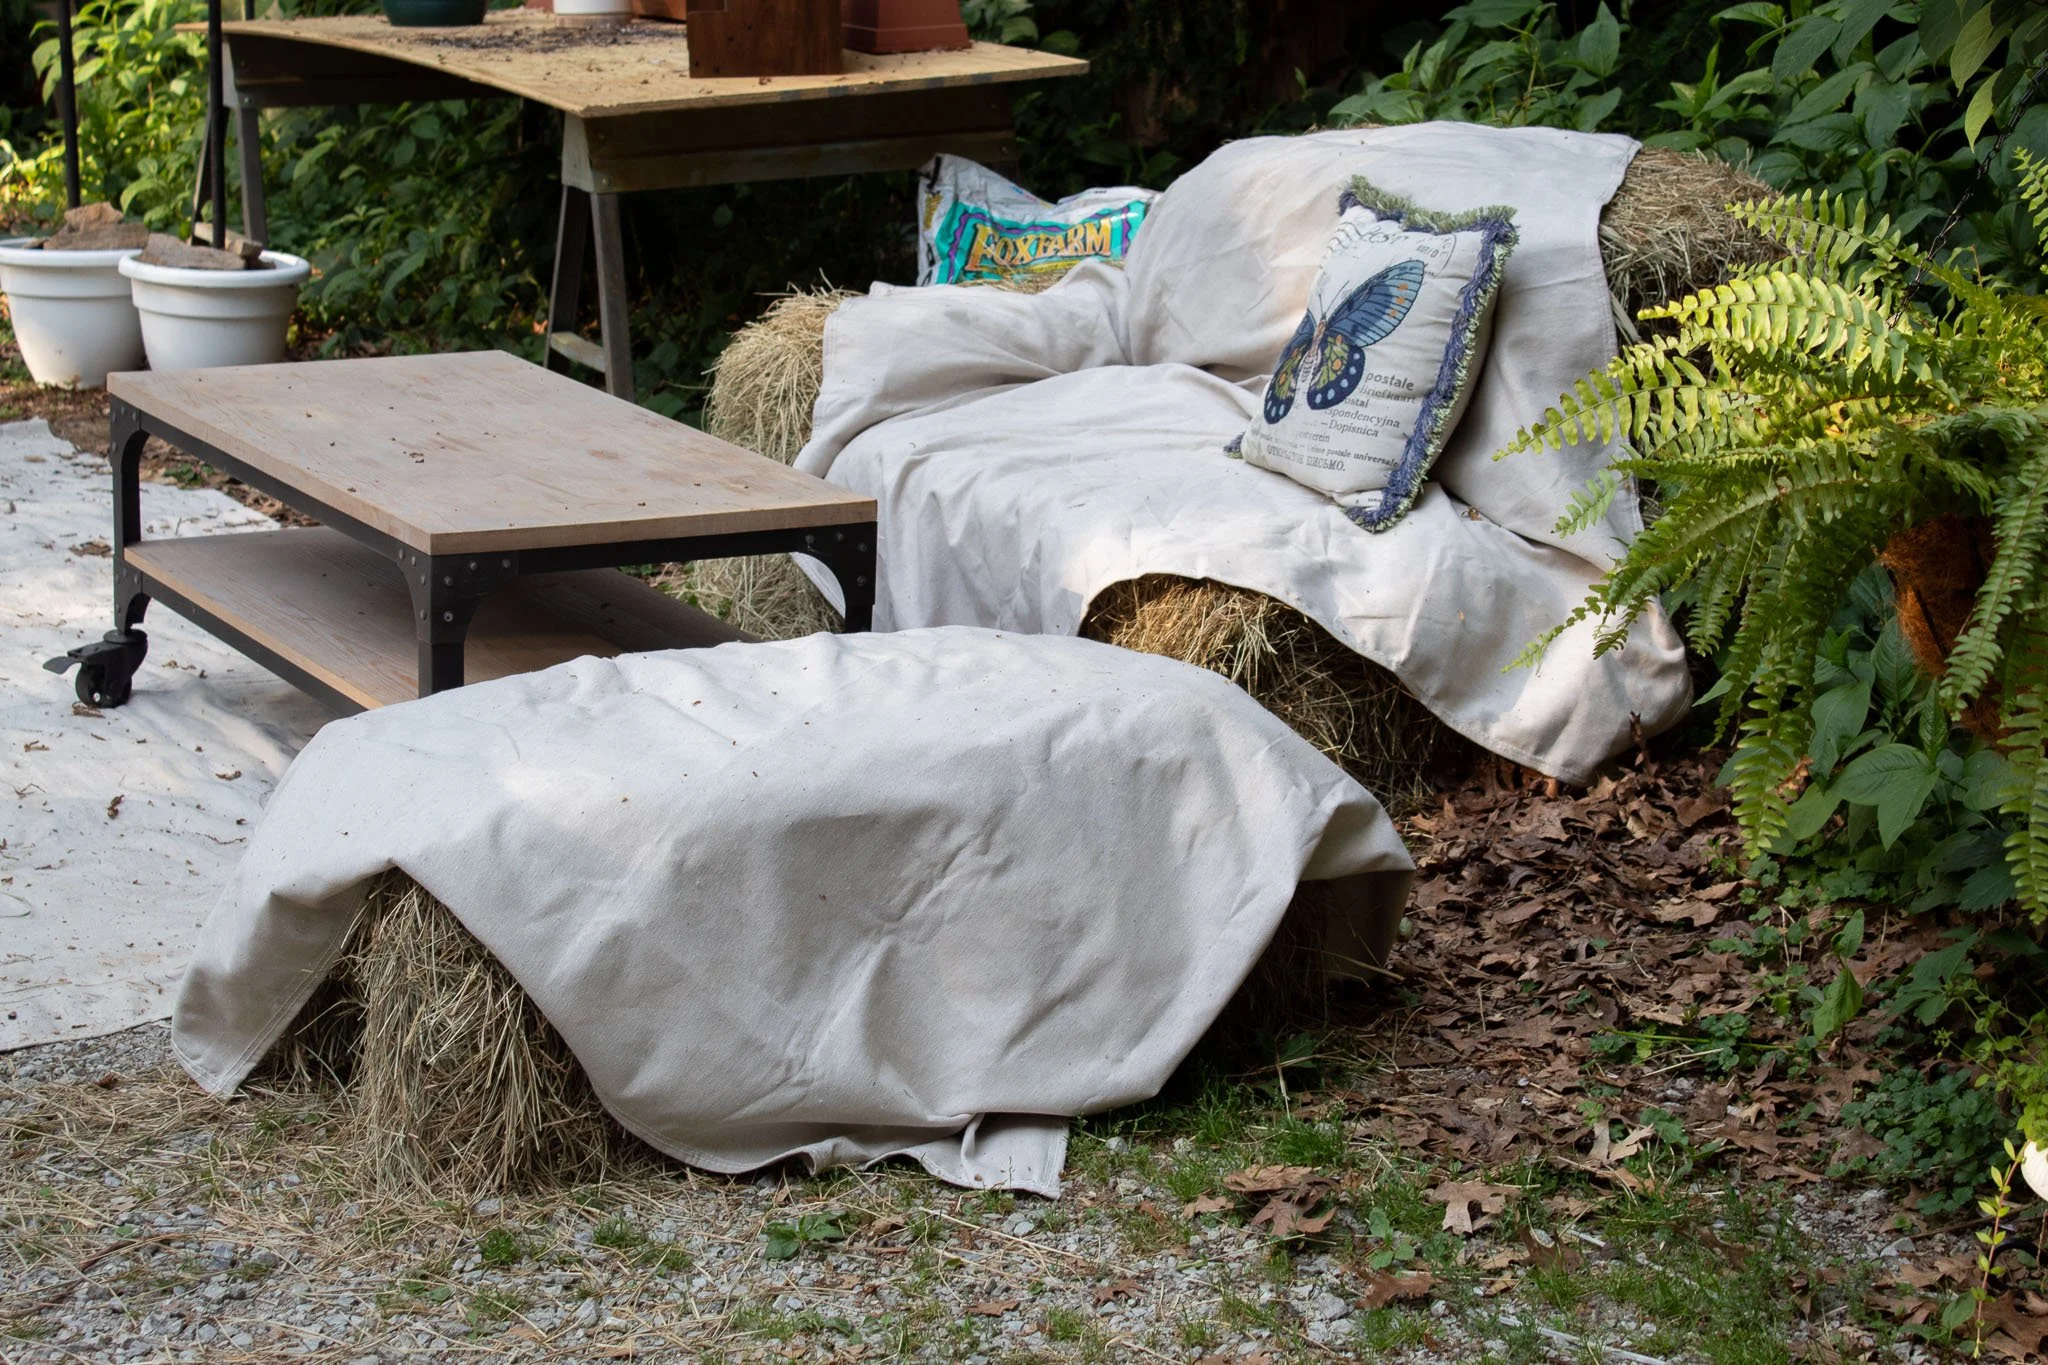
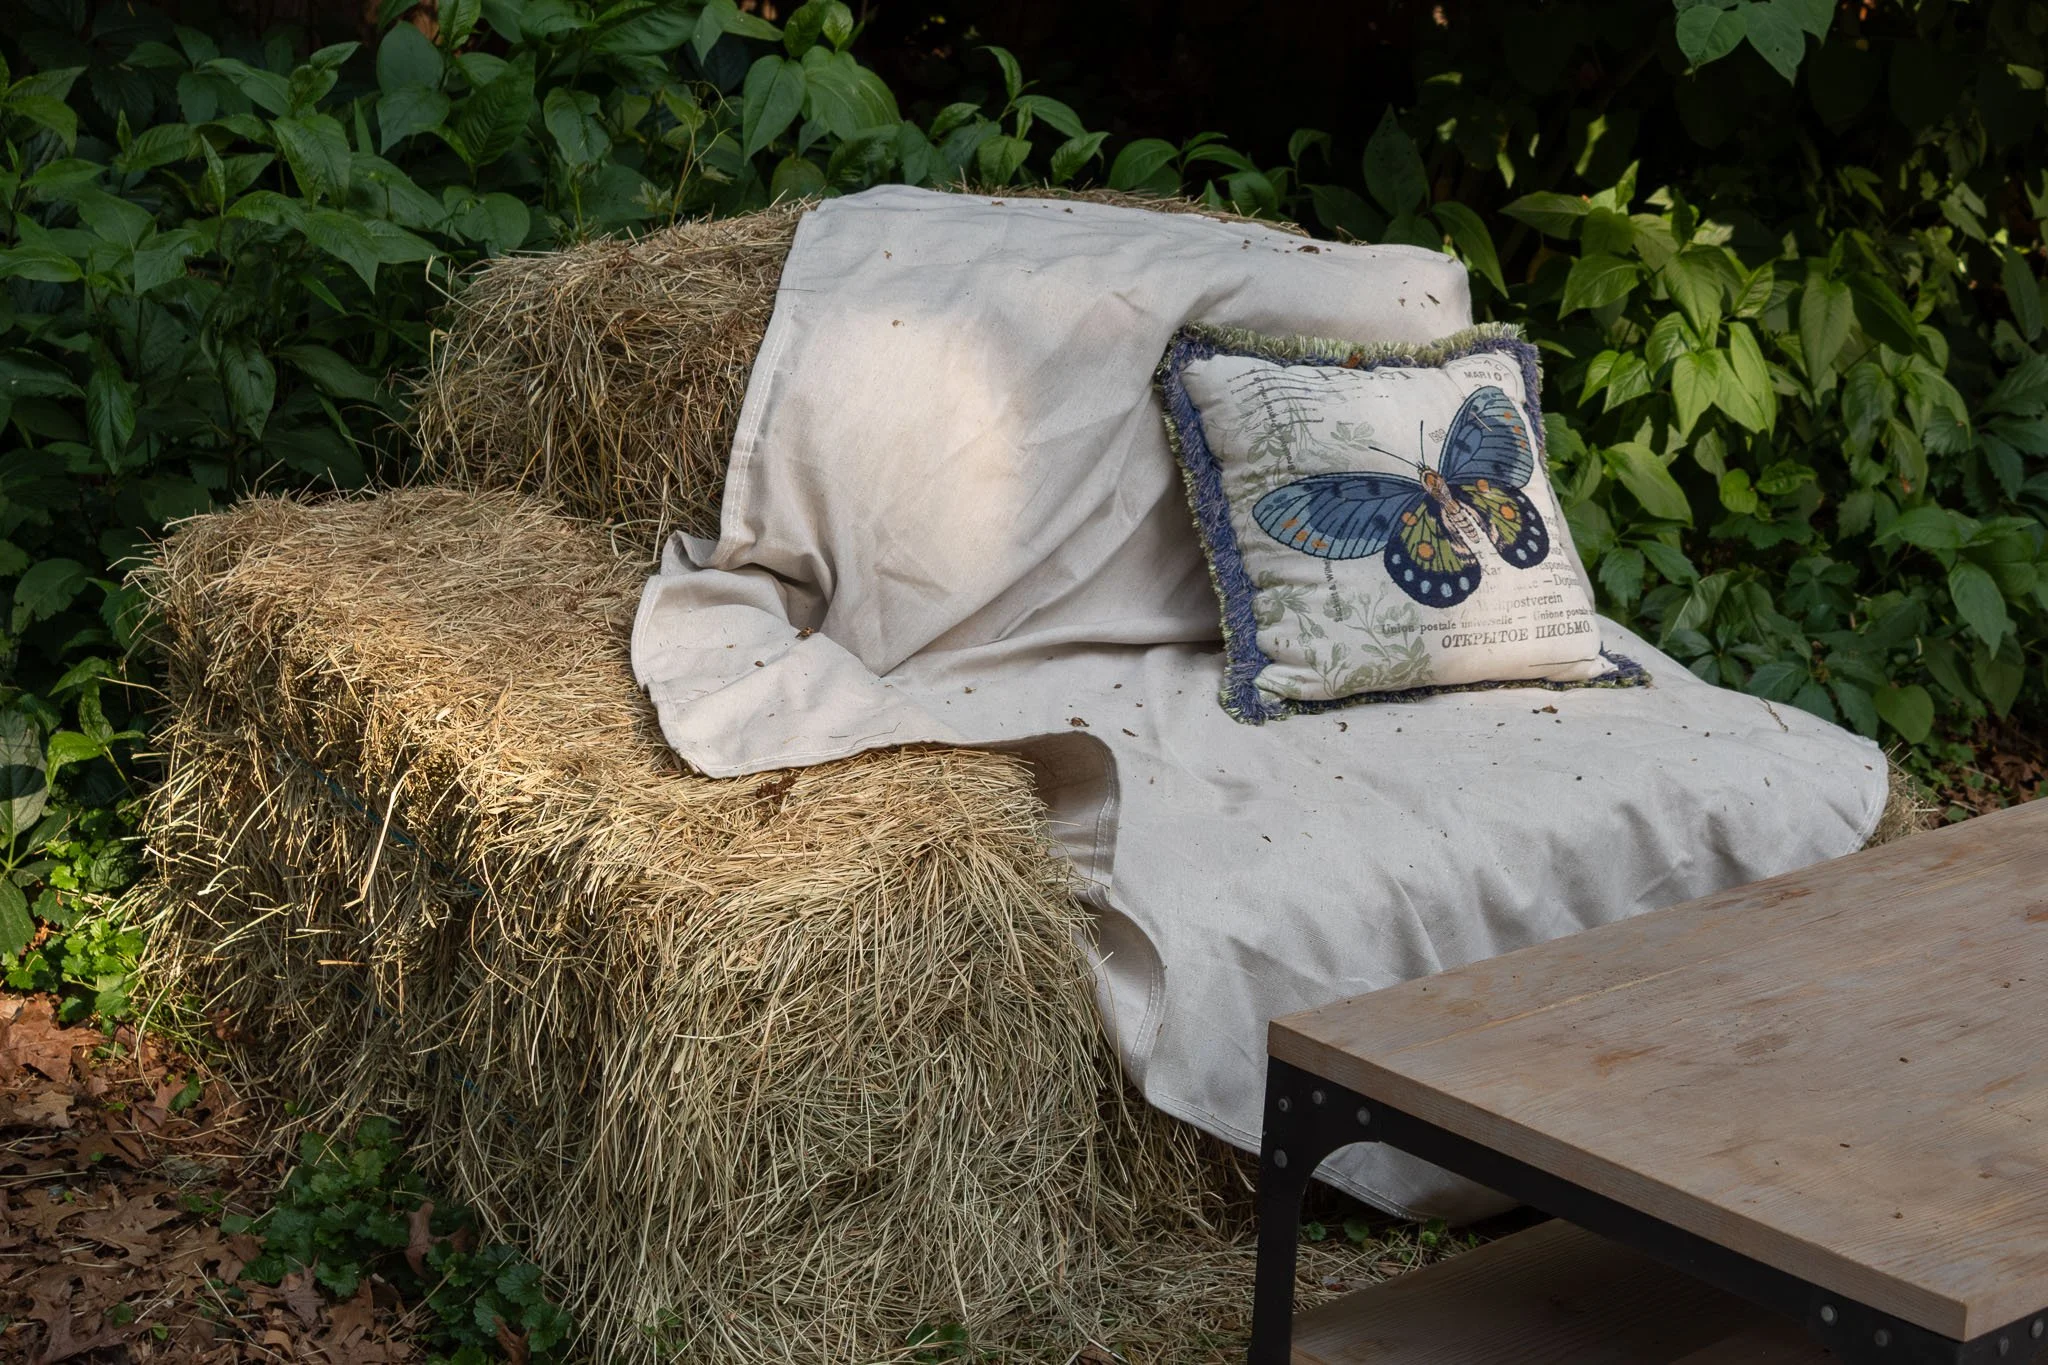
I created a separate lounge area with more hay bales, a canvas drop cloth used as a rug, and a coffee table brought outside from my house. Its low height worked well for younger children to eat or draw at without requiring a designated kids’ table.
I purchased the hay bales from Galusha Farm for $10 each. They had been stored in a temperature-controlled space and were certified weed- and dust-free. The weed-free certification was especially useful because I planned to reuse the hay as garden mulch after the party.
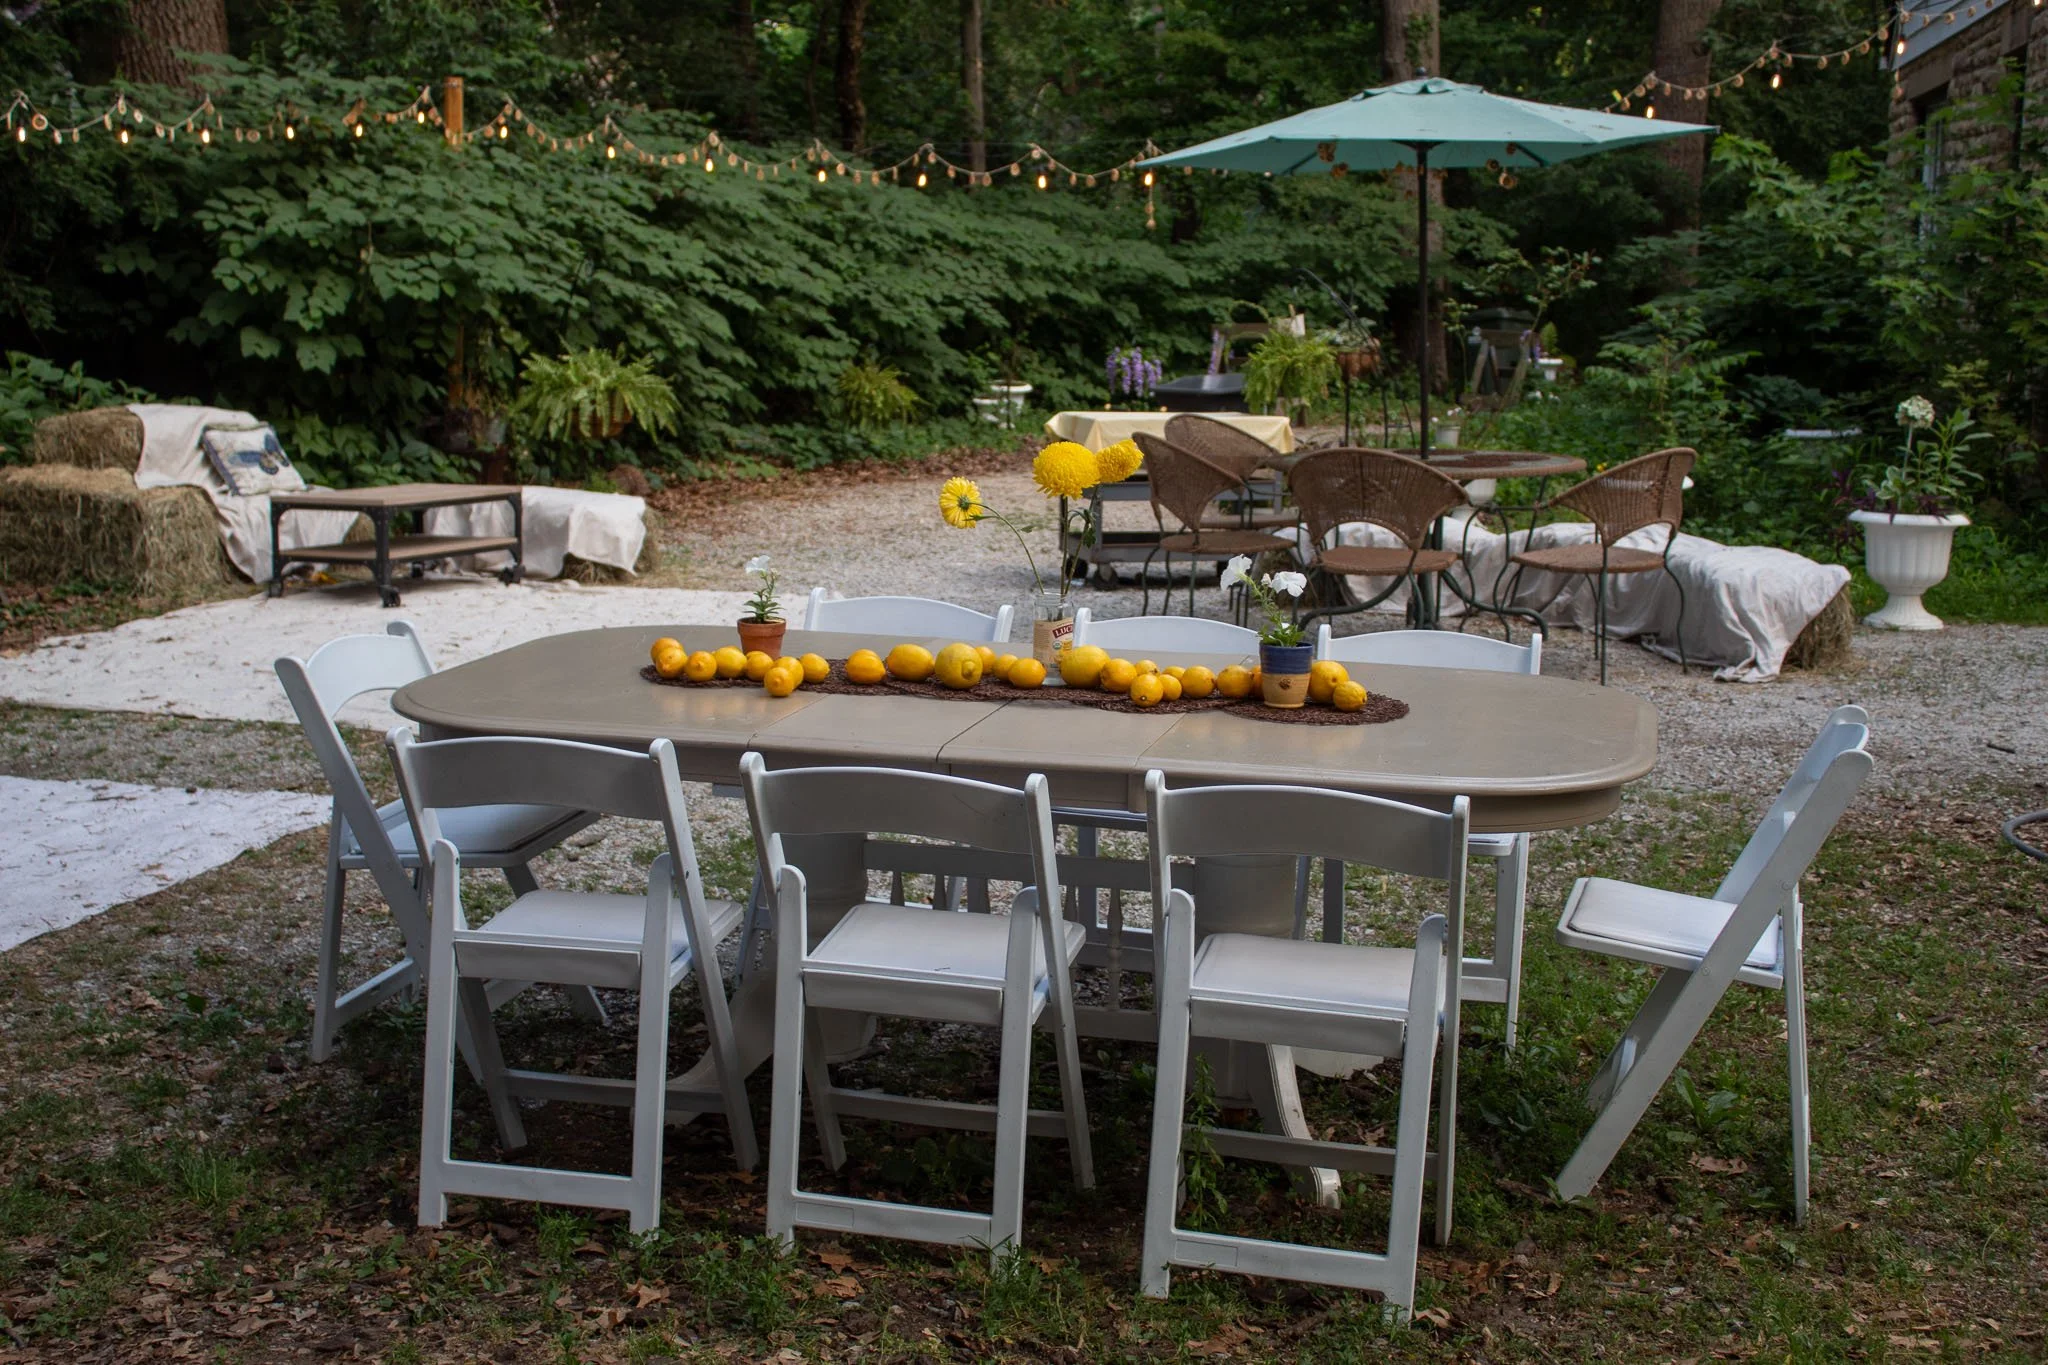
We saw that our neighbors were conveniently getting rid of a dining table, so my husband and I carried it across the street and paired it with rented white garden chairs. Inside the garage, I pushed two rented rectangular tables together, covered them with linen tablecloths, and added butcher paper as a runner. I used rented black metal chairs there because they suited that part of the setting better. I also borrowed a wicker bench and a small metal garden table and chair set from my mom.
The different arrangements created small nooks where groups of guests could sit and talk. Because the styles varied, the seating also felt like part of the party decor rather than something purely functional. You can simplify this by using the furniture you already own and renting only the additional tables or chairs needed to fill the gaps.
At a Glance
What it is: a mix of rented tables, patio furniture, hay bales for lounge seating, and smaller conversation areas
Why it worked: varied seating gave guests places to rest, eat, talk, and gather while adding to the decor
Keep costs down: use what you already own, borrow what you can, and rent only what you still need
Add variety: mix tables and chairs with casual seating like hay bales, rugs, or outdoor furniture
Simplify it: create one main seating area and a smaller secondary area with existing furniture
Atmosphere
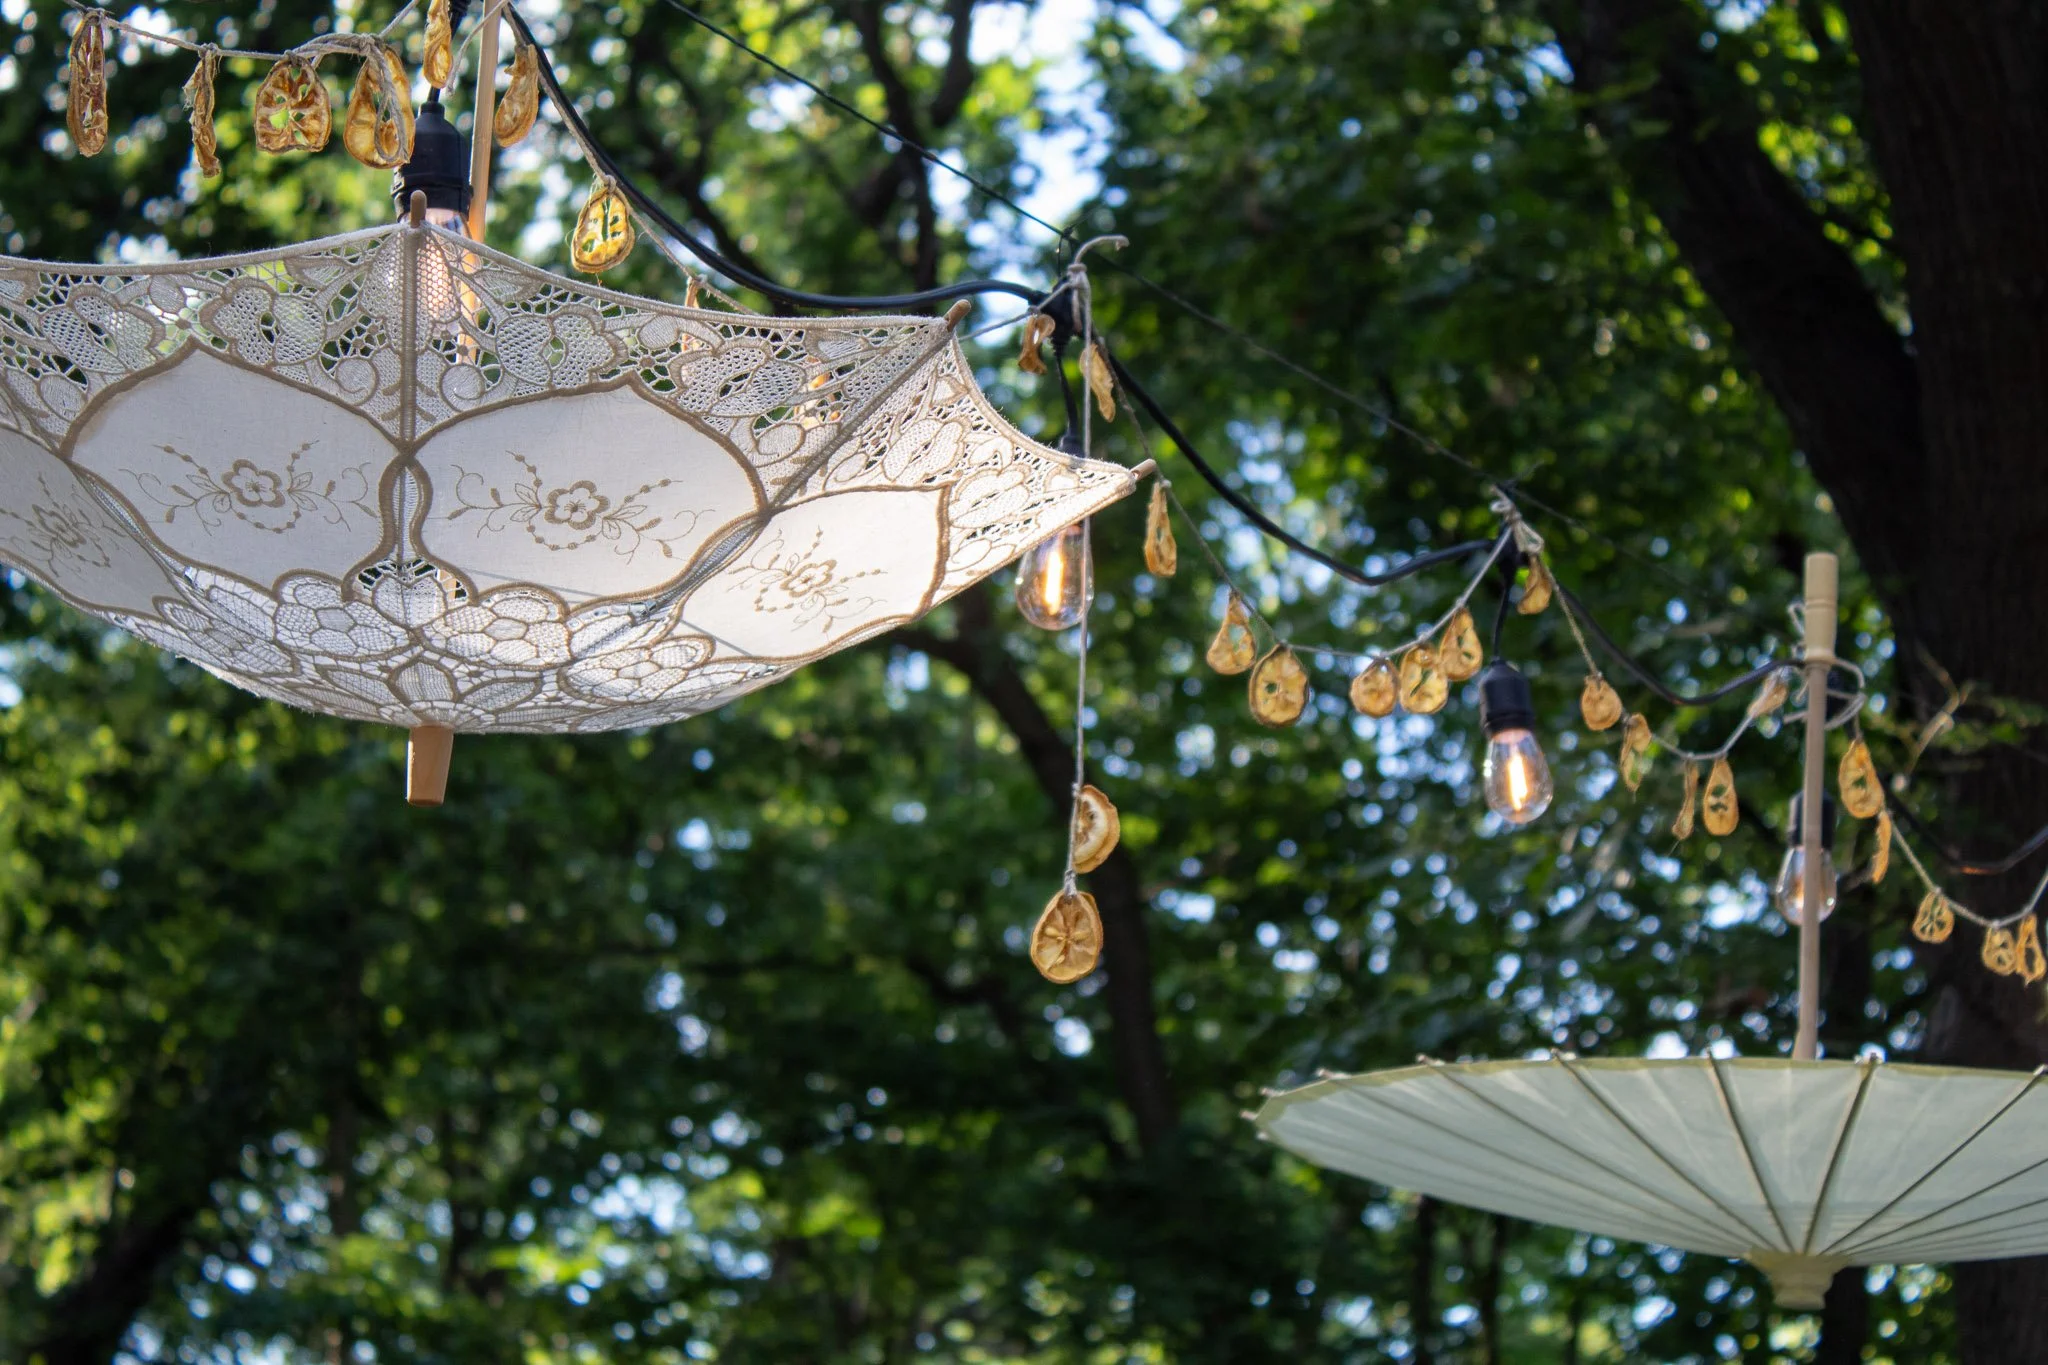
The atmosphere creates the overall feeling of the party. I prefer to focus first on a few high-impact elements rather than obsessing over smaller details like tablescapes or cake toppers. If time allows, I can always add more detail afterward.
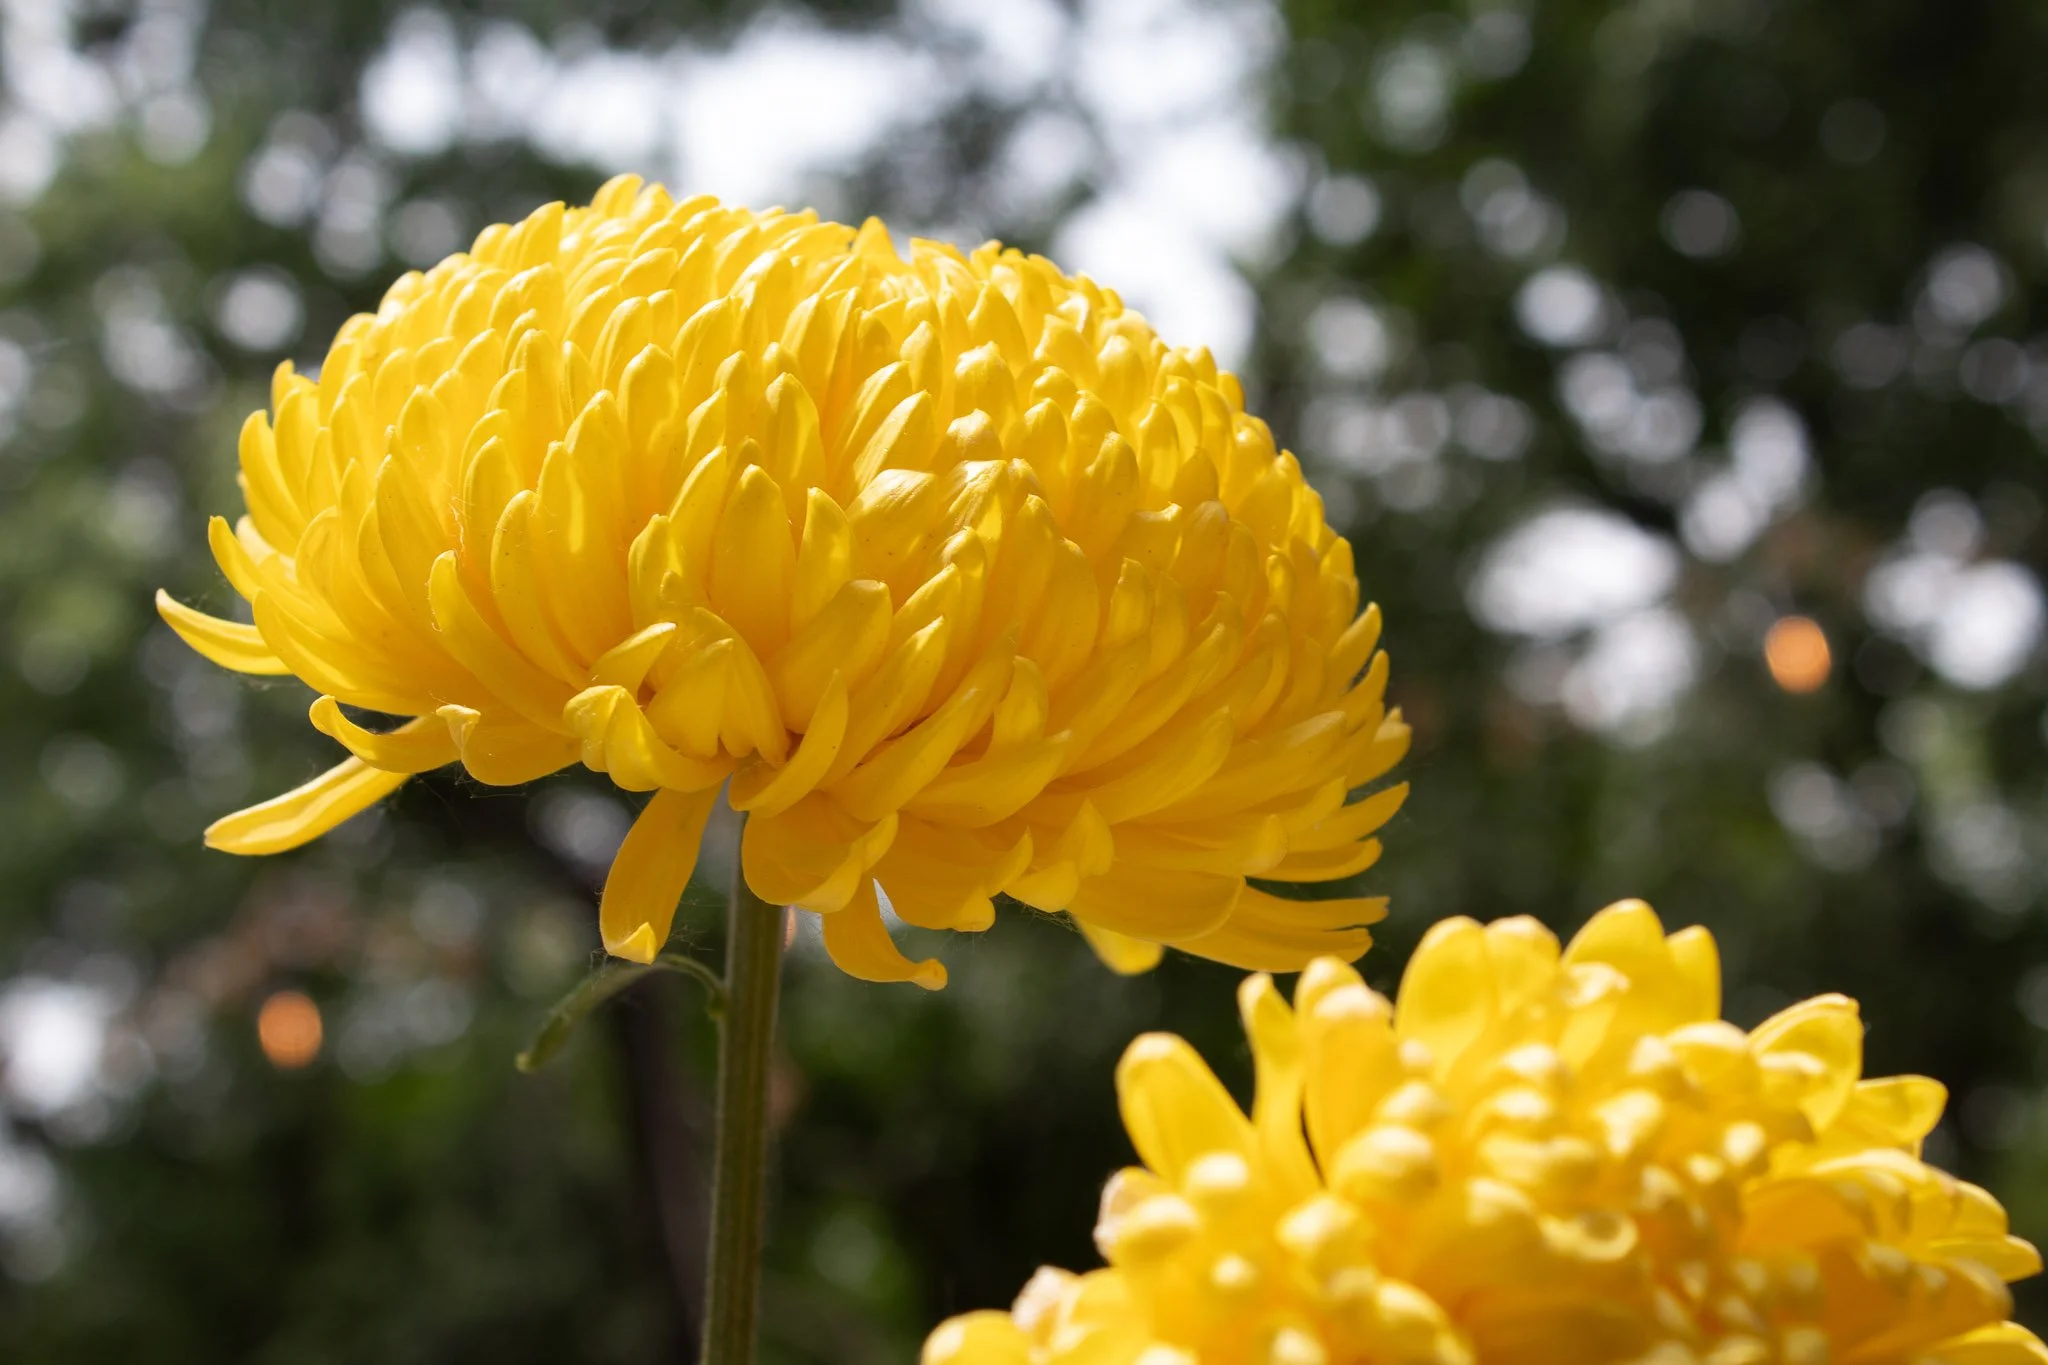
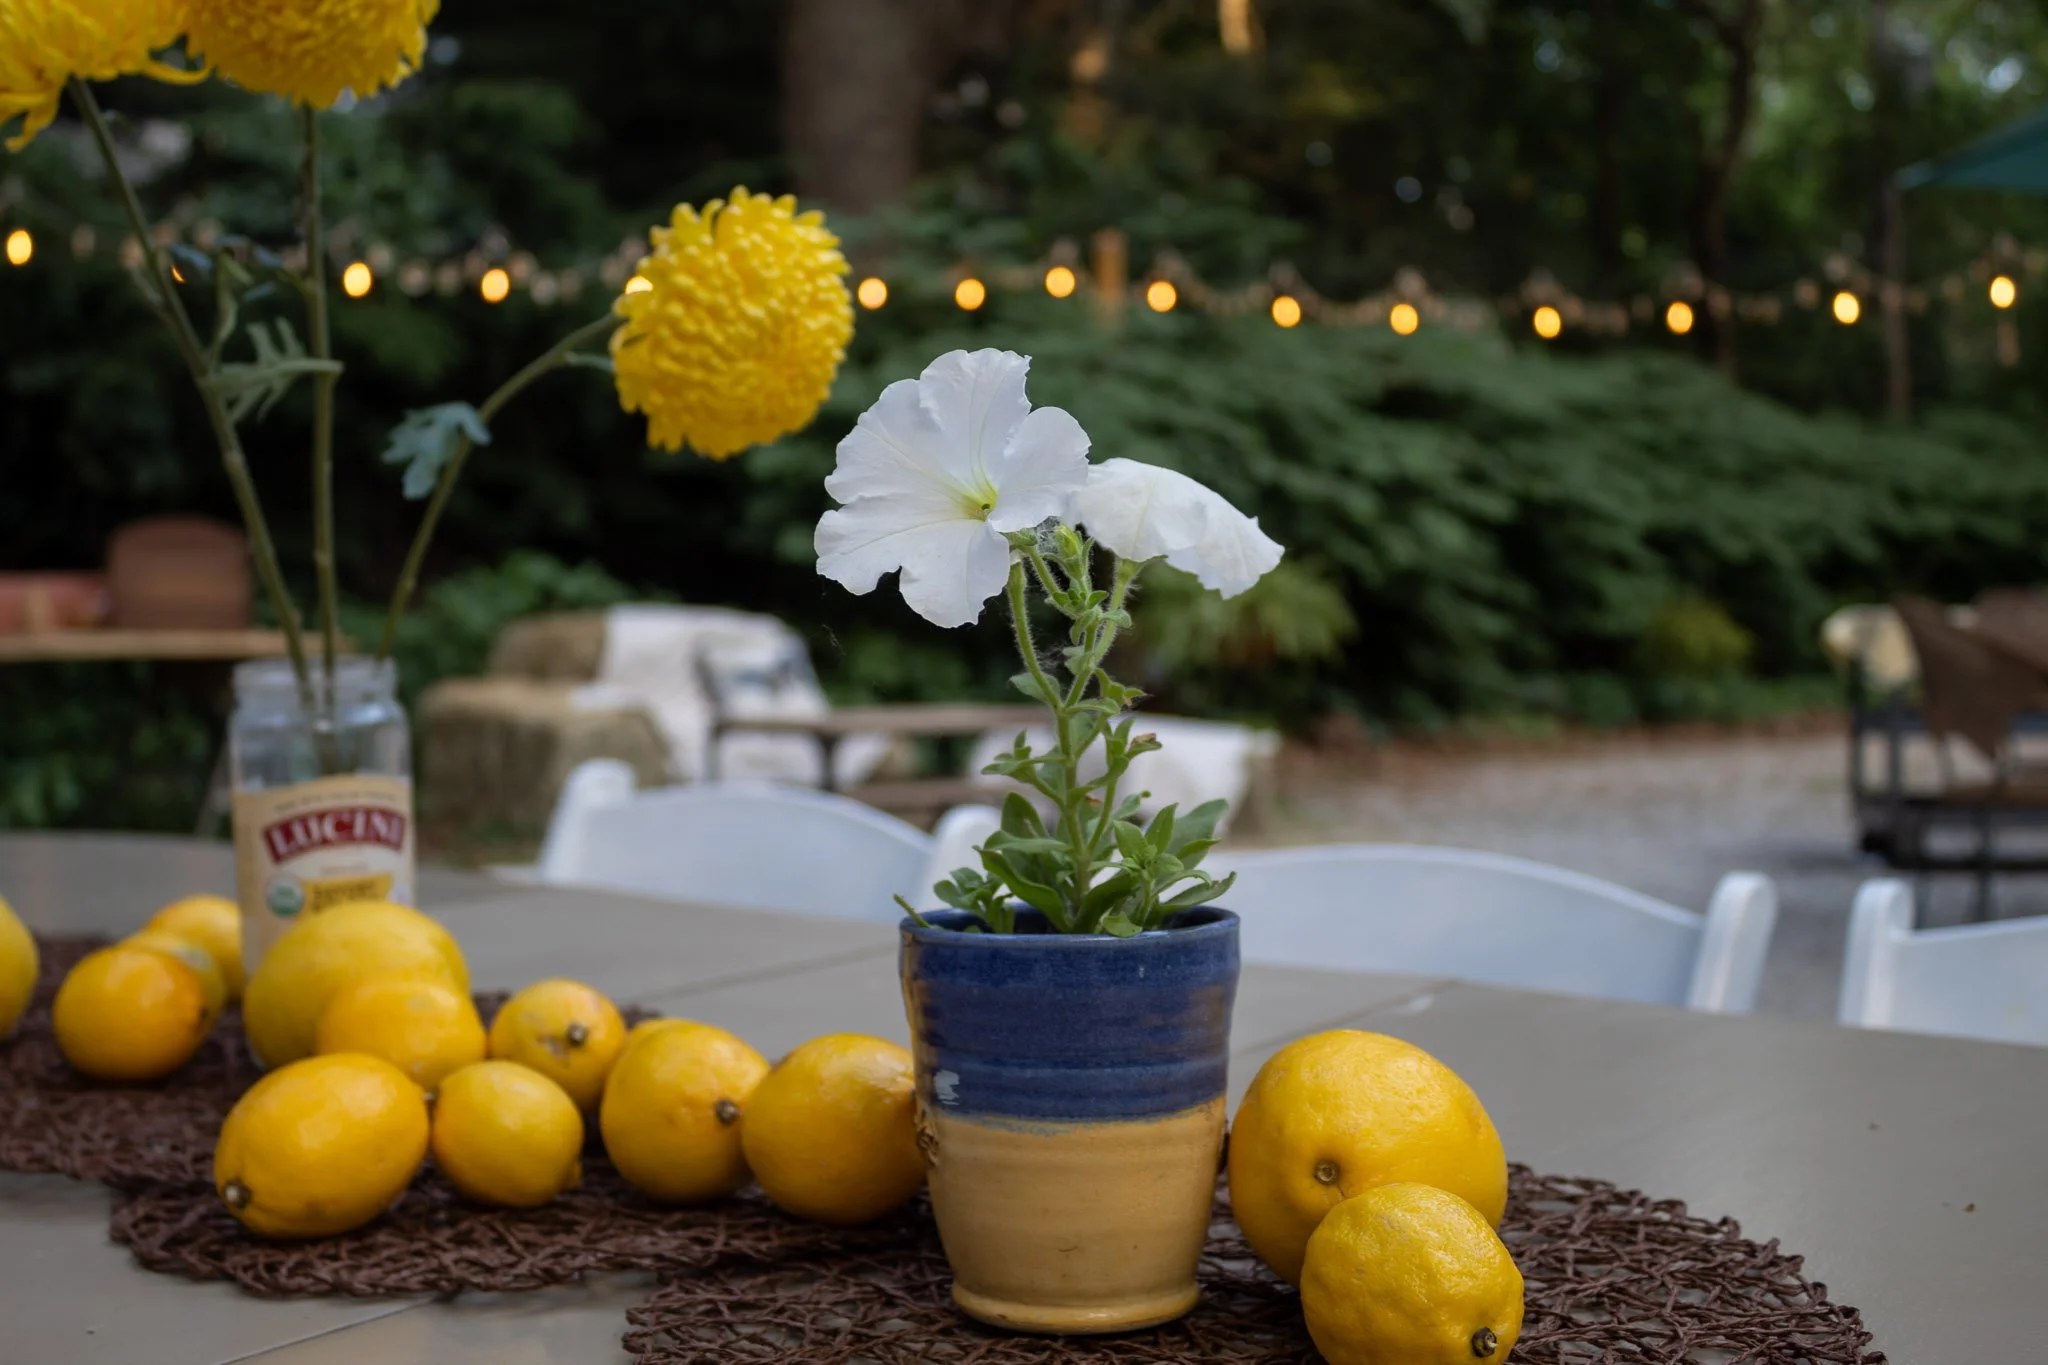
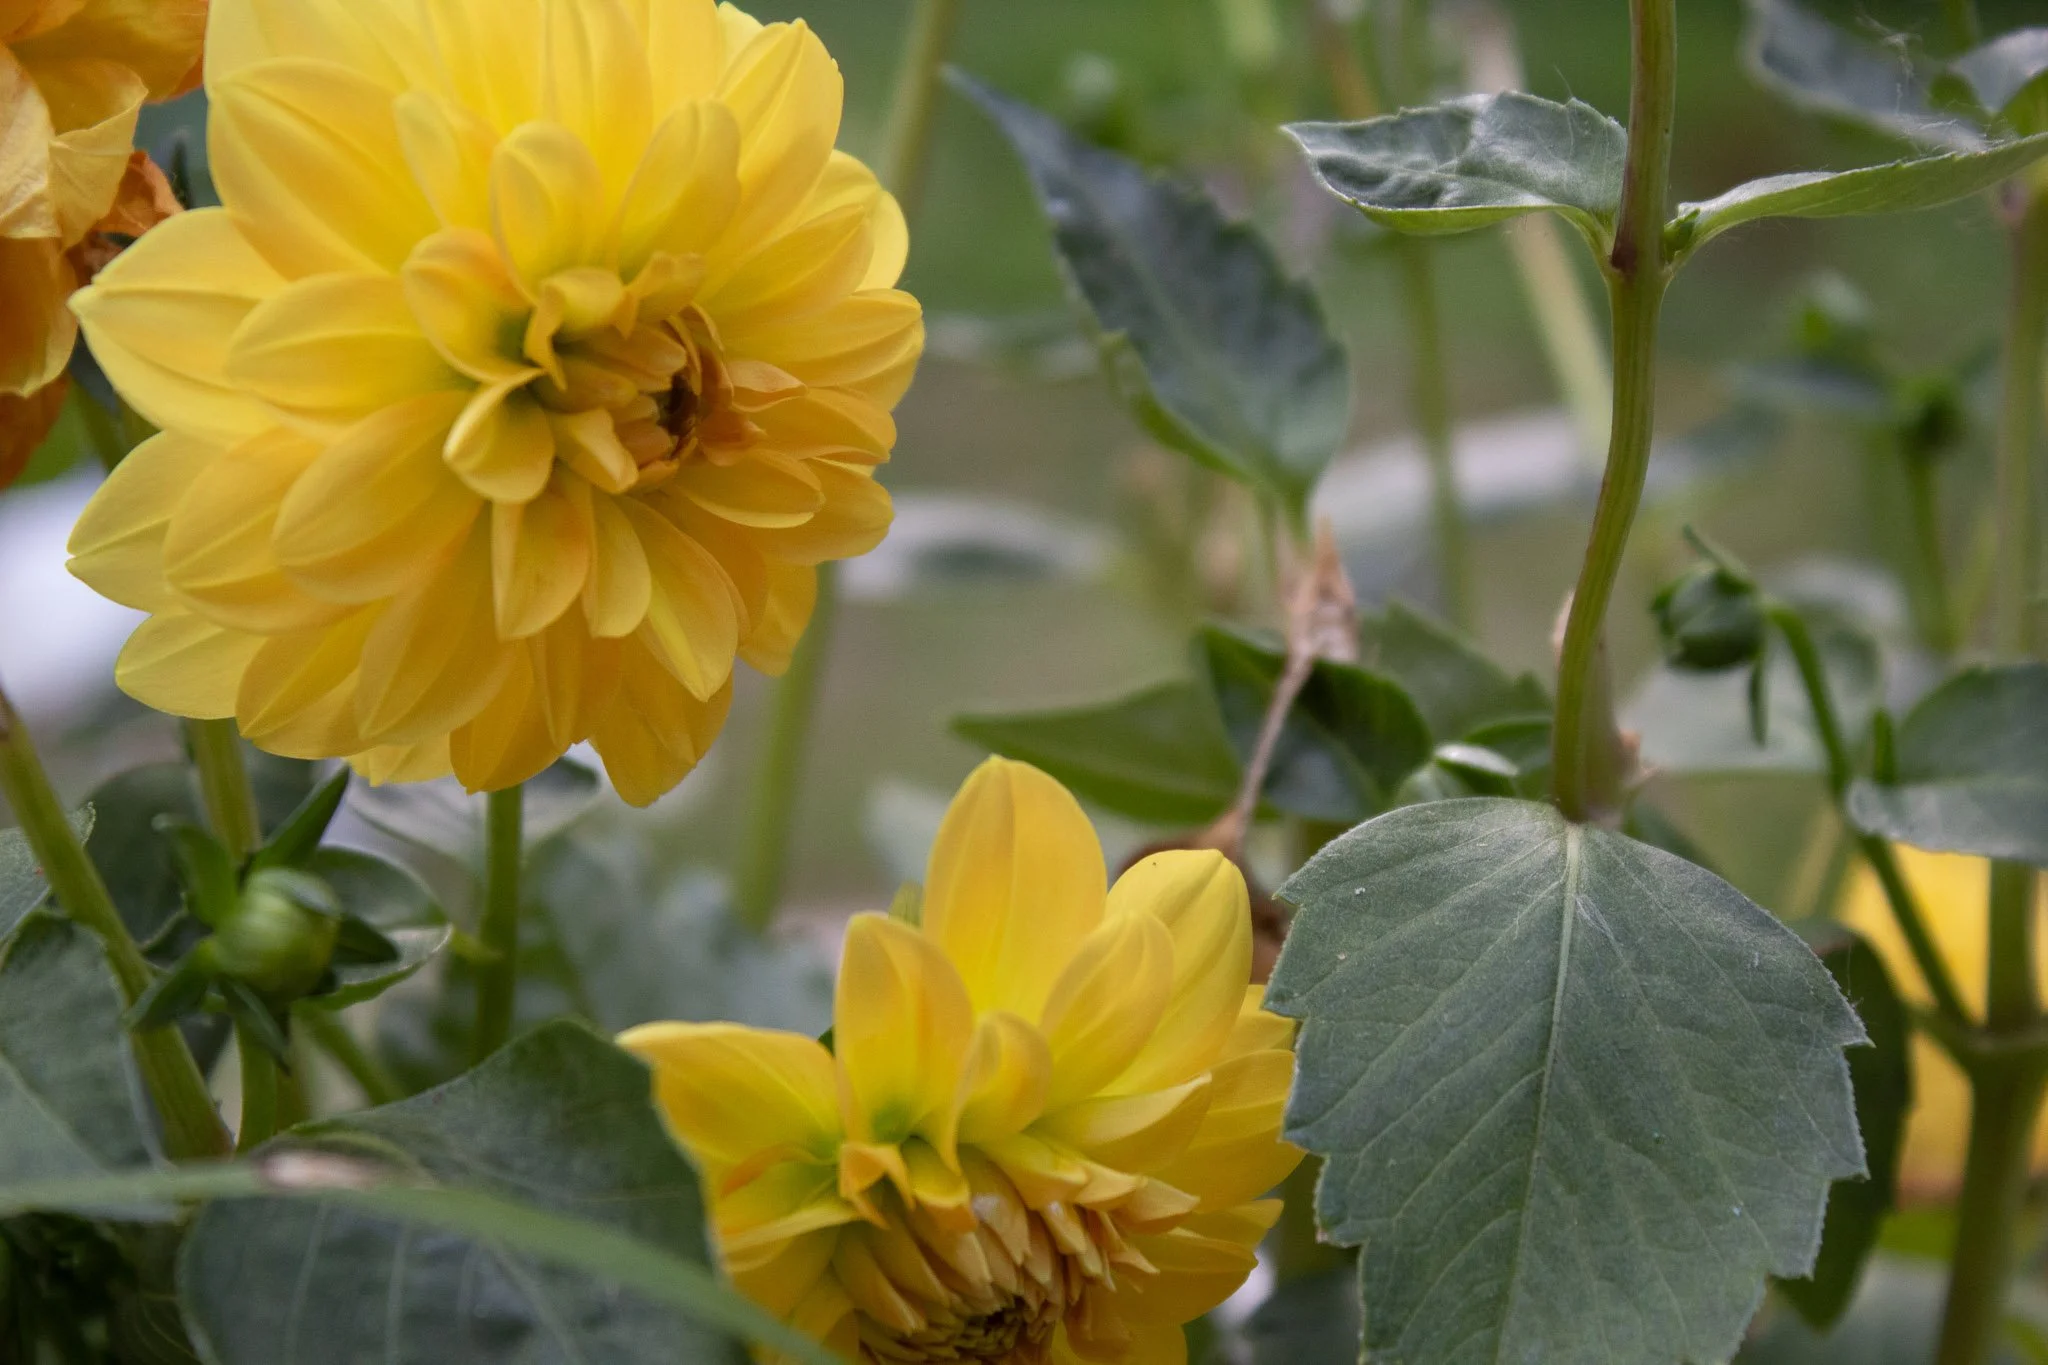
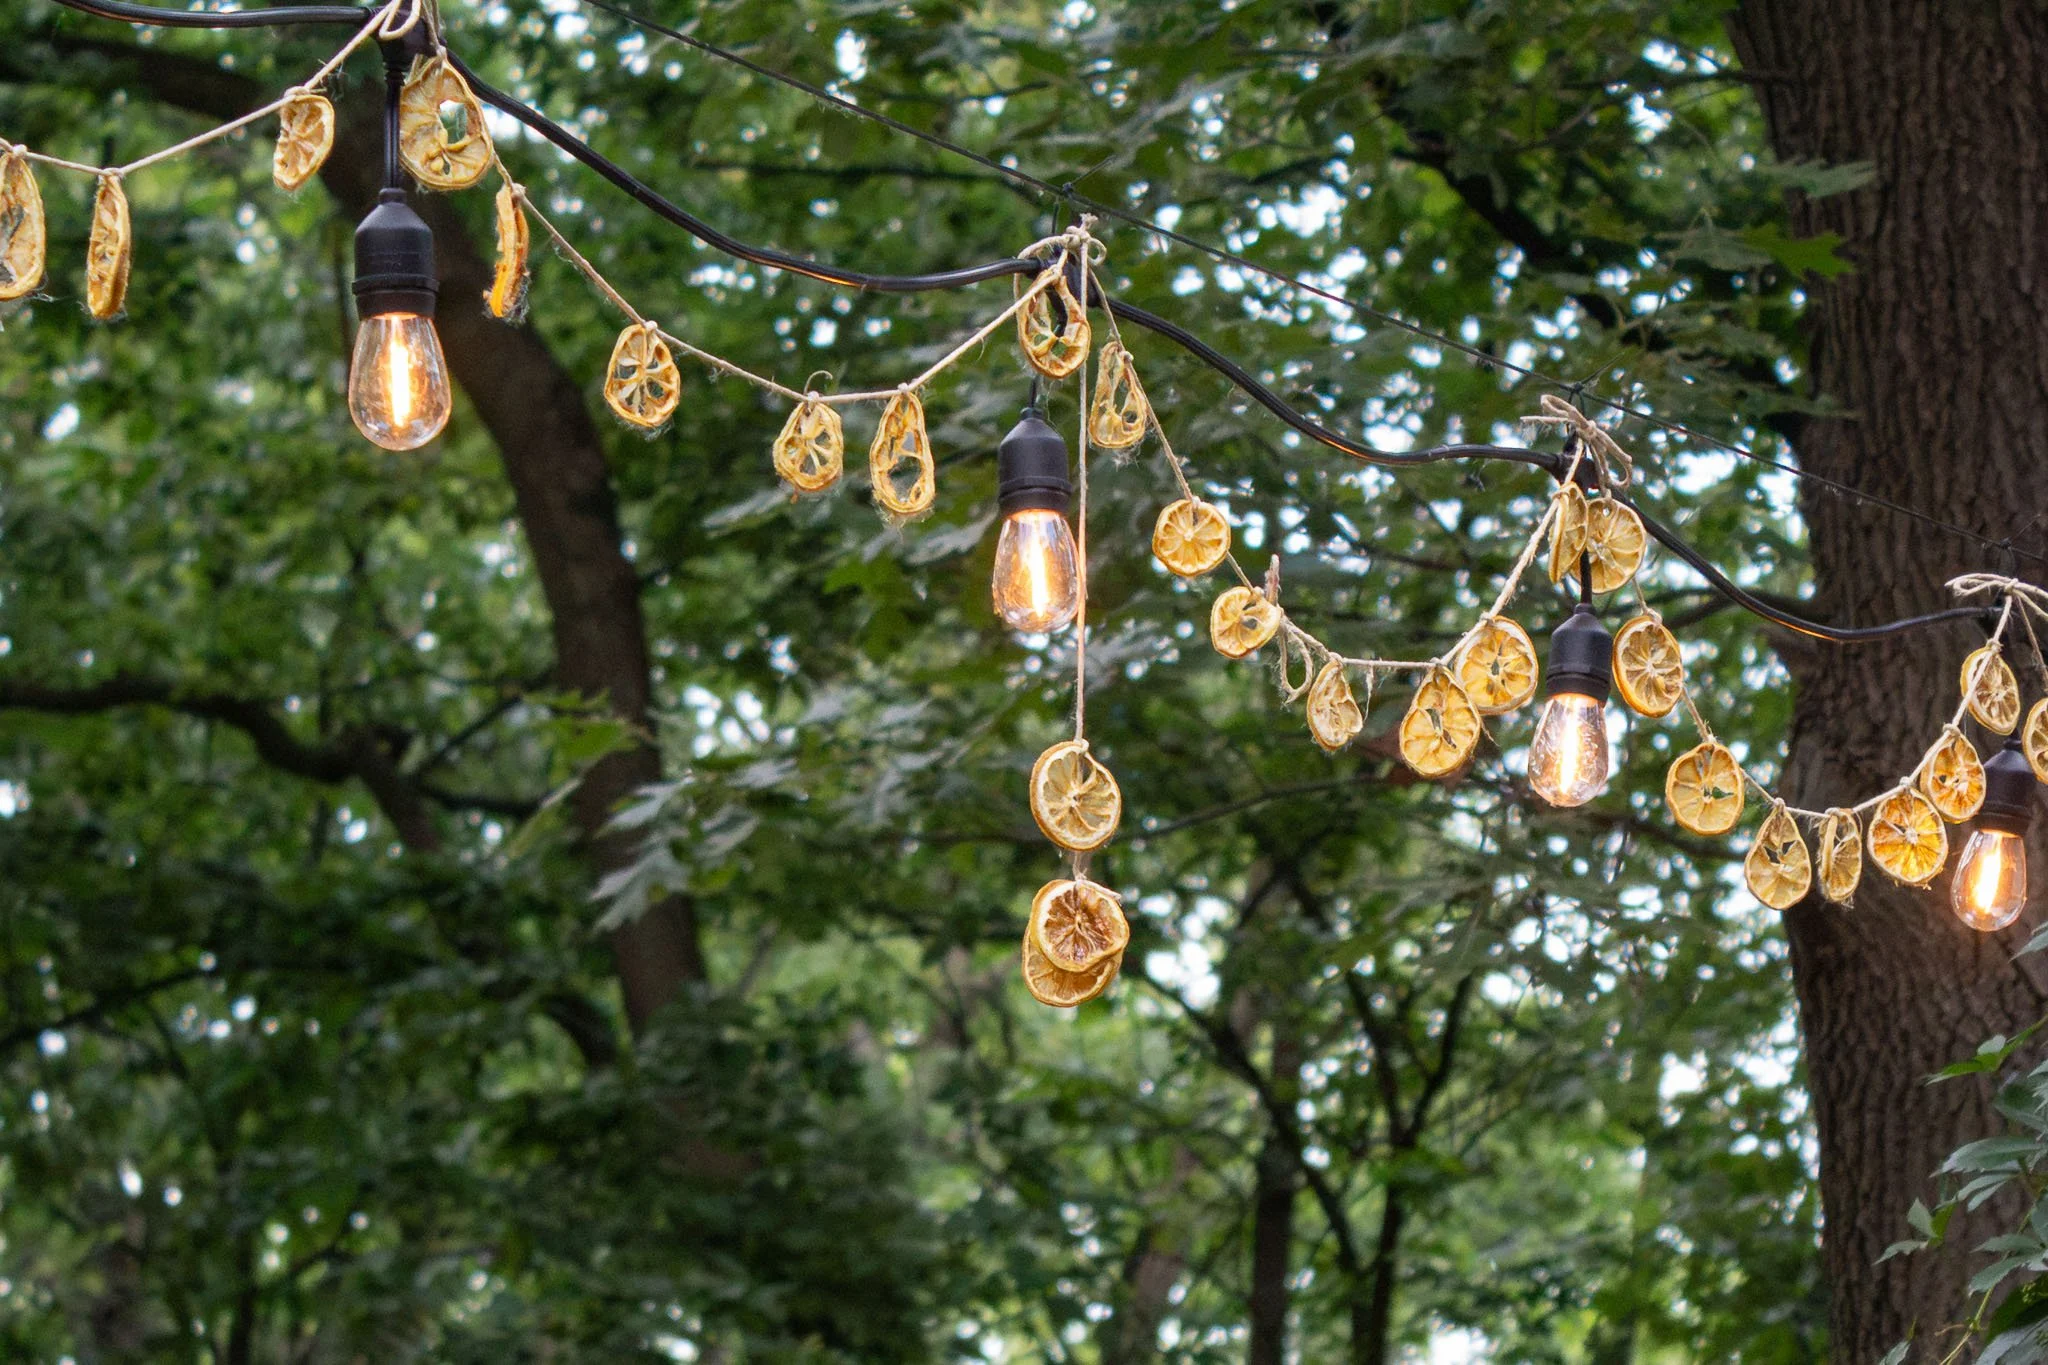
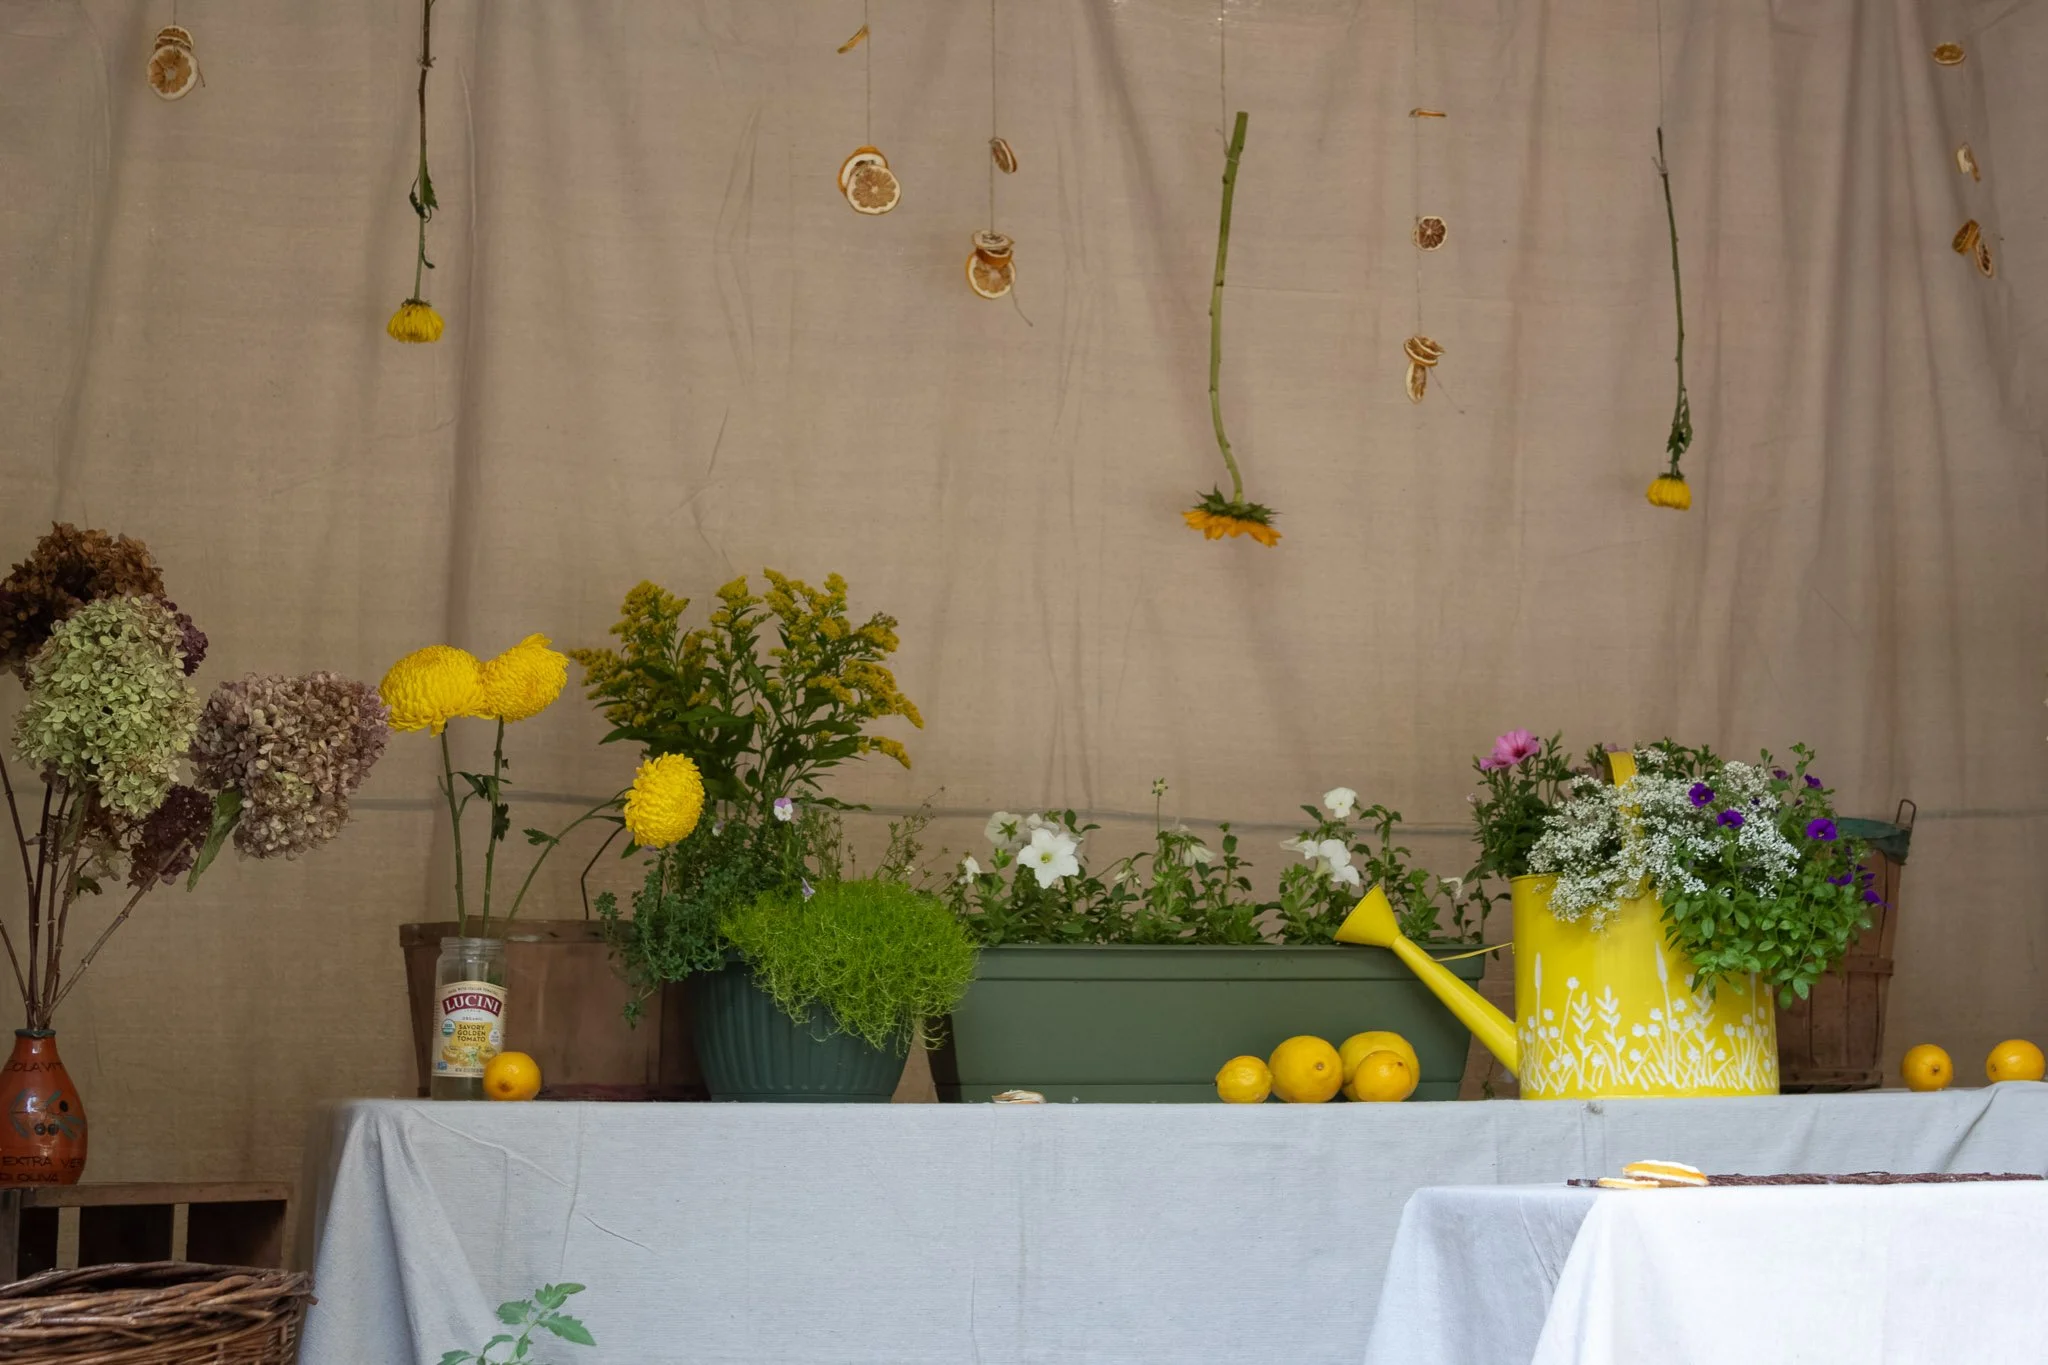
A handful of choices carried most of the ambiance. String lights with lemon garlands, hay bales and mixed seating, and canvas drop cloths used to cover the garage doors and create rugs transformed the space more than the potted plants I placed throughout the party. Everything else felt like icing on the cake.

At a Glance
What it is: the high-impact elements that create the overall feeling of the party
Focus first on: lighting, large surfaces, seating, and repeated decorative elements
What worked: string lights with lemon garlands, mixed seating, hay bales, and canvas drop cloths helped transform the space
Simplify it: choose one large visual element, such as string lights or fabric-covered walls
Remember: create the atmosphere first; the smaller details are icing on the cake
Bundle Station Supplies Ahead of Time
A drawback of backyard or outdoor parties is that setup can be limited by weather, animals, wind, and falling debris. Some items simply cannot be left outside ahead of time without risking damage or disruption.
To make party-day setup easier, gather and bundle the materials for each station in advance. I prepared stations like the potting activity and memory table ahead of time, collected everything needed for each setup, and planned the arrangement before the party. On the day itself, I could place everything outside without having to make additional decisions or waste time locating supplies and figuring out what went where.
Anything protected inside a garage or house can be set up much earlier. Don’t wait to hang decor or arrange stations that can safely remain in place without getting damaged. The more elaborate your ideas are, the earlier you’ll need to begin.
At a Glance
Bundle together: signs, supplies, serving pieces, decor, and any tools needed for each station
Reduce decisions: decide the arrangement and gather everything ahead of time
Set up early: complete anything inside the house or garage that can remain in place
Wait until party day: place outdoor items that could be affected by rain, wind, animals, or falling debris
Create a Week-of Timeline
The final week before the party should be reserved for cleaning, food prep, and any time-sensitive tasks that need to happen close to the date. Ideally, the house and garage will already have been deep-cleaned. If that doesn’t happen, focus only on the spaces guests will use. The goal is to make the house feel tidy, not to scrub walls and baseboards.
Anything that can be closed behind a door does not need your energy. Sometimes simply removing clutter from a room can make it feel noticeably cleaner. Give the bathroom and kitchen a thorough cleaning, then plan for a lighter refresh closer to the party. Make sure bathroom supplies are stocked and easy for guests to find.
Confirm rentals and deliveries at the beginning of the week if you have not already heard from the companies. If anyone has offered to help, find out exactly what day and time they are coming so you can plan around their availability.
Most party food will need to be prepared within the final week. If anything on your menu can be frozen, prepare it earlier. Food safety and storage capacity also limit how far ahead certain dishes can be made. Plan the schedule around how long each dish can be refrigerated, whether it freezes well, when it will need to be reheated or assembled, and whether you have enough refrigerator or freezer space.
Break the cooking into manageable amounts based on your capacity and personal schedule. This is how the cooking got divided across the week while preparing food for 65 guests. A few tasks were pushed later than I originally planned, but I was still able to finish all the food except for the hummus, which I decided to buy instead to save time.
Monday and Tuesday: bought most of the ingredients
Tuesday: hollowed out the lemon shells and juiced the lemons to make lemon-honey syrup and lemonade concentrate
Wednesday: made the stuffed grape leaves filling with uncooked rice and prepared the mixed-berry syrup
Thursday: made the cabbage filling, rolled and cooked the grape leaves, and combined the pasta salad ingredients except for the pasta
Friday: cooked the pasta and finished the salad, made the smash cake, rolled and cooked the cabbage rolls, and sliced the bread for the tomato bread
Saturday: made the tomato bread, reheated the cabbage rolls, cut the watermelon, garnished the food, and diluted the lemonade concentrate
I had originally planned to make the smash cake on Tuesday, but that day got too packed with other tasks, so I moved it to Friday. In hindsight, I would avoid making a time-consuming cake or meal the day before the party. Keep that day’s cooking as light as possible so there’s room for setup, unexpected tasks, and anything that was pushed back earlier in the week.
The day of the party should be reserved for the essentials. This includes garnishing and reheating food, tidying any new messes, getting yourself and the baby ready, placing the bundled stations, and setting out food and drinks.
Try not to add new projects or become fixated on completing something exactly as you envisioned it. Finish the simple version first. If there is still time after the priorities are handled, you can return to it.
It can be difficult to pivot when you’ve already purchased supplies or invested time in an idea, but some tasks, like feeding guests and preparing the spaces they will use, are non-negotiable. Party day will arrive whether every project is finished or not.
Last-minute surprises will almost always come up, so keeping the final week as open as possible will give you more room to respond without becoming overwhelmed.
At a Glance
Focus on: cleaning, food prep, rental confirmations, and other time-sensitive tasks during party week
Clean strategically: prioritize the spaces guests will use and save lighter cleaning for closer to the party
Plan food: consider refrigeration time, freezing, storage space, and reheating
Break it up: divide cooking into manageable tasks based on your capacity and schedule
Keep the day before light: avoid time-consuming dishes so there’s room for setup and unexpected tasks
Reserve party day for: final garnishing and reheating, light tidying, getting ready, placing bundled stations, and setting out food and drinks
Remember: complete the simple version first and leave room for last-minute surprises
Delegate Help
Leading up to the party, I had help cleaning the house, garage, and yard. I also had people watch my son at times while I completed tasks I couldn’t do with him. Friends and family also helped string lemons, roll grape leaves, stuff cabbage, cut watermelon, and make the tomato bread. I also had help picking up my son’s costume and coordinating the guest cake, including its delivery.
Among many of the things already listed, my mom helped me pot plants, brought over decor, arranged it, and assisted with projects like covering the garage doors, which required two people. Without my mom, husband, and the support of our friends and family, the party would have looked very different.
I mention this not only because I am incredibly grateful for the support, but also because the help available to you directly shapes your capacity. It affects how much you can realistically include and how early certain projects need to begin.
Think about help in two categories: tasks that can be completed before the party and responsibilities someone can fully own during the event.
Ask for support on party day too, if possible. Anyone who has hosted before knows how much invisible labor is involved in keeping food stocked, drinks filled, activities moving, and messes contained. For a milestone like a first birthday—which also marks your first year of parenthood—you may be especially grateful for the opportunity to step out of the hosting role at times and fully take in the day.
Assign people to specific responsibilities such as:
refilling drinks
monitoring and replenishing food
taking photos
reminding guests to contribute to the memory book
helping with cake-smash cleanup
managing the snow cone station
keeping an eye on children’s activity areas, such as the bounce house or mud kitchen
helping with final cleanup
Ask people in advance and give each person one clear responsibility so you are not delegating in the middle of the party. Specific assignments are more useful than a general request for help because people know what to watch for without waiting to be directed throughout the event.
At a Glance
Ask for specific help: cleaning, childcare, food prep, errands, pickup, and projects that require more than one person
Think in two categories: tasks that can be completed before the party and responsibilities someone can fully own during the event
Ask early: confirm who is helping, when they are available, and what they will handle
Party-day roles: refilling drinks, monitoring food, taking photos, managing activities, reminding guests about the memory book, and helping with cleanup
Remember: effective help should reduce your mental load, not require you to keep directing everyone
Assign a Photographer and Make a Shot List
So much work goes into throwing a birthday party that you will likely want memories of the day to look back on. It’s often the sign of a good party when guests say they didn’t take many photos because they were too busy enjoying themselves. Even when people do capture parts of the day, though, they may not photograph everything you hoped to have recorded.
For that reason, I like to designate someone to take photos. I also try to photograph the food and setup before the party begins, or at least near the start, before anything has been moved, eaten, or disturbed. This is easier said than done. I often plan to take these pictures myself and then realize I don’t have the capacity once the final setup begins.
Consider hiring a professional photographer if high-quality photos are especially important to you. Having a designated person responsible for documenting the day allows you to be more immersed in it.
During my son’s cake smash, he was absolutely adorable, sticking his face into the cake and trying to eat it. I remember saying out loud that I hoped someone was recording. My brother laughed because we had two instant cameras going, two photographer friends, and several other guests recording on their own devices.
After a year of being the person behind the camera, it felt strange not to be the one documenting him. But having other people handle it meant I could sit there, laugh, and connect with my son.
Whether you, a friend, a family member, or a professional are recording the day, make a list beforehand of the details and moments that are most important to capture. Don’t forget to include a photo of you with your baby too. That way, you can relax knowing someone is watching for the moments that matter most.
At a Glance
Assign someone: choose a friend, family member, or professional to document the day
Photograph early: capture the food, decor, and setup before guests arrive or before anything is moved
Make a shot list: note the details, people, and moments you most want recorded
Include yourself: make sure someone takes a photo of you with your baby
Why it matters: having someone else document the party allows you to be more present in it
Create a Cleanup Plan
By the end of a party, my energy is usually low from all the work that went into the day. The thought of cleaning everything up can feel especially depleting. I am always grateful when people offer to help, but I still recommend asking at least one person in advance to stay for cleanup rather than relying on someone volunteering in the moment.
Start with anything perishable. Put food away promptly so it remains safe to eat and, hopefully, leaves you with a ready-made meal for the following day or two.
Bring in anything that might not hold up well overnight, especially the supplies and decor you waited until party day to place outside. Pick up trash while helpers are still available or you still have the capacity. It can technically wait if you truly need to rest, but it’s usually easier to handle before everyone leaves and you become even more tired.
Bring in reusable dishes, linens, and anything else that needs washing. Clean them right away if you can, or gather everything in one place to handle the next day.
Place trash and recycling containers throughout the party area so guests don’t have to search for them. I used leaf-litter bags with the tops folded down as makeshift trash cans. They blended into the garden setting better than exposed plastic bags while still making cleanup easier.
Winding Down the Party
Beginning to clean can also gently signal that the party is winding down. Whether you’re ready for guests to leave or happy for them to linger, beginning some cleanup before the evening gets too late can make the end of the day feel more manageable.
I prefer to open presents after the party or near the end, when there’s no pressure to fit them into the schedule or rush the birthday boy. Guests who want to stay and watch can do so more leisurely, while everyone else is free to head home.
Cleanup is arguably the most draining part of the day, but doing even just the most important pieces will make your future self grateful.
At a Glance
Plan for help: ask at least one person in advance if they can stay to help with cleanup
Handle first: refrigerate perishables and bring in anything that should not stay outside overnight
While help is available: pick up trash and gather reusable items
Make disposal easy: place trash and recycling containers where guests can find them
Signal the ending: beginning light cleanup can gently show that the party is winding down
Open gifts later: save presents for the end or after the party so the birthday child is not rushed
Remember: prioritize the things that can’t wait and leave the rest for the next day if you’re at capacity
What I’d Do Differently
The biggest practical change I would make is leaving more time at the end. I would protect the day before from time-consuming cooking, set earlier internal deadlines for anything I was depending on others to complete, and be willing to let go sooner when the schedule began to shift.
The difficulty was not only a lack of time, though. There is a tug many parents may recognize in wanting to do something that fulfills you while also feeling guilty about the time it takes away from your child.
I wanted to execute the full creative vision I had in my head because I genuinely loved the process of making it. At the same time, my perfectionism made me wish I had chosen fewer projects so I could complete each one exactly as I imagined. I also wished I had spent more quality time with my son in the days leading up to his birthday.
All three desires were competing with one another. Completing the full vision required more of my time, scaling it down meant letting go of ideas I loved, and protecting more time with my son left less time for the creative work. I could not fully satisfy one without giving something up somewhere else.
Ordinary life narrowed the available time further. A last-minute camping trip, a visit with friends, and help that was not always available affected the schedule. I stayed up all night finishing the remaining work before the party. I’m glad it was done, but I would much rather have arrived at the celebration well rested.
I had some reservations about holding the party on his actual birthday, but I hoped I could still protect quality time with him in the morning. In reality, the last-minute tasks that come with hosting took more of that time than I expected. I had also underestimated how important that private time would be to me. When the party started, other people understandably wanted time with him too, so I didn’t get to experience as much of the party with him as I would have wanted.
I had also hoped to reserve time the day before to recreate a meal from when I was admitted to the hospital that I never ended up eating. It would have been a small way of reclaiming part of that experience for myself, but I ran out of time. A first birthday marks a year in a child’s life, but it also marks a year of parenthood. I wanted space to celebrate my son while reflecting on everything that first year carried for me too.
The answer for me was not to abandon the creative work or give up on throwing a party. The creative outlet gave me a way to use a part of myself that exists beyond motherhood while still creating something inspired by my son. The better answer was to find a balance between making something meaningful and being present with the person it was all for.
I would still throw the party, but next time I would hold it on a different day. Keeping his actual birthday for just my husband, my son, and me would have protected uninterrupted time with him and given me room to mark my own first year of motherhood without feeling I was fitting my time with him in alongside everyone else’s.
The party was still beautiful and meaningful, and I’m glad I created it in the form it ultimately took, even with what was cut. I’m proud of what I achieved. There may not be a way to fully satisfy every competing desire, but next time, I would recognize those conflicts earlier and decide more intentionally how much space each one deserves. I would protect the day before, build in more buffer for the schedule to go off course, and treat private time for myself and with my son as something to protect just as carefully as any other party detail.
In the week after the party, we returned to some of the activities with just the three of us. I also chose another day to recreate the hospital meal, reflect on the year, and bring some closure to that part of my birth experience.
The moments we imagine do not always unfold that way in reality, but flexibility allows us to appreciate what did happen and create another opportunity for what did not. Sometimes, the new version is even better.
At a Glance
Leave more buffer: protect the day before and expect the schedule to shift
Recognize the conflict: creativity, perfection, rest, and time with your child may compete
Protect private time: treat time for yourself and with your child as a real priority, not the first thing to cut
Consider the date: holding the party on another day can help the actual birthday feel more intimate while leaving room for your own time and needs
Remember the parent: the milestone marks a year of parenthood too
Stay flexible: be willing to simplify, and remember that a missed moment can still take a meaningful new form
TL;DR
Do this first: choose the date, rough guest count, and the moments that matter most. Everything else can be added or cut around those decisions.
Set the date, estimate the guest count, and send invitations early
Pick two or three backbone moments that matter most
Make a master project list and separate must-haves from nice-to-haves
Book rentals and confirm the major logistics
Gather decor and supplies, remembering that DIY and thrifting save money but take time
Plan filling food that can mostly be prepared ahead
Create clear party zones and bundle each station in advance
Make a week-of timeline and keep the day before as light as possible
Delegate specific jobs, assign a photographer, and plan cleanup
Leave buffer, protect private time, and simplify when the schedule shifts
Minimum Version
A first birthday party can simply be:
invitations (editable invite template)
cake or another birthday treat
enough seating
filling food and drinks
one child-friendly activity
shade or weather protection
someone assigned to take pictures
a cleanup plan
Add More Only If It Fits
Add themed food, styled photo moments, extra activity stations, or elaborate decor only if they fit your time, energy, space, and budget.
Activity ideas: Storytime, Mud Kitchen, Potting Station, Fort, Memory Book, Lemon Harvest, Photo Spot, Milk Bath, Snow Cone Station, Kids’ Corner
Party decor: dehydrated lemon garlands, hay bale seating, potted plants, cut flowers, upcycled food jars, canvas drop cloths, string lights, garden tools, old wooden crates/baskets, and whole lemons
Choose the backbone first, complete the simplest workable version, and add details only when they support the experience rather than compete with it.
Shop the Lemon Baby Garden Party
Before purchasing anything new, look at what you already own or could thrift, borrow, or repurpose. You do not need to recreate every detail exactly.
If you still need a few supplies, I’ve gathered some of the products I used, along with similar alternatives. This isn’t an exhaustive list, but it includes several of my favorite items and some of the things I had difficulty knowing exactly what to buy (like an appropriately sized milk-bath tub for a one-year-old).
Affiliate disclosure: This section contains affiliate links. If you purchase through them, I may earn a commission at no additional cost to you. I only share products I used, would use, or that closely match this party. As an Amazon Associate, I earn from qualifying purchases.
Recreate the invitation: Shop the Lemon Baby garden-party invitation in my Etsy shop.
Planning a local celebration? Rent tables, chairs, a snow-cone machine, and other party equipment from Dino Jump.
Local sources used for this party: Cake by Moonlit Sweet Studio and mulch hay from Galusha Farm.
Decor
Magnets for hanging decorations on a garage door
Food and Serving Supplies
Lemon Baby Outfit
Activity Supplies
Sensory activities: storytime, mud kitchen, and milk bath
Milk-bath tub (this size was perfect for my one-year-old)
Planting station
Butcher paper (also used as table runners)
Plant labels (also used as food labels)
Memory-book station
Lemon harvest
Small baskets for gathering the lemons
Easel for activity poster
Kids’ corner
About Dino Jump
Dino Jump is located in Chicago Ridge, IL and offers party rentals throughout Chicagoland. Specializing in bounce houses, Dino Jump helps families create memorable backyard birthdays, graduations, and family events.
Planning your own celebration? Browse Dino Jump’s party rental inventory to find bounce houses, games, concessions, tables, chairs, and more.